Filtering Antivirus Logs
Comodo Internet Security allows you to create custom views of all logged events according to user defined criteria. You can use the following types of filters:
Clicking on the handle at the bottom enables you to filter the logs for a selected time period:
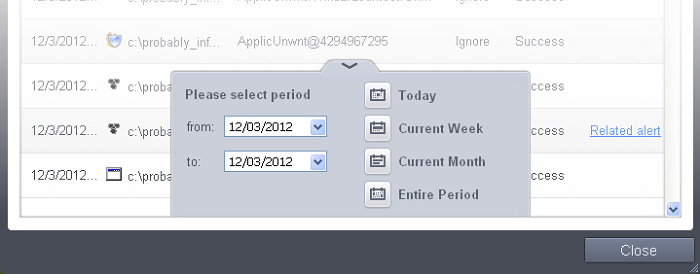
- Today - Displays all logged events for today.
- Current Week - Displays all logged events during the current week. (The current week is calculated from the Sunday to Saturday that holds the current date.)
- Current Month - Displays all logged events during the month that holds the current date.
- Entire Period - Displays every event logged since Comodo Internet Security was installed. (If you have cleared the log history since installation, this option shows all logs created since that clearance).
- Custom Filter – Enables you to select a custom period by choosing the 'From' and 'To' dates under 'Please Select Period'
Advanced Filters
Having chosen a preset time filter you can further refine the displayed events according to specific filters. Following are available filters for Antivirus logs and their meanings:
- Action - Displays events according to the response (or action taken) by the Antivirus
- Location - Displays only the events logged from a specific location
- Malware Name - Displays only the events logged corresponding to a specific malware
- Status - Displays the events according to the status after the action taken. It can be either 'Success' or 'Fail'
To configure Advanced Filters for Antivirus events
-
Click the funnel button
 from
the title bar. The Advanced Filter interface for AV events will open
 -
Select the filter from the 'Advanced Filter' drop-down and click 'Add' to apply the filter.
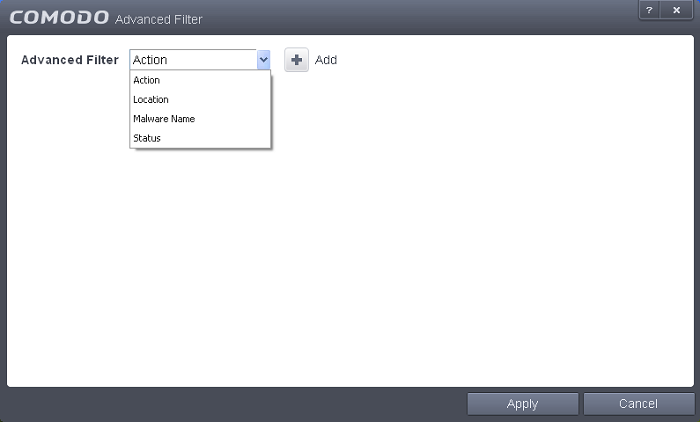
You have 4 categories of filters that you can add. Each of these categories can be further refined by either selecting or deselecting specific filter parameters or by the user typing a filter string in the field provided. You can add and configure any number of filters in the 'Advanced Filter' dialog.
Following are the options available in the 'Advanced Filter' drop-down:
-
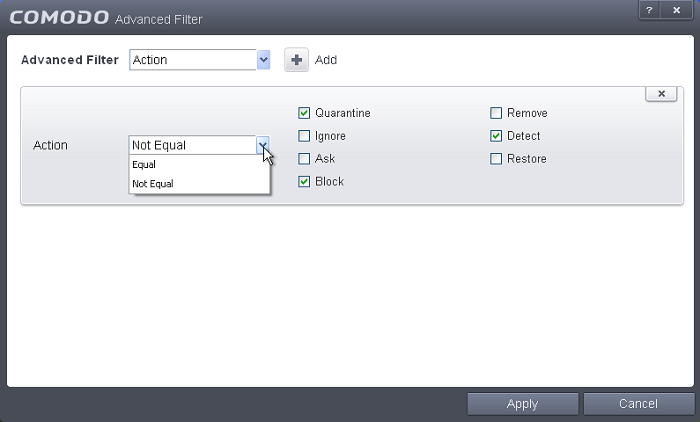
Action: The 'Action' option allows you to filter the entries based on the actions taken by CIS against the detected threat.Selecting the 'Action' option displays a drop down field and a set of specific filter parameters that can be selected or deselected.
-
Select 'Equal' or 'Not Equal' option from the drop down. 'Not Equal' will invert your selected choice.
-
Now select the checkboxes of the specific filter parameters to refine your search. The parameter available are:
- Quarantine: Displays events where the user chose to quarantine a file
- Remove: Displays events where the user chose to delete an item
- Ignore: Displays events where the user chose to ignore an item
- Detect: Displays events for detection of a malware
- Ask: Displays events when user was asked by alert concerning some Defense+, Firewall or Antivirus event
- Restore: Displays events of the applications that were quarantined and restored
- Block: Displays events of the applications that were blocked
For example, if you checked the 'Quarantine' box then selected 'Not Equal', you would see only those Events where the Quarantine Action was not selected at the virus notification alert.
-
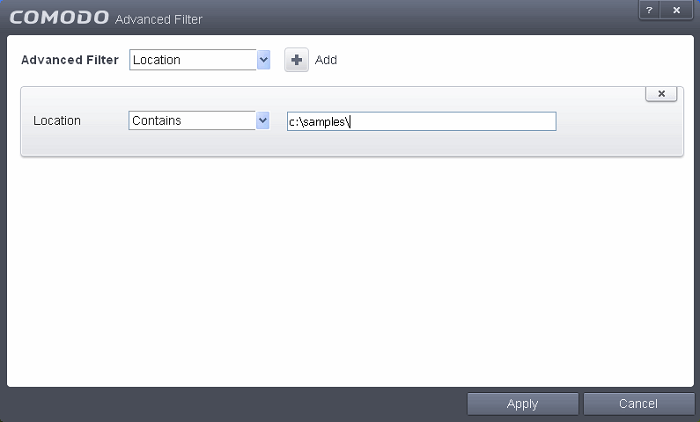
Location: The 'Location' option enables you to filter the log entries related to events logged from a specific location. Selecting the 'Location' option displays a drop-down field and text entry field.
-
Select 'Contains' or 'Does Not Contain' option from the drop-down field.
-
Enter the text or word that needs to be filtered.
For example, if you select 'Contains' option from the drop-down field and enter the phrase 'C:\Samples\' in the text field, then all events containing the entry 'C:\Samples\' in the Location field will be displayed. If you select 'Does Not Contain' option from the drop-down field and enter the phrase 'C:\Samples\' in the text field, then all events that do not have the entry 'C:\Samples\' will be displayed.
-
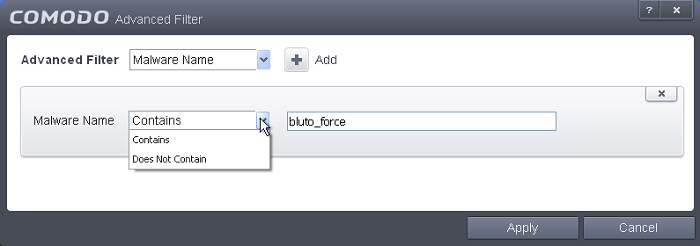
Malware Name: The 'Malware Name' option enables you to filter the log entries related to specific malware. Selecting the 'Malware Name' option displays a drop-down field and text entry field.
-
Select 'Contains' or 'Does Not Contain' option from the drop-down field.
-
Enter the text in the name of the malware that needs to be filtered.
For example, if you select 'Contains' option from the drop-down field and enter the phrase 'bluto-force' in the text field, then all events containing the entry 'bluto-force' in the Malware Name field will be displayed. If you select 'Does Not Contain' option from the drop-down field and enter the phrase 'bluto-force' in the text field, then all events that do not have the entry 'bluto-force' in the 'Malware Name' field will be displayed.
-
Status: The 'Status' option allows you to filter the log entries based on the success or failure of the action taken against the threat by CIS. Selecting the 'Status' option displays a drop-down field and a set of specific filter parameters that can be selected or deselected.

-
Select 'Equal' or 'Not Equal' option from the drop-down field. 'Not Equal' will invert your selected choice.
-
Now select the checkboxes of the specific filter parameters to refine your search. The parameter available are:
- Success: Displays Events that successfully executed (for example, the malware was successfully quarantined)
- Failure: Displays Events that failed to execute (for example, the database malware was not disinfected)
| Note: More than one filter can be added in the 'Advanced Filter' pane.
After adding one filter type, select the next filter type and
click 'Add'. You can also remove a filter type by clicking the 'X'
button at the top right of the filter pane.
|
- Click 'Apply' for the filters to be applied to the Antivirus log viewer. Only those entries selected based on your set filter criteria will be displayed in the log viewer.


