Apply Policies to Networks and Roaming/Mobile Devices
- Click 'Configure' > 'Policy' to open the 'Policies' screen
- A policy is a security profile which contains at least one 'Security Rule', 'Category Rule' or 'Black/Whitelist'.
- You add the rules to a policy then apply the policy to a device or network. You can also add block pages which are shown when users visit a banned website.
- You must have already created at least one rule before you can create a policy. See 'Manage XSIG Rules' for help.
- You must also have added at least one device or network or have imported a site using the local resolver.
- See Add Networks, Roaming Endpoints and Mobile Devices to manually add networks and devices.
- See Setup Local Resolver Virtual Machines and Import Sites to setup a local resolver and automatically import a network site.
- You can create multiple policies. You can add multiple networks/devices to a single policy.
- You can also apply policies to internal
network objects covering a single endpoint or IP address block.
How XSIG applies rules in a policy:
- XSIG checks the whitelist first, then the blacklist, then the security/category rules.
- For example, if they visited domain is whitelisted, then access is allowed. XSIG will check no further.
- If it is not in the whitelist, XSIG checks the blacklist. If found, then it is blocked.
- If it is not in blacklist, XSIG checks the security / category rules. If the site belongs to a banned category, then it is blocked.
- If the site isn’t in the blacklist or category rules, then it is allowed.
Click 'Configure' > 'Policy' to open the 'Policies' screen.
_1.png)
- Add New Policy - Create a new policy and apply it to networks, devices and imported network sites. See Create a new policy for help with this.
- Domain Classification Requests - View the category of a domain, suggest a different category, and propose an unclassified site is added to our database. See Domain Classification Requests
- Check Policy - Test whether your rules function correctly. See Test whether your policy work for help.
- Click 'Configure' > 'Policy'
- Click 'Add New Policy'
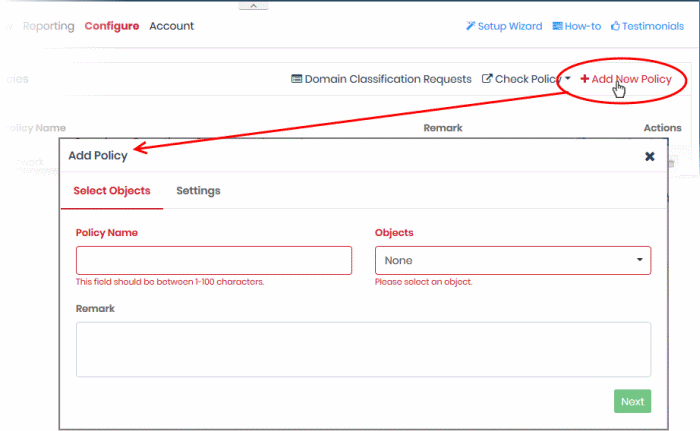
- Policy Name - Enter a label for the policy
- Objects - Select the items to which the policy should apply.This can be a network, roaming device, site, internal network or mobile device. You can select multiple instances of each.
- Note - The 'Objects' menu only shows networks, devices or sites that do not yet have a policy.
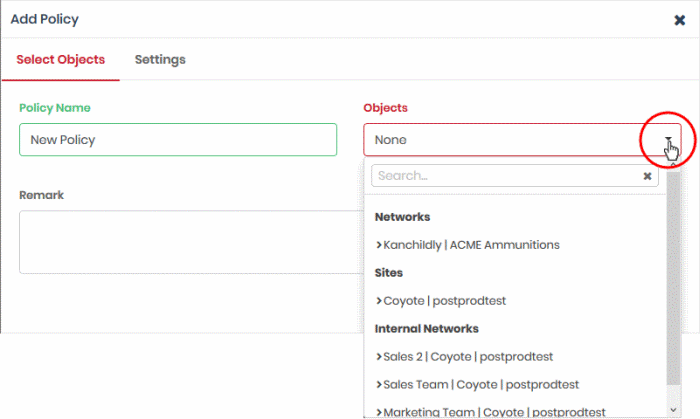
- Networks - List of manually added networks
- Agents - List of roaming Windows and Mac OS devices enrolled by installing the Secure Internet Gateway agent
- Mobile Agents - List of enrolled Android and iOS devices
- Sites - List of network sites imported by deploying the local resolver agent
- Internal Networks - Internal network objects within imported sites. Note – Policies applied to a site will over-rule policies applied to internal network objects
- You can apply a policy to any number of objects
- Remark - Enter a description for the policy (optional)
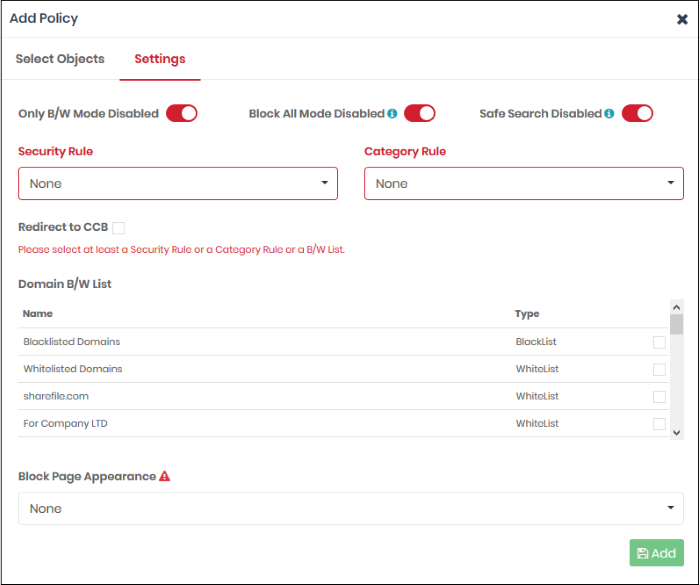
- Click 'Next' or 'Settings' to configure the policy:
-
Only B/W Mode - If enabled, you can only add blacklist and/or whitelist rules to this policy. You cannot add security or category rules to the policy.
-
Block All Mode - If enabled, all domains are blocked EXCEPT the domains mentioned in the whitelist(s) selected for this policy. You can only add whitelists to the policy under this setting.
-
Safe Search - Activates the content filtering feature of search engines like Google, Bing and Yahoo. Safe search eliminates explicit and potentially offensive websites from the results page of a search. This setting is disabled by default.
- Security Rule - Select a 'Category Rule' to block websites by content-type. The drop-down lists category rules that have been added in the 'Policy Settings' section. See 'Manage Category Rules' for more details.
- Redirect to CCB - If enabled, sites in this policy are instead opened in a virtual environment. Enable this and select a virtual session rule from the drop-down. See ‘Manage Cloud Browser Settings’ if you need more information on virtual session rules.
- Category Rule - Select a 'Category Rule' to block websites by content-type. The drop-down lists category rules that have been added in the 'Policy Settings' section. See 'Manage Category Rules' for more details.
- Domain B/W List - Select a black/white list to block specific domains. B/W lists added to the the 'Policy Settings' section are shown in the dialog.
- Select the B/W list(s) you want to add to the policy.
See 'Manage Domain Blacklist and Whitelist' for more details.Please note - B/W lists will over-rule security/category rules in the event of a conflict over a particular domain.
- Block Page Appearance - Choose the block page to be shown to users if they try to visit a site prohibited by your policy. The drop-down displays block pages added via the 'Policy Settings' area. See Manage
Block Pages for more details.
- Note - The block page is shown on all devices to which the policy is applied, except on mobile devices.
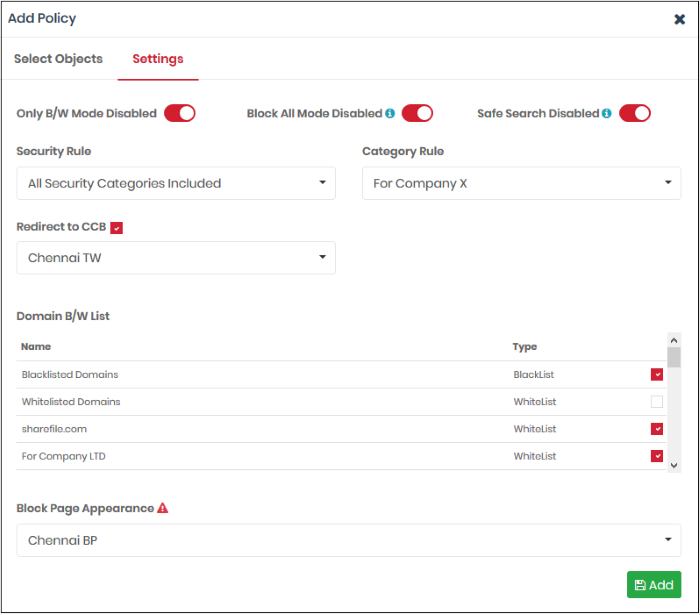
Example policy settings are shown in the following screenshot:
-
Click 'Add' to save your policy.
The policy is applied to the chosen networks and devices.
- Click 'Configure' > 'Policy'
- Click the edit button in the row of the policy you want to update:
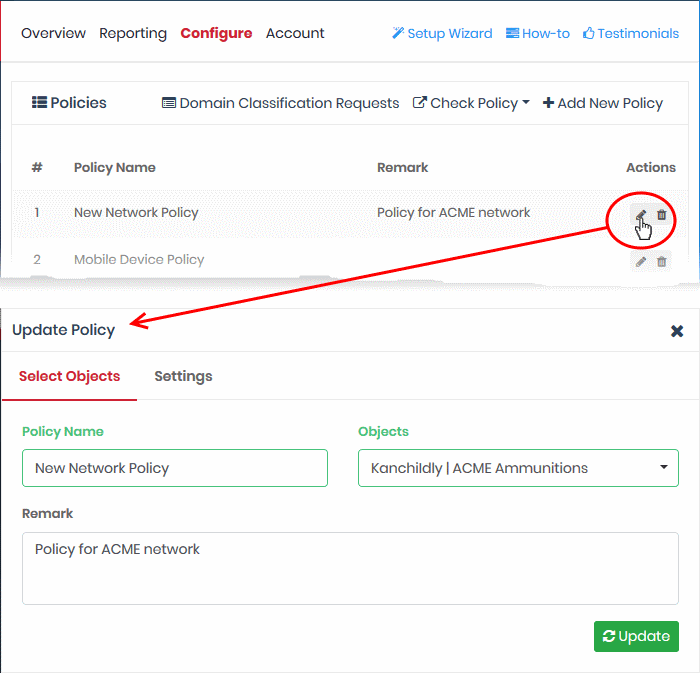
The 'Update Policy' dialog will open. The dialog is similar to the 'Add Policy' dialog explained above.
- Modify the name, description and/or settings as required.
- Click the 'Update' button
The updates will be applied to all devices on which the policy is active.
Test whether your policy works
The policies interface lets you check whether your rules are functioning correctly on your networks and roaming devices.
- Login to Secure Internet Gateway from any endpoint in an enrolled network, or from an enrolled roaming/mobile device.
- See Log-in to the Administrative Console if you need help with this.
- Click 'Configure' > 'Policy'
- Click 'Check Policy' at the top-right
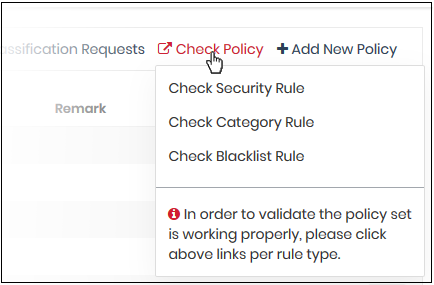
- Check Security Rule - Test whether policy security rules are working correctly on your devices
- Check Category Rule - Test whether policy category rules are working correctly on your devices
- Check
Blacklist Rule -
Test whether policy blacklist rules are working correctly on your
devices
You need to repeat this process on each device you want to test.
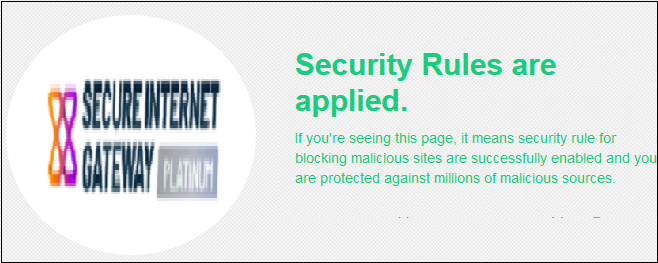
You will see the following message if the rule is active:
You will see the following if the rule is not active:
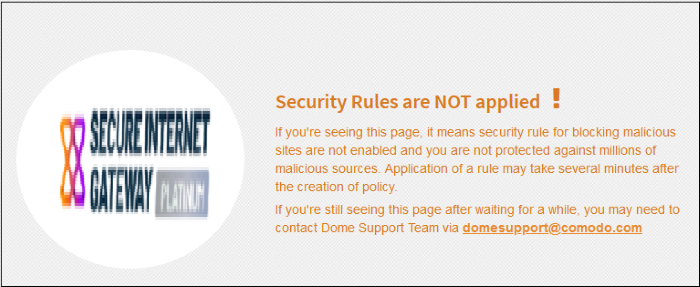
Please check that you have configured your policy correctly and that you have applied it to target devices.
- Click 'Configure' > 'Policy'
- Click the trash can icon beside a policy
A confirmation dialog is shown:

- Click 'OK' to confirm removal of the policy from the list
The policy is removed from the networks/endpoints on which it was active.


