


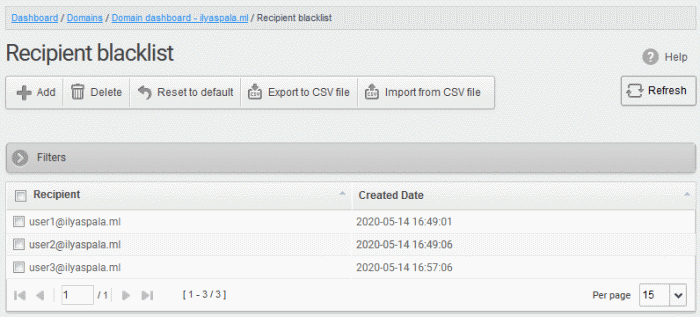
Recipient Blacklist
- CASG will automatically block all emails to blacklisted recipients.
- Blocked messages are not quarantined and legitimate SMTP mail servers will send a bounce message to the sender.
Administrators can:
- Reset the list - Remove all recipients from the blacklist by clicking the 'Reset to default' button
Configure recipient blacklist
- Click
the 'Recipient blacklist' from the 'Domain Rules' drop-down on the
left
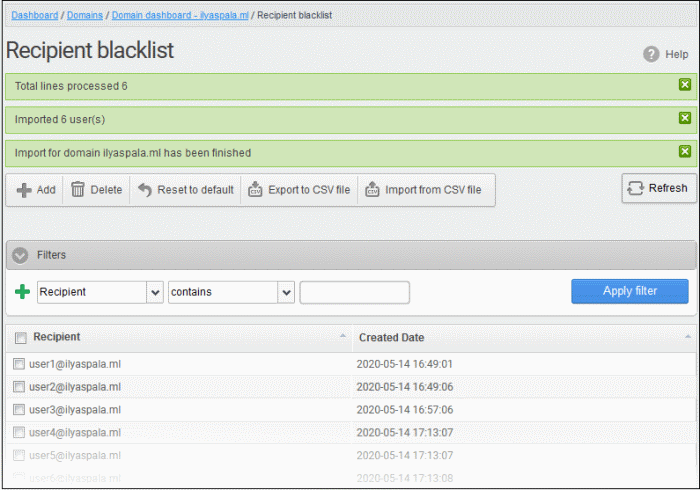
The 'Recipient blacklist' interface of the selected domain opens:
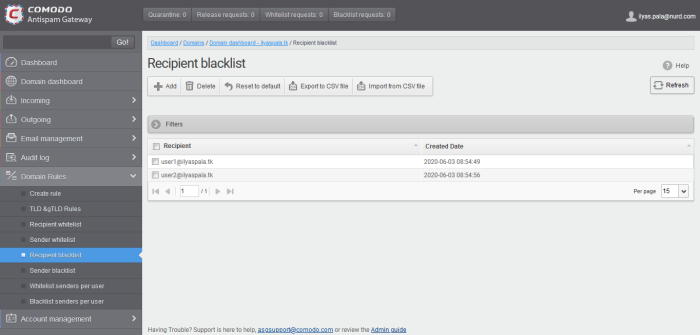
- Recipient – Blacklisted recipients’ mail address
- Created date – Date and time the user was added
Add Users to Recipient Blacklist
You can add recipients to the black list in the following ways:
- Click 'Add' to add a new user to the list

-
Enter the recipient name in the 'E-mail' textbox and click the 'Save' button. Repeat the process to add more recipients to blacklist.
-
To add a particular set of recipients to blacklist, prefix or suffix the wildcard * in the E-mail text field. For example, enter *.stores for all the recipients in stores department to be blacklisted.
-
To add a whole domain to blacklist, enter the wildcard * in the 'E-mail' text field and click the 'Save' button. Now all the recipients in that domain are blacklisted.
The list of
blacklisted recipients are
displayed.
Import users to blacklist from CSV file
Administrators can import multiple users to the recipient blacklist from a .csv file. Specify users in separate lines. See example below:
user1@testdomain.com
user2@testdomain.com
user3@testdomain.com
- Click the 'Import from CSV file' button
The 'Upload' dialog opens:
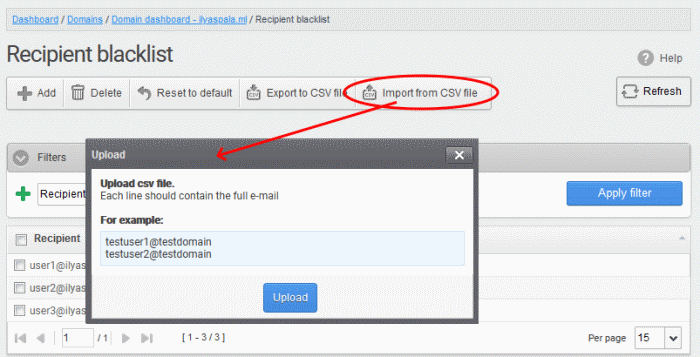
- Click 'Upload', navigate to the location where the file is saved and click the 'Open' button. The maximum size of the file that can be uploaded is 9 MB.
The upload is placed in import tasks queue and the progress of the upload is shown.
Remove the upload from the queue
- Click
the 'Remove import task' button. 'Remove import task' deletes only the remaining part of an 'in-progress' task.
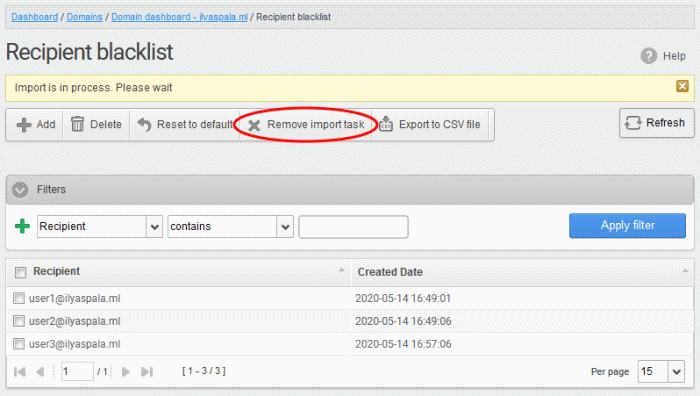
On completion of the upload process, the result is displayed.
The recipient blacklist from .csv file are uploaded and the administrator who carried out the task receives a notification about the import task completion.
Export the Recipient Blacklist to CSV file
Administrators can save the recipient blacklist by exporting it as a CSV file. If required in future, the administrator can import the users from the csv file, for example for a new account or after a reset.
Export the list
-
Click the 'Export to CSV file' to save the list of blacklisted recipients as a CSV file
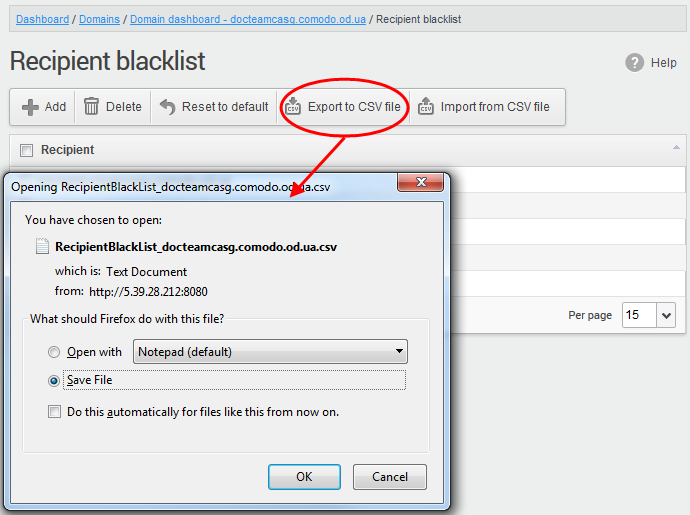
A file download dialog is displayed.
- Click 'OK' to save the file in your system.
Delete Users from the Recipient Blacklist
- Click ‘Reset to default’ to remove all blacklisted recipients
- To remove recipient(s), select them from the list and click the 'Delete' button
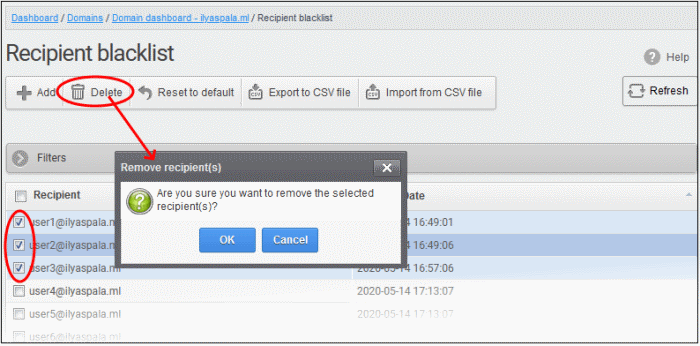
- Click 'OK' to confirm your changes.
The user(s) are
removed from the blacklist and the mails addressed to them are
allowed as per the existing filter settings in CASG.