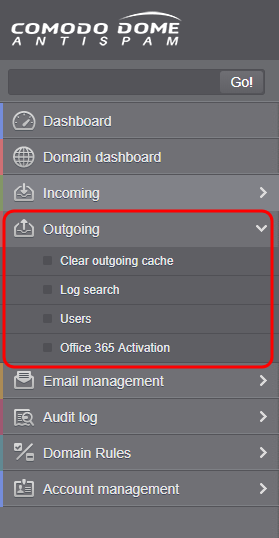
Comodo Help
Find the desired product help
Comodo Antispam Gateway

Comodo Antispam Gateway

Admin Guide ver 1.10

English

Print Help Download Help
The Administrative Interface > The Dashboard Area > Domain Management > Managing Domain > Outgoing
  • Introduction To Comodo Antispam Gateway
    • Release Notes
    • Purchasing License
    • Adding More Users, Domains Or Time To Your Account
    • License Information
  • Getting Started
    • Incoming Filtering Configuration
      • Configuring Your Mail Server
      • Configuring MX Records
        • Updating MX Records In Windows 2003/2008 Server
        • Updating MX Records On A Host Using BIND
        • Updating MX Records For Comodo DNS
        • Updating MX Records For GoDaddy
        • Updating MX Records For Enom
        • Updating MX Records For Network Solutions
        • Updating MX Records For Yahoo! Small Business
        • Updating MX Records For 1and1
        • Updating MX Records For 4D Web Hosting
        • Updating MX Records For DNS Park
        • Updating MX Records For DreamHost
        • Updating MX Records For DynDNS
        • Updating MX Records For IX Web Hosting
        • Updating MX Records For No-IP
        • Updating MX Records In CPanel
    • Outgoing Filtering Configuration
      • Per-User Authentication
      • Outgoing Smarthost Setup
        • Configuring QMail To Use A Smarthost
        • Configuring PostFix To Use A Smarthost
        • Configuring Sendmail To Use A Smarthost
        • Configuring Exchange 2000/2003 To Use A Smarthost
        • Configuring Exchange 2007/2010 To Use A Smarthost
        • Configuring Exim To Use A Smarthost
          • Configuring Exim / CPanel To Use A Smarthost
          • Configuring Exim / Directadmin To Use A Smarthost
  • The Administrative Interface
    • Logging-in To The Administrative Interface
    • The Dashboard Area
      • Domain Management
        • Adding Domains
        • Deleting Domains
        • Editing Domains
        • Managing Domain
          • Incoming
            • Quarantine
            • Incoming Spam Detection Settings
            • Report Spam
            • Delivery Queue
            • Destination Routes
            • Local Recipients
            • Clear Incoming Cache
            • Log Search
            • Domain Aliases
            • Domain Settings
            • Manage Report Subscriptions For Selected Domain
          • Outgoing
            • Clear Outgoing Cache
            • Log Search
            • Users
          • Email Management
            • Email Size Restrictions
            • Blocked Extensions
            • Released Requests
            • Blacklisted Requests
            • Whitelisted Requests
          • Whitelist / Blacklist
            • Recipient Whitelist
            • Sender Whitelist
            • Recipient Blacklist
            • Sender Blacklist
          • Account Management
            • User Account Management
            • Viewing User History
            • Importing Users From LDAP
              • LDAP Import Configuration
              • LDAP Import Confirmation List
              • LDAP Import Ignore List
      • Administrator Account Management
        • Administrators
        • Groups & Permissions
        • My Profile
          • Changing Password Of The Administrator
          • Change Settings
        • User History
      • Customer Management
        • Viewing Customer Information
        • Managing Subscriptions For Reports
  • CASG Reports - An Overview
    • Quarantine Report
    • Domain Statistics Report
  • Appendix 1 – CASG Error Codes
  • About Comodo

Outgoing


To be able to send outgoing email, first a valid user needs to be added to the filter cluster. This can be done from the web interface. By default the following port are available for the outgoing service: default recommended port 587 (supports STARTTLS/SSL). The outgoing service listens by default on all IPv4 addresses activated on the server.


Create a separate outgoing user on the filtering cluster for each end-user to relay outgoing email and use an "automatic user locking" to automatically close the account in case abuse is detected. There are two methods you can make per-user authentication to work - The first method is to instruct all end-users to authenticate directly to the filter cluster for their outgoing emails or in the second method, configure your current outgoing SMTP server so that it authenticates each end-user separately to the filter cluster for all outgoing emails. If you choose the second method, how easily you can configure your SMTP server depends on the SMTP software.


While using per-user authentication for outgoing mails, ensure to set the limits correctly based on the usage of the end-user and enable automatic locking.


If you find using the per-user authentication method for outgoing mails too cumbersome to set up, the other alternative is to use smarthost setup. In this method, you add a single outgoing account either based on IP or username/password in the filtering server and point all outgoing emails to this server, thus using the filtering cluster as smarthost. Most email servers have 'smart host setting' feature with which you can easily accomplish the task of configuring outgoing email filtering. Make sure to disable the 'automatic locking' setting to prevent the full server account getting locked even if one end-user sends out spam email. Also ensure to enable 'block spam' so that individual spam messages will be blocked and the administrator notified.


While using smarthosting setup for outgoing mail filtering, ensure to set the limits correctly per user based on the server.


In the 'Outgoing' area of the Manage Domain section, you can clear outgoing cache, search for outgoing email messages, set a user account for spam checking.


Click the following links for more details:

  • Clear outgoing cache
  • Log search
  • Users
Terms and Conditions Privacy Policy

© Comodo Group, Inc. 2013. All rights reserved.