Mass Management of Vendors
You can perform the same action on multiple vendors records at once. This is useful when you are updating details that are common to a set of vendor records.
To manage multiple records:
- Click 'All' > 'Vendors' to open the list of vendors
- Select the vendors you want to work on using the check-boxes to the left
- Click the 'Actions' button
- Select the action you wish to perform.
- Mass management actions include 'edit', 'delete', 'send email', 'de-duplicate', 'import' and 'export'
|
Tip: If you want to update the details of a single vendor record:
|
The interface allows you to:
Edit common details of several vendor records
- Click 'All' > 'Vendors' to open the 'Vendors List' interface
- Select the vendors you want to edit
- Click 'Actions' > 'Edit'
The 'Mass Editing Vendor' pop-up will appear:
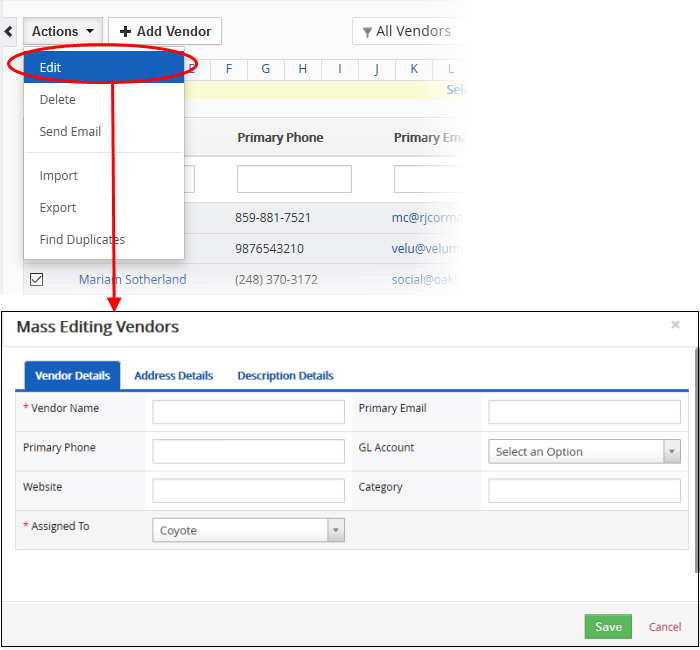
This interface contains three tabs:
- Vendor Details – Specify common details for vendor name, email, website, assignee and more
- Address details – Specify a common address for the vendors
- Description Details – Specify a common description for the vendors
Click 'Save'.
Vendor records that are no longer required can be removed.
- Click 'All' > 'Vendor' to open the 'Vendor List' interface
- Select the vendors you want to delete
- Click 'Actions' > 'Delete'
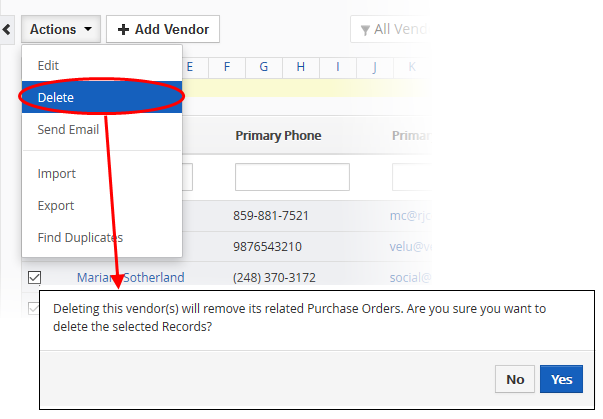
- Click 'Yes' in the confirmation dialog to remove the record(s)
You can send mails to multiple vendors at once. All vendors should have a primary email contact.
- Click 'All' > 'Vendors' to open the 'Vendor List' interface
- Select the vendors you want to email
- Click 'Actions' > 'Send Email'
- This will open the email editor with the email addresses of all selected vendors in the 'To' field
- Compose your email OR click 'Select Email Template'
- Click 'Send' or 'Save as draft' as required.
To import / export vendor records
Export:
- Click 'All' > 'Vendor'
- (Optional) Manually select the vendors you wish to export
- Click 'Actions' > 'Export'
- Choose whether to export selected records, all visible records, or all records
- Click 'Export Vendors'.
- The vendors will be exported to a .csv file
Import:
- Click 'All' > 'Vendors'
- Click 'Actions' > 'Import'
- Browse to the file containing your vendor records
- Specify the format of your file (.csv or .vcf)
- Click 'Next' to begin the import.
See 'Import
and Export Records' for more information.
- Click 'All' > 'Vendors' to open the 'Vendors' interface
- Click 'Actions' > 'Find Duplicates'
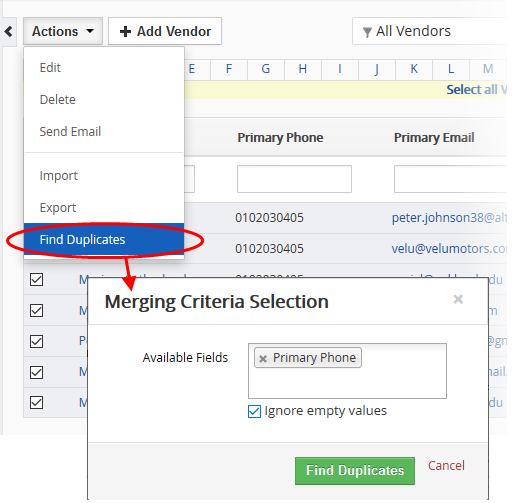
- Click in the 'Available Fields' box and choose the vendor associated fields from the drop down. 'Ignore empty values' means the CRM will not consider matching blank fields as an indication of a duplicate.
-
'Ignore empty values' - The CRM will not consider matching blank fields as indicating a duplicate.
-
Click 'Find Duplicates' to start the search.
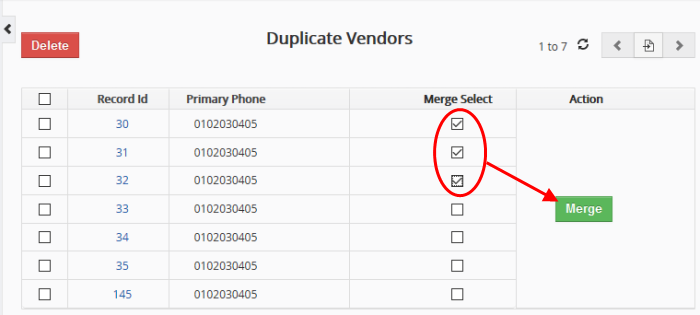
Any duplicates found will be listed as follows:
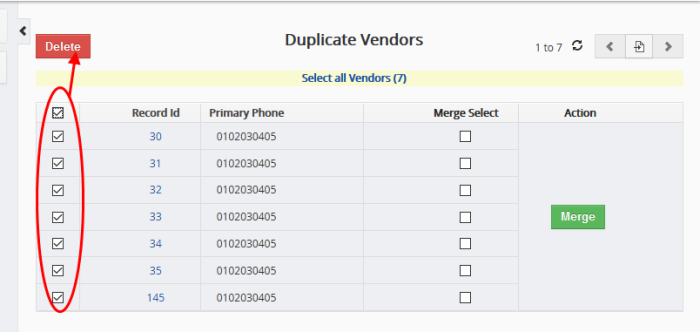
- Delete duplicates – Use the check-boxes on the left to select the records you want to delete. Click the 'Delete' button
- Merge duplicate records - Use the check-boxes under 'Merge Select' to choose the records you want to merge. Click the 'Merge' button”
- Next, you have to specify which information to include in the merged record:
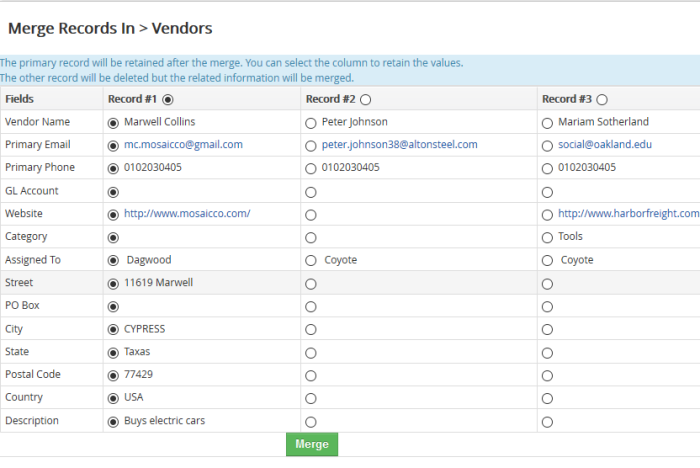
- The record selected in the header row is the 'primary' record. This is the one that will be kept after the merge
- You can change the primary record by choosing a different record
- Select the field row values that you want to retain. Please note you can select only one value from each record
- Click 'Merge'. The information will be merged into a single record in the 'Vendors' interface.


