


Managing Incidents
The 'Incident Management' interface displays a list of incidents along with details such as customer network, the user to whom it is assigned and so on. Administrators can view incident details, reassign them to different users, add incidents to a case, close/re-open incidents and more.
To open the 'Incident Management' interface, click the 'Menu' button from the top right, choose 'Incidents' and then click 'Incident Management'.
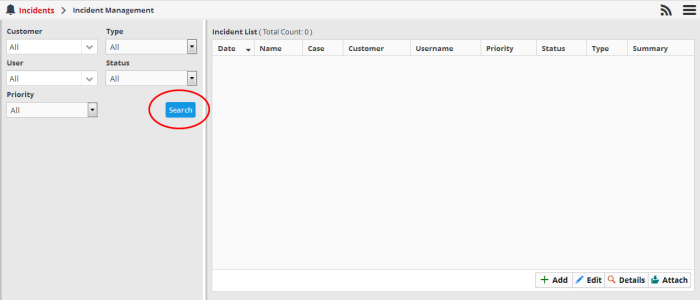
The panel on
the left allows you to filter which incidents are displayed.
- To
view all incidents without filtering, select 'All' in all the filter
option drop-downs and click 'Search'.
- To view incidents detected from specific customer networks, assigned to specific users, of specific type, status and/or priority, select the option(s) from the respective drop-downs and click 'Search'.
|
Tip: To view a list of all incidents on all customer networks in this interface, click the notification icon on the title bar:
|

The example
below, shows all incidents from all customer networks.

The left panel displays a pie-chart showing a breakdown of incidents based on priority.Placing the mouse cursor over a sector displays the count of incidents and priority/severity level.
|
Column Header |
Description |
|---|---|
|
Date |
Displays the precise date and time at which the incident was detected or added. |
|
Name |
For incidents added by correlation rules - The 'Name' column displays the name of the rule based on which the incident was detected. For manually added incidents - The 'Name' column displays the name as entered during its creation. |
|
Case |
Displays the name of the case to which the incident is attached. A case is a collection of incidents assigned to a user for collective investigation and countermeasure. Refer to the section Managing Cases for more details. |
|
Customer |
Indicates the customer on whose network the incident was detected. |
|
Username |
Indicates the user to whom the incident is assigned for investigation. |
|
Priority |
For incidents added by correlation rules - The 'Priority' column displays the severity level of the incident, as configured for the rule based on which the incident was detected. For manually added events - The 'Priority' field displays their severity level as entered during creation. |
|
Status |
Displays the status of the incident on whether it is attended or yet to be attended. The possible values are:
|
|
Type |
Indicates whether the incident is added manually or by a correlation rule. The possible values are:
|
|
Summary |
For incidents added by correlation rules - The 'Summary' column displays a short description of the it as defined in the rule based on which the it was detected. For manually added events - The 'Summary' field displays the short description of it as entered during its creation. |
Sorting Options:
- Clicking on any column header sorts the items in alphabetical order of entries in that column.
Following sections explain on:
Viewing the details of incidents
The administrator can view the complete details including of an incident from the 'Incident Details' pane. The 'Incident Details' pane also allows the administrator to view the details of events detected by the same rule from other endpoints in the same customer network at different time points.
To view the details of an incident
- Select an incident that you want to view the details and click the 'Details' button at the bottom
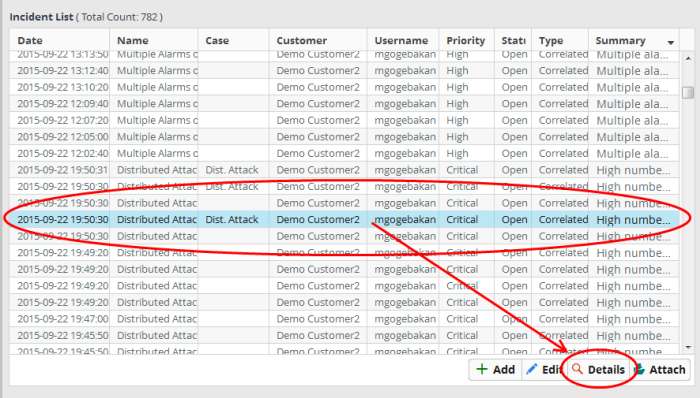
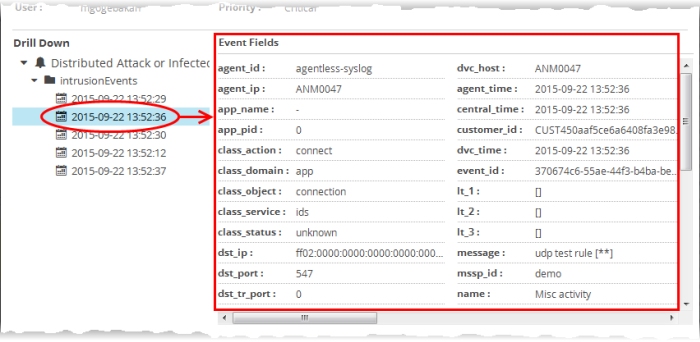
The 'Incident Details' pane for the selected incident will be displayed. It provides complete information about the incident such as the name of the rule that triggered the alert, name of the customer, type of incident and more. Use the 'Drill Down' report to view all the devices affected by the incident.
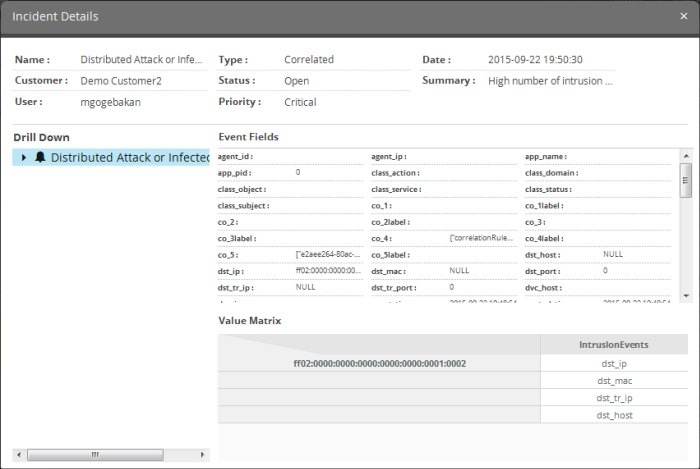
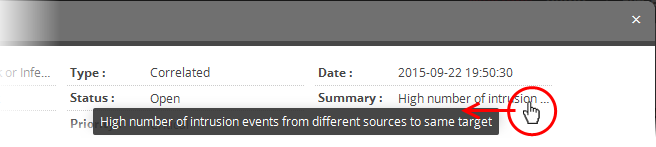
The upper portion displays the details like name of the rule that triggered the incident, name of the customer, type of incident, date and time the incident was created and so on. Placing the mouse cursor over an item shows the full details as a tool tip.
The 'Event Fields' pane at the right displays the values of all the fields of the event detected as the incident. The 'Value Matrix' pane at the bottom right displays the aggregation values fed by the rule from the detected event, in order to generate a new event indicating the event detection by it. Refer to the explanation of 'Output Mappings' under 'Configuring a Correlation Rule' in the section Managing Rules for more details.
The 'Drill Down' pane at the left allows you to view the details of the incidents identified by the same rule.
-
To view the events, expand the folder structure under drill-down and select the time point.
The field values of the respective event detected at the time point will be displayed at the right.
In addition to the incidents reported by the correlation rules, the administrator can manually add an incidents in order to assign specific jobs to the user allotted to a customer. The manually added incidents can also be attached to a case for combined investigation and action by the user.
To add and assign an incident
- Click the 'Add' button at the bottom of the screen.
The 'Add Incident' dialog will open.

- Name - Enter a name for the incident.
- Customer - Choose the customer from the drop-down for whom you want to add the incident.
- User - The drop-down will display the users assigned to the selected customer. Choose the user to whom the incident is to be assigned. Refer to the section 'Administration' for details about assigning users to customers.
- Priority - Select the severity level of the incident from the drop-down. The options available are 'Info', 'Low', 'Medium', 'High' and 'Critical'.
- Status - Select the status of the incident from the drop-down. The options available are – Open, In Progress, False-Positive and Closed.
- Description - Enter an appropriate description for the incident
- Click the 'Save' button
The incident will be added and displayed in the 'Incident List' and will be available for attachment to a case. Please note that incidents added manually will be classified as 'Default'.
Editing and Reassigning an Incident
You can change the status, edit the name, severity level of an incident at any time. You can also reassign an incident to a different user if required.
To edit an incident
- Use the filter options at the left to view the list of incidents pertaining to a specific customer, assigned to a specific user, specific type, status and/or priority level .
- Select the incident that you want to edit from the list and click the 'Edit' button at the bottom.
The 'Update Incident' dialog will be displayed.
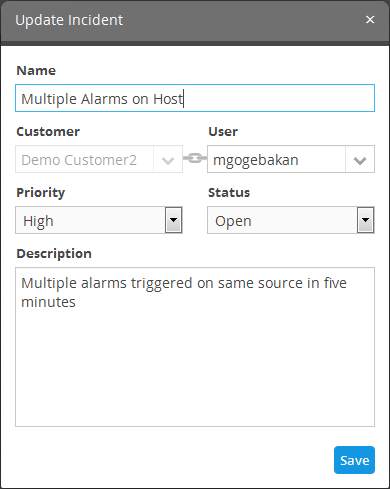
- Edit the details like Name, priority, status as required.
- To reassign the incident select the new user to whom the incident has to be assigned, from the User drop-down.
|
Note: The 'User' drop-down will display only the users that are added for the customer. Refer to the section 'Administration' for details about assigning users to customers. |
- Click the Save button for your changes to take effect.
A 'Case' is a collection of mutually related or a series of incidents for collective investigation and remedial action by the user to whom it is assigned. The administrator can create a case and assign to a same user, from the 'Case Management' interface and attach incidents to cases from the 'Incident Management' interface. For more details on creation and management of cases, refer to the section Managing Cases.
To attach an incident to a case
- Use the filter options at the left to view the list of incidents pertaining to a specific customer, assigned to a specific user, specific type, status and/or priority level .
- Select the incident that you want to add to case and click the 'Attach' button.
The 'Incident Attachment to Case' pane will open with a list of cases assigned to the same user to whom the selected incident is assigned.
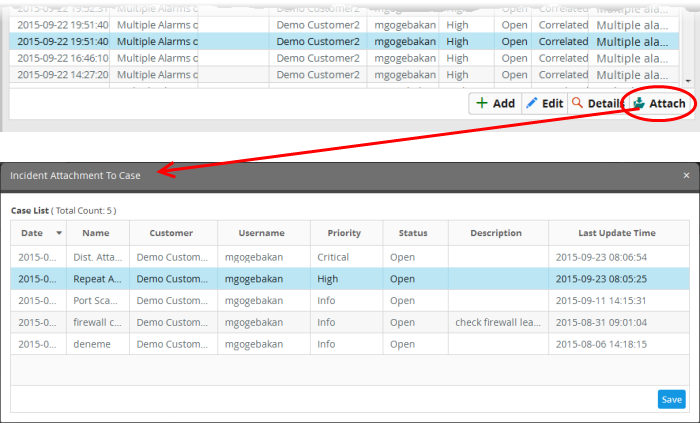
- Select the case to which the incident needs to be added
- Click 'Save'.
The incident
will be added to the case.