


Managing Live List Content
The values for a Live List can be populated in two ways:
- The values can be manually entered to the list.
- Correlation rules that are used for identifying events based on certain criteria and to generate incidents, can be configured to feed the values from the events identified by it, to the live lists. Refer to the explanation of List Mappings in the section Managing Rules.
This section explains on manually adding values to lists and managing existing values. The 'Live List Content Management' interface allows the administrator to view the values added to all or selected lists, manually add new values, edit existing values and remove values from a list.
To open the 'Live List Content Management' interface, click the 'Menu' button from the top right, choose 'Lists' and then click 'Live List Content Management'.
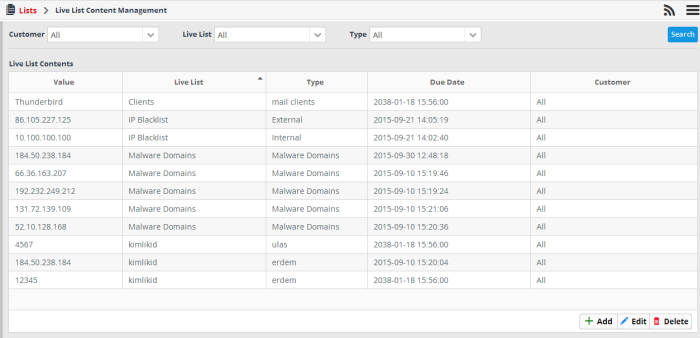
By default, the Live List Contents table shows the values added to all the lists. You can filter the table to view the values added to a specific list using the filter options from the top.
|
Live List Contents Table – Column Descriptions |
|
|---|---|
|
Column Header |
Description |
|
Value |
Displays the value added to a list. |
|
Live List |
Displays the Live List to which the value belongs. |
|
Type |
Displays the type of the Live List, to which the value belongs. |
|
Due Date |
Indicates date and time till which the value is valid in the list. On lapse of the due date, the value will be automatically removed from the list. |
|
Customer |
Displays the customer to which the value is applicable. |
Sorting and Filtering Options:
- Clicking on any of 'Value', 'Live List' and 'Type' table header sorts the items in alphabetical order of entries in that column.
- To filter the values for a specific customer choose the customer from the 'Customer' drop-down and click 'Search'.
- To view the values belonging to a specific Live List, choose the list from the 'Live List' drop-down and click 'Search'.
- To
view the values belonging to a specific Live List Type, select the
list from the 'Live List' drop-down, then choose the type from the
'Type' drop-down and click 'Search'.
The interface allows you to:
To manually enter a value to a list
- Click the 'Add' button at the bottom right of the 'Live List Content Management' interface.
The List Content Add dialog will appear.
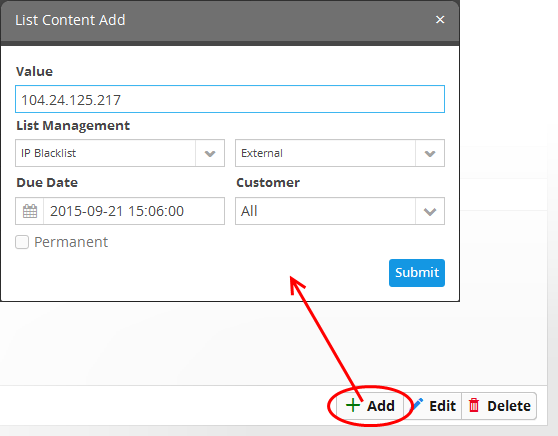
- Select the Live List and the list type to which the value is to be added, from the respective drop-downs under 'List Management'.
- Enter the value for the field defined for the Live List in the 'Value' field.
- Enter the date till which the value is valid in the Due Date field. You can click the calendar icon at the left of the field and choose the date. On the specified date, the value will be automatically removed from the list. If you want the value to be permanently valid, select the Permanent checkbox.
- Select the customer to which the value is applicable from the Customer drop-down.
- Click 'Submit'.
The value will be added to the selected list type.
- Repeat the process for adding more values to the list.
To edit an existing value in a list
- Select the Live List and choose the type from the 'Live List' and 'Type' drop-downs at the top of the Live List Content Management interface and click 'Search', to view only the values added to the required Live List/Type.
- Select
the value and click the 'Edit' button
 at the bottom right of the interface.
The List Content Edit dialog will appear for the
chosen value. The dialog is similar to the List Content Add dialog.
Refer to the section above for more
details.
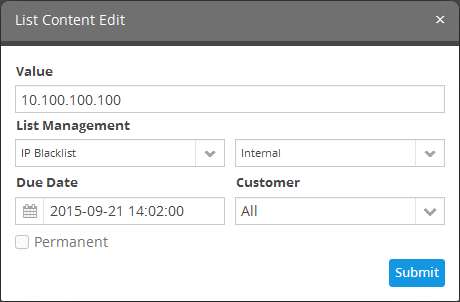
- Edit the details as required and click 'Submit'.
The value will be edited and will take immediate effect on the Event Queries and Correlation Rules in which the Live List has been used.
- Select the Live List and choose the type from the 'Live List' and 'Type' drop-downs at the top of the Live List Content Management interface and click 'Search', to view only the values added to the required Live List/Type.
- Select
the value and click the 'Delete' button
 at the bottom right of the interface.
A confirmation dialog will
appear.
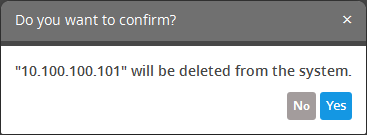
- Click Yes to confirm the removal.
The list will be updated for the removal of the value and take effect immediately on the Event Queries and Correlation Rules in which the Live List has been used.