


Configure the Sandbox
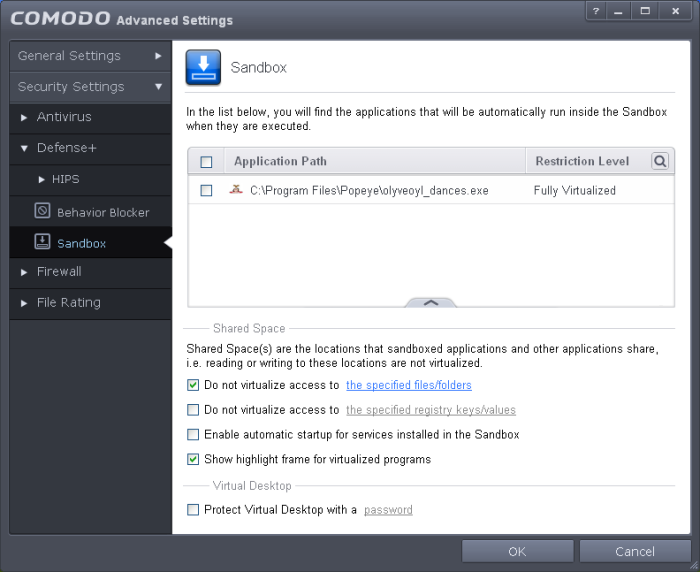
The 'Sandbox' section of 'Advanced Settings' allows you to view, manage and add applications which should always be run inside the sandbox. A sandboxed application has much less opportunity to damage your computer because it is run in a virtual environment isolated from your operating system and your files. This allows you to safely run applications that you are not 100% sure about. When adding a new application, you can also set that particular application's 'restriction level' (this determines the degree of access that the application has to your 'real' system) and the amount of resources it should be allowed to consume. If you do not select a restriction level then it will run as 'Fully Virtualized'.
The 'Sandbox' area allows you to configure settings that apply to all sandboxed programs. Other sandbox-related options include the ability to password protect the Virtual Desktop. For easy identification, Comodo Internet Security will show a green border around programs that are running in the sandbox.
- The 'Sandbox' panel can be accessed by clicking 'Tasks > Sandbox Tasks > Open Advanced Settings > Security Settings > Defense+ > Sandbox
The interface is divided into three areas:
- Sandboxed Programs - Add and configure programs that should always run sandboxed
- Shared Space Settings - Files downloaded or generated by sandboxed applications that you wish to be able to access from your real system should be downloaded to the shared space
- Virtual Desktop Settings - Create an 'exit' password for the Virtual Desktop. If set, the Virtual Desktop cannot be closed or minimized until the correct password is entered. This prevents guests or younger users from exiting this sandbox environment.
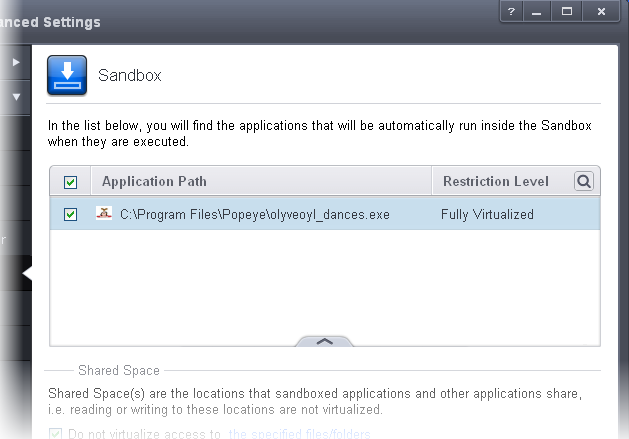
The upper pane lists all programs that you have added to sandbox along with their installation paths and their access restriction level. Because the sandbox is isolated from your operating system, any programs that are known to be problematic or to cause conflicts with other software can be safely run in the sandbox.
You can search for a application or program from the list by clicking the search icon  at the far right in the column header.
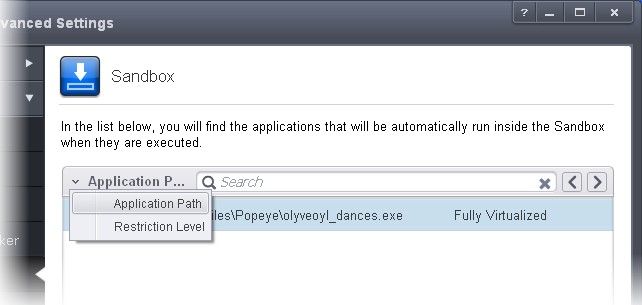
- Click the chevron on the left side of the column header and select the search criteria from the drop-down.
- Enter the name of the application in part or full in the search field.
- Click the right or left arrow at the far right of the column header to begin the search.
- Click the
 icon in the search field to close the search option.
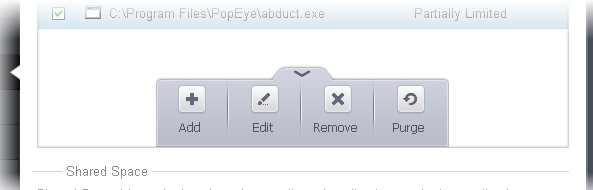
- Add – Allows you to add programs that should be run in the sandbox in future.
- Edit – Allows you to edit sandbox options for a selected program in the list.
- Remove – Releases the currently selected program from the sandbox
- Purge - Checks that all files listed are actually installed on your computer at the path specified. If not, the file or the file group is removed (purged) from the list.
|
Note: Programs added to this list will always be executed inside the sandbox. If you want to run an application in the sandbox on a 'one off' basis instead, you can do it in two ways:
|
To manually add a program to Sandbox
- Click the handle at the bottom and select 'Add':
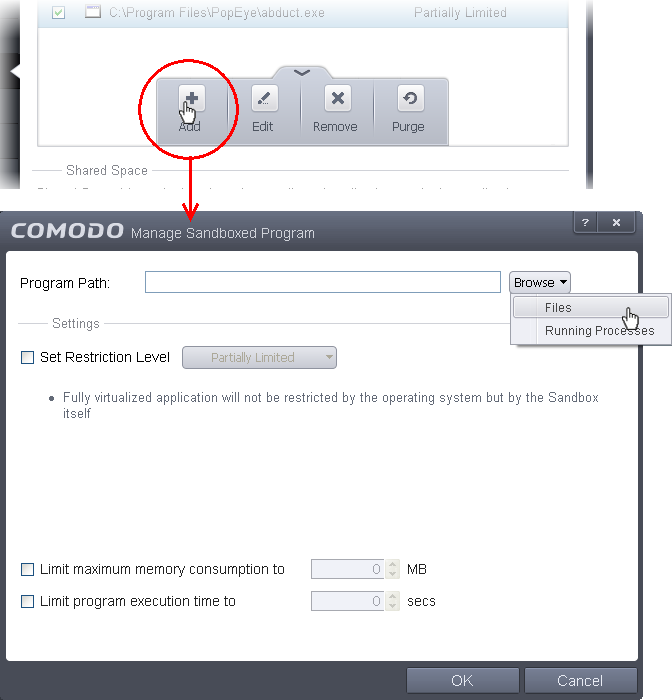
- The 'Manage Sandboxed Program' interface will open.
To add a program, you can manually enter the path to the executable or click 'Browse' to add the program by choosing:
- Files – Allows you to navigate to the executable of the program you wish to add.
- Running Processes - Allows you to add a program to the sandbox by choosing a running process.
Settings:
- Set Restriction Level – The Access restriction level determines the amount of privileges a sandboxed application has to access other software and hardware resources on your computer. (Default = Disabled)
- Set an access restriction level by enabling the 'Set Restriction Level' check-box and choosing a level from the drop-down.
- If you do not set a restriction level, CIS will automatically apply a level of 'Fully Virtualized'.
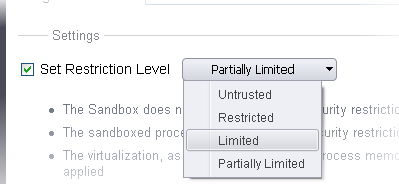
- Fully Virtualized - The application will be run in a virtual environment completely isolated from your operating system and files on the rest of your computer.
- Untrusted -The application is not allowed to access any operating system resources. The application is not allowed to execute more than 10 processes at a time and is run with very limited access rights. Please note, some applications that require user interaction may not work properly under this setting.
- Restricted -The application is allowed to access very few operating system resources. The application is not allowed to execute more than 10 processes at a time and is run with very limited access rights. Please note, applications like computer games may not work properly under this setting.
- Limited - Only selected operating system resources can be accessed by the application. The application is not allowed to execute more than 10 processes at a time and is not allowed to execute actions that require Administrator account privileges. Access to many system resources, like the clipboard, are also prohibited.
- Partially Limited (Default) - The application is allowed to access all operating system files and resources like the clipboard. Modification of protected files/registry keys is not allowed. Privileged operations like loading drivers or debugging other applications are also not allowed.
- Limit maximum memory consumption to: You can define how much system memory can be allocated to the application by selecting this check-box then entering the desired memory (in MB) in the combo box beside it. (Default = Disabled)
- Limit the program execution time to: You can define how long the program is allowed to run by selecting this check-box then entering the time (in seconds). The program will be terminated after this time has elapsed. (Default = Disabled)
- Click OK to add the program to the list of sandboxed programs. From this point onwards the application will be run in the sandbox.
- If you wish to remove it at a later date, simply select it in the list and click 'Remove'. Next time you execute this application it will run outside of the sandbox (presuming it is not then detected as malicious or automatically sandboxed as per the sandboxing process).
- To edit the restriction settings for an application included in the sandbox, select the application and click 'Edit'. The process is same as explained in adding a program to sandbox.

'Shared Space' is a dedicated area on your local drive that sandboxed applications are permitted to write to and which can also be accessed by non-sandboxed applications (hence the term 'Shared Space'). For example, any files or programs you download via a sandboxed browser that you wish to be able to access from your real system should be downloaded to the shared space. This folder is also used by the Virtual Desktop and is located by default at 'C:/Program Data/Shared Space'.
You can access the shared space folder in the following ways:
- Clicking the 'Shared Space' shortcut on your computer desktop
- Clicking 'Shared Space' button on the CIS interface
- Opening 'Sandbox Tasks' from the Tasks interface then clicking 'Open Shared Space'
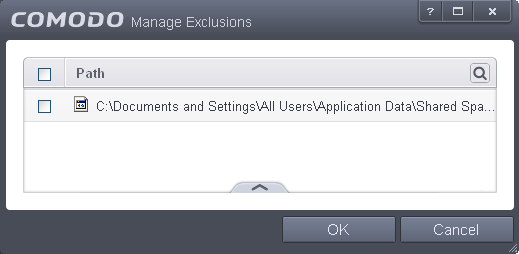
By default, sandboxed applications can access folders and files on your 'real' system but cannot save any changes to them. However, you can define exceptions to this rule by using the 'Do not virtualize access to...' links.
To define exceptions for files and folders
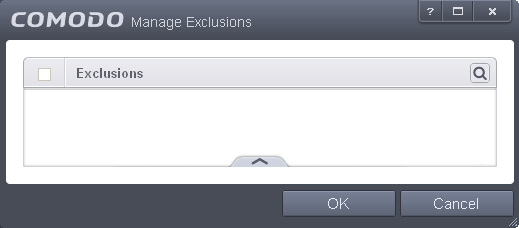
- Enable the 'Do not virtualize access to the specified files/folders' check-box then click on the words 'the specified files/folders'. The 'Manage Exclusions' dialog will appear.
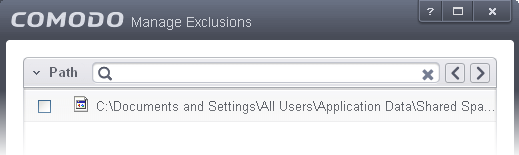
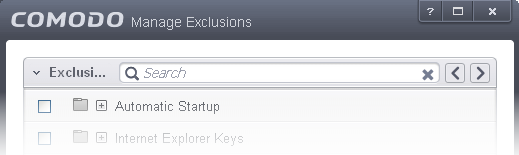
You can search for specific excluded path, file or folder from the list by clicking the search icon  at the far right in the column header and entering the name of the file/folder in full or part. You can navigate through the successive results by clicking the left and right arrows.
- Click the handle at the bottom to open the tools menu then click 'Add.
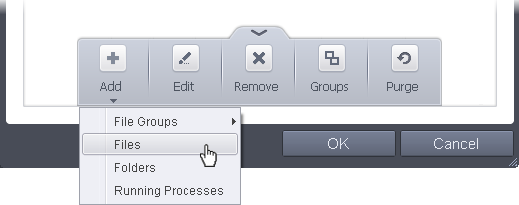
- Files - Allows you to specify files or applications that sandboxed applications are able to access
- Folders – Specify a folder that can be accessed by sandboxed applications
- File Groups - Enables you to choose a category of files or folders to which access should be granted. For example, selecting 'Executables' would enable you to create an exception for all files with the extensions .exe .dll .sys .ocx .bat .pif .scr .cpl. For more details on file groups, refer to the section File Groups.
- Running Processes - Allows you to specify a parent program that sandboxed applications are able to access by choosing a running process.
- To edit an exception, select it from the list, click the handle to open the tools menu then select 'Edit'.
- Change file or folder location path and click 'OK'
- Click 'OK' to implement your settings
- To manage available file groups, click the 'Groups' button from the tools menu. The 'Manage File Groups' dialog allows you to view, add and edit file groups. Please refer to File Groups if you need more information with this area.
To define exceptions for specific Registry keys and values
- Enable the 'Do not virtualize access to the specified registry keys/values' check-box then click on the words 'the specified registry keys/values'. The 'Manage Exclusions' dialog will appear.
You can search for specific excluded Registry Keys or Values from the list by clicking the search icon at the far right in the column header and entering the name of the key/value in full or part. You can navigate through the successive results by clicking the left and right arrows.
- Click the handle at the bottom to open the tools menu then click 'Add'.
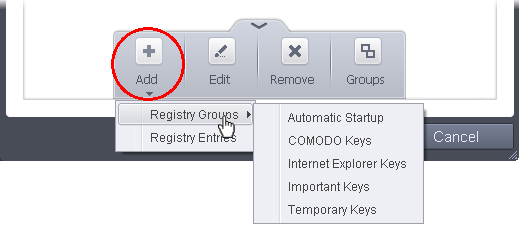
- Registry Groups - Allows you to batch select a predefined group of important registry keys as exceptions. For an explanation of CIS registry groups, refer to the section Registry Groups.
- Registry Entries – Opens an interface that allows you to quickly browse Windows registry keys and add them as exceptions:
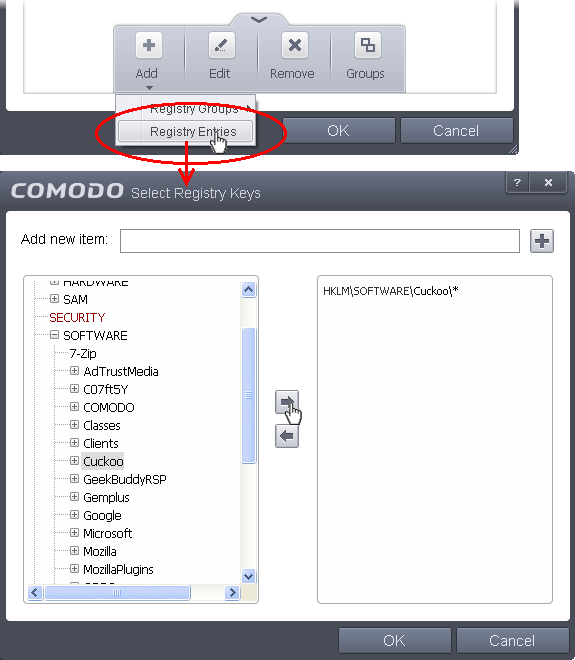
- Click 'OK' to implement your settings.
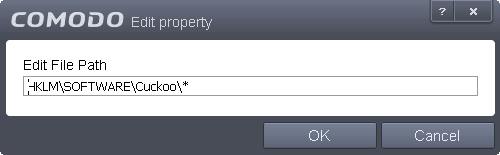
- To edit an exception, first select it from the list, click the handle to open the tools menu then select 'Edit'.
- Edit the key path and click OK.
-
To view and manage Registry Groups, click the handle at the bottom and select 'Groups'. From here you can add/remove registry groups, rename a groups and add/remove individual keys to/from a group. Note - any changes you make here are not limited to registry group 'exceptions', they apply to registry groups overall. Refer to the section Registry Groups for more details on managing registry groups.
Other Settings:
Enable automatic startup for services installed in the sandbox – By default, CIS does not permit sandboxed services to run at Windows startup. Select this check-box to allow them to do so. (Default = Disabled)
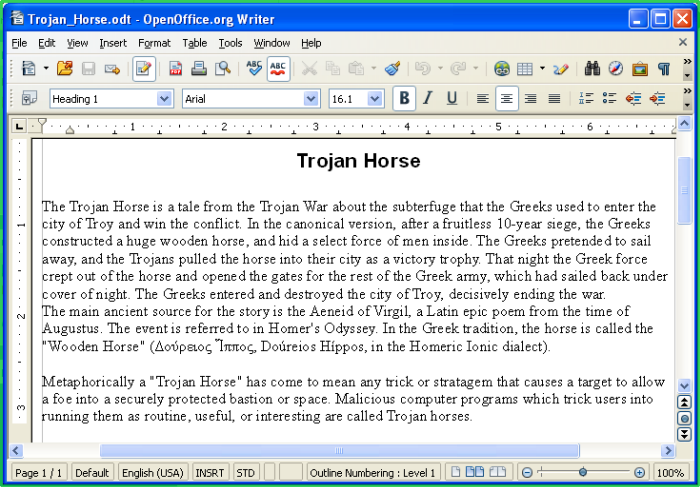
Show highlight frame for virtualized programs - If enabled, CIS displays a green border around the windows of programs that are running inside the sandbox. The following example shows an .odt document opened with a sandboxed version OpenOffice Writer:
The Virtual Desktop Settings area allows you to password protect your Virtual Desktop. Once set, the password has to be entered every time when the Virtual Desktop is closed.
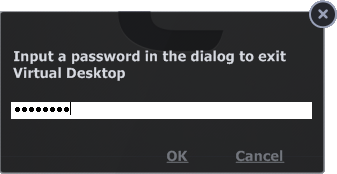
The exit password for the Virtual Desktop acts as a security measure to prevent guest users or younger users from exiting out of the isolated environment you have prepared for them and potentially exposing the real system to danger.
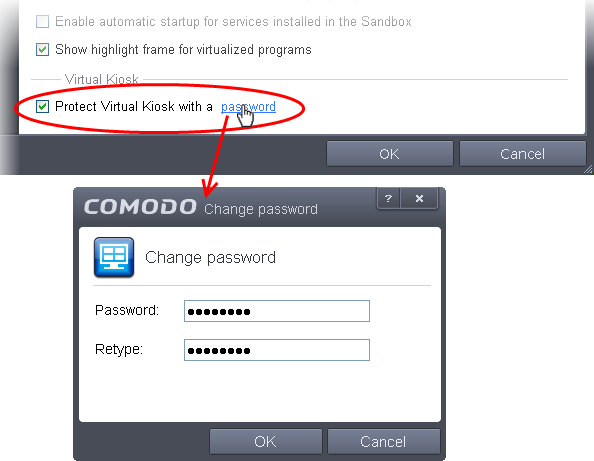
To set an exit password for Virtual Desktop:
-
Select the 'Protect Virtual Desktop with a password' check-box then click the words password. The 'Change password' dialog will appear.
-
Type a password which contains a combination of alphabetic and numeric characters and symbols which cannot be easily guessed by others. We recommend a password of at least 8 character in length.
-
Re-enter the password in the 'Retype' field then click 'OK'.
You will now be asked for a password every time you exit the Virtual Desktop.