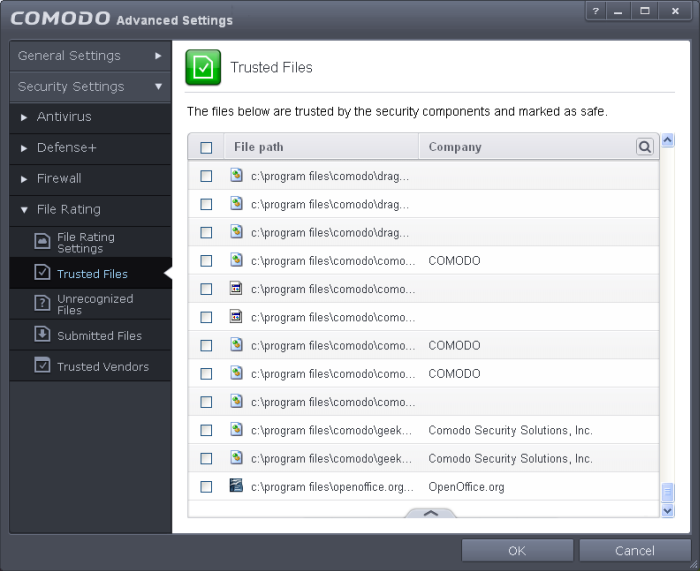
Trusted Files
Files added to the Trusted Files list are automatically given Defense+ trusted status. If an executable is unknown to the Defense+ safe list then, ordinarily, it and all its active components generate Defense+ alerts when they run. Of course, you could choose the 'Treat this as a Trusted Application' option at the alert but it is often more convenient to classify entire directories of files as 'Trusted Files'.
CIS allows you to define a personal safe list of files to complement the default Comodo safe list.
By adding executables to this list (including sub folders containing many components) you can reduce the amount of alerts that Defense+ generates whilst maintaining a higher level of Defense+ security. This is particularly useful for developers that are creating new applications that, by their nature, are as yet unknown to the Comodo safe list. Files can be transferred into this module by clicking the 'Move to' button in the 'Unrecognized Files' area.
- The Trusted Files panel can be accessed by clicking Security Settings > File Rating > Trusted Files from the Advanced Tasks interface

You can use
the search option to find a specific item in the list by clicking the
search icon at the far right in the column header at the far right in the column
header.

- Click the chevron on the left side of the column header and select the search criteria from the drop-down.
- Enter the name of the item to be searched in the search field.
- Click the right or left arrow at the far right of the column header to begin the search.
- Click
the
 icon in the search field to close the search option.
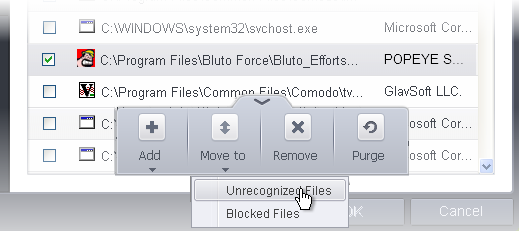
Clicking the handle at the bottom center of the panel opens the following options:

- Add – Allows you to add files to Trusted Files list manually
- Move – Allows you to move files from Trusted Files list to Blocked Files or Unrecognized Files list
- Remove - Allows you to remove files from Trusted Files list
- Purge - Runs a system check to verify that all the files listed are actually installed on the host machine at the path specified. If not, the file is removed, or 'purged', from the list.
Adding files to Trusted Files list
CIS allows you to add files and executables to the list of Trusted Files so that those files will be given Trusted status. For the files added manually, it generates a hash or a digest of the file using a pre-defined algorithm and saves in its database. On access to any file, its digest is created instantly and compared against the list of stored hashes to decide on whether the file has 'Trusted' status. By this way, even if the file name is changed later, it will retain its Trusted status as the hash remains same. However you can also add files by their file names, but if you happen to change the file name later, it looses its 'Trusted' status.
To add new file(s) to Trusted Files list
-
Click the handle from the bottom center and choose 'Add'

You can add files to the Trusted Files list by three ways:
- Files - Allows you to navigate to the file or executable of the program you wish to add.
- Folders - Allows you to navigate to the folder you wish to add. All the files in the folder will be added to the 'Trusted Files' list.
- Running Processes - Allows you to select a currently running process. On selecting a process, the parent application, which invoked the process will be added to 'Trusted Files' list.
- Click OK for your changes to take effect.
To move an included entry to Unrecognized Files or Blocked Files
- Select the entry to be transferred out of the 'Trusted Files' list into either Unrecognized Files or Blocked Files. You can select several entries to be moved at once by marking the check-boxes beside the entries.
- Click the handle from the bottom center and choose 'Move'

- Choose 'Unrecognized Files' or 'Blocked Files' from the drop-down.
- Click OK for your changes to take effect.
To remove an included entry from the Trusted Files list
- Select the entry to be removed from the 'Trusted Files' list. You can select several entries to be removed at once by marking the check-boxes beside the entries.
- Click the handle from the bottom center and choose 'Remove'. The file is only removed from the list and not deleted from your system.
- Click OK for your changes to take effect.


