Protected Registry Keys
The 'Registry Protection' panel allows you to protect system critical registry keys against modification. Irreversible damage can be caused to your system if important registry keys are corrupted or modified in any way. It is essential that your registry keys are protected against any type of attack.
Click the 'Registry Keys' tab in the Protected Objects interface.
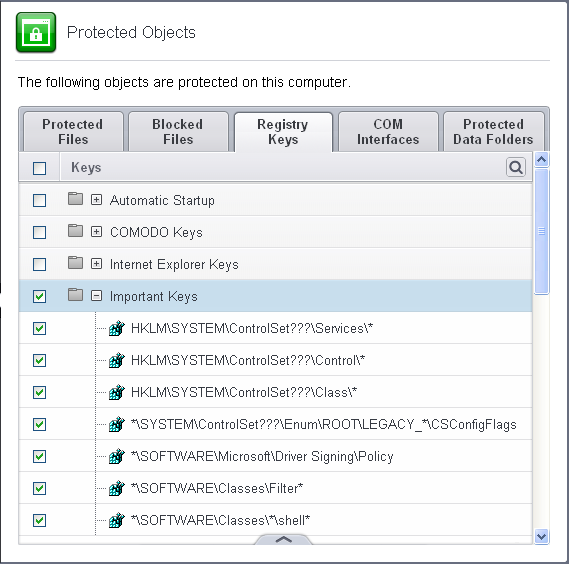
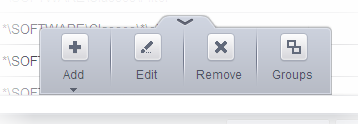
Clicking the handle at the bottom of the interface opens an options panel with the following options:
-
Add – Allows you to add Registry groups or individual registry keys/entries to Registry Protection list.
-
Edit – Allows you to edit the path of the Registry group or individual registry keys/entries of the selected item in the Registry Protection interface.
-
Remove - Deletes the currently highlighted Registry group or individual registry key from the Registry Protection list.
-
Groups – Opens the Manage Registry Groups interface that allows you to edit pre-defined Registry groups and define new Registry groups for inclusion in Registry Protection list.
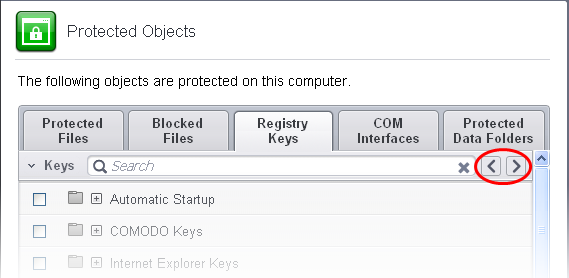
You can use the search option to
find a specific registry key or group in the list by clicking the
search icon at the far right in the column header and entering the
key/group name in full or part. You can navigate through the
successive results by clicking the left and right arrows.
To manually add an individual Registry key or Registry Group
-
Click the handle from the bottom center and select 'Add'.
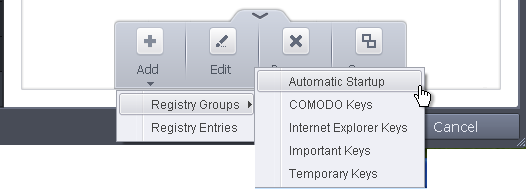
You can add the items by following methods:
-
Adding Registry Groups – Selecting Registry Groups allows you to batch select and import predefined groups of important registry keys. Comodo Internet Security provides a default selection of 'Automatic Startup' (keys), 'Comodo Keys', 'Internet Explorer Keys' and 'Important Keys'. For explanations on editing existing registry groups and creating new groups refer to the section Registry Groups.
-
Adding individual Registry Keys - Selecting 'Registry Entries' opens the 'Select Registry Keys'.
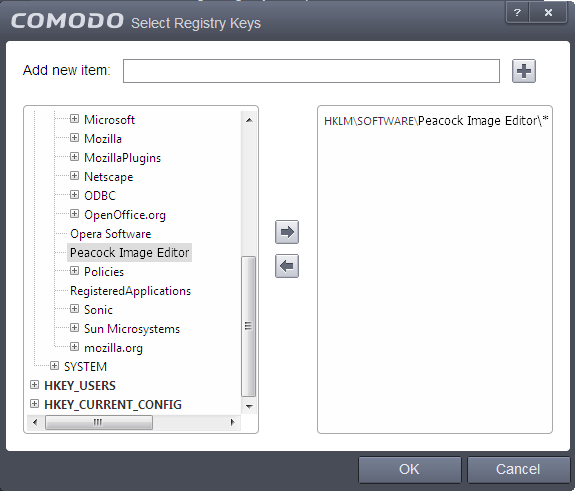
You can add items by browsing the registry tree in the right hand pane, selecting the key and moving it to right hand side pane by clicking the right arrow button. To add item manually enter its name in the 'Add new item' field and press the '+' button.
To edit an item in the Registry Protection list
-
Select the key from the list, click the handle from the bottom and select Edit. The 'Edit Property' dialog will appear.

-
Edit the key path, if you have relocated the file and click OK.
|
Note: The Registry Groups cannot be edited from this interface. You can edit Registry Groups from the Manage Registry Groups interface. Refer to the section Registry Groups for more details. |
To delete an item from Registry Protection list
-
Select the item from the list, click the up arrow from the bottom and select 'Remove'.
The selected item will be deleted from the Registry Protection list. CIS will not generate alerts, if the key or the group is modified by other programs.
Registry groups are predefined batches of one or more registry keys. Creating a registry group allows you to quickly add it to Registry Protection list.
To open the Manage Registry Groups interface
-
Click the handle from the bottom center of Registry Protection interface and select 'Groups'.
The 'Manage Registry Groups' interface will open.
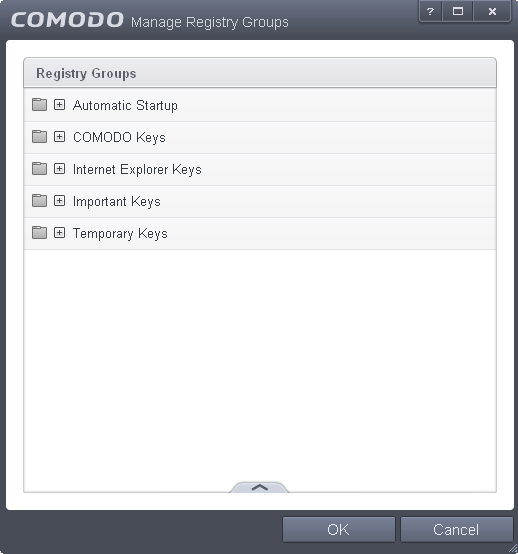
This interface allows you to
-
To add a new group or add key(s) to an existing group, click the handle from the bottom and click 'Add'.

-
Add a new group - Select 'New Group' from the 'Add' drop-down, enter a name for the group in the 'Edit property' dialog and click OK

-
Add keys to a group - Select the Group, click the handle and click Add and choose 'Registry Keys'. The 'Select Registry Keys' dialog will be opened.

You can add items by browsing the registry tree in the right hand pane, selecting the key and moving it to right hand side pane by clicking the right arrow button. To add item manually enter its name in the 'Add new item' field and press the '+' button.
-
To edit an existing group, select the group, click the handle and choose Edit. Edit the name of the group in the Edit Property dialog

-
To remove an individual file from a group, click + at the left of the group to expand the group, select the key or entry to be removed, click the handle and choose 'Remove'.


