Automatic Configuration
You need to provide FTP details for your site to enable automatic configuration. SOCaaP Web Protection will use the details to upload the scanner agent.
- Open the SOCaaP Web Protection dashboard
- Select the target website from the menu at top-left
- Click the 'Scan' tab then 'Server Side Scan' > 'Overview'
- Click 'Enable Scanner'
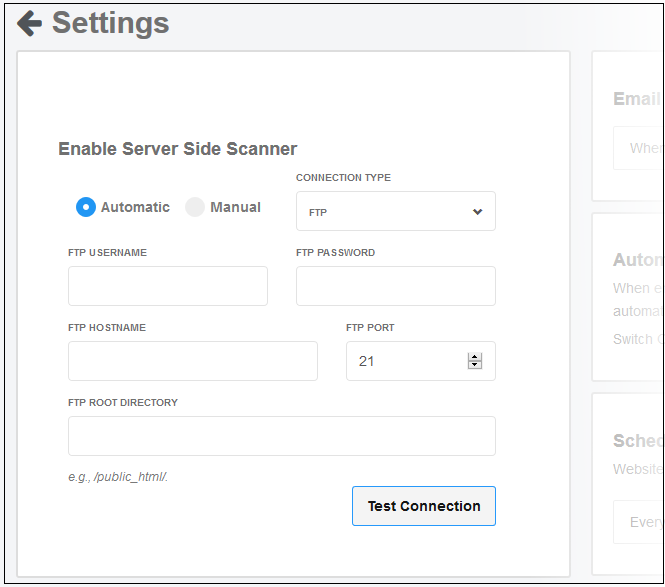
- Select ‘Automatic’ in the server side scanner box:

|
FTP / s/FTP Settings - Table of Parameters |
|
|---|---|
|
Parameter |
Description |
|
Connection Type |
Select FTP or sFTP as required. |
|
FTP Username / FTP Password |
Enter the username and password of your FTP server. |
|
Hostname |
IP or hostname of your web-server. |
|
Port |
By default, FTP / sFTP connections use ports 21 and 22 respectively. Change this if your web-server uses different ports for FTP connections. |
|
FTP Directory |
The path of your web root folder. For example '/public_html/. |
-
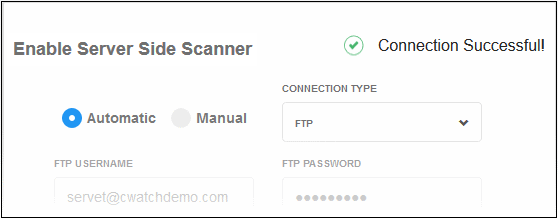
Test Connection - Click this after completing all fields. SOCaaP Web Protection will check your settings and, if successful, show a confirmation message as follows:

- Click 'Save'
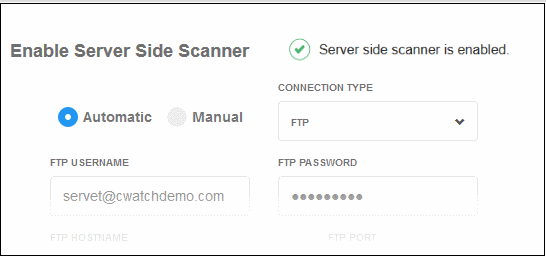
SOCaaP Web Protection will upload the agent to your site. You will see 'Server side scanner is enabled' message if everything is successful:

- Note. Our technicians will also use these FTP settings to access your site IF you request them to remove malware
Add exceptions
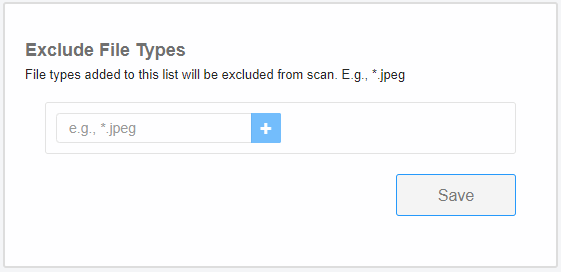
You can exclude files from the server-side scan as follows:
- Scroll down to the exclude file types section:

- Type the extension of the file that you want to exclude. You must prefix the extension with *. For example, *.txt
- Click '+'
- Repeat the procedure to add more file extensions
Click 'Save'.


