

Restore and Download Website Files
Select the target website from the menu at top-left > Click the ‘Backup’ tab
- You can restore your site from any backup you have taken in the past.
- You can restore all files or selected files
1. Restore your website files.
- Select the target website from the menu at top-left
- Click the ‘Backup’ tab
- Scroll to the table at the bottom of the page.
- Click ‘Options’ in the ‘Restore’ column of the backup you want to use.
- Select ‘Auto-restore All Files’ or ‘Selective Auto Restore’.
- This restores your site files, but does not overwrite your current database.
2. Restore your database. You must do this manually. You can download the database from the ‘Restore’ options. You can get the database from a different backup-row if required.
The options above offer you flexibility when restoring a website. For example, you can restore your site to the ‘last-known-working’ version, while keeping a database which has your most recent transactions.
Run a restore operation
- Select the target website from the menu at top-left
- Click the 'Backup' tab
- Scroll down to the backup history table:
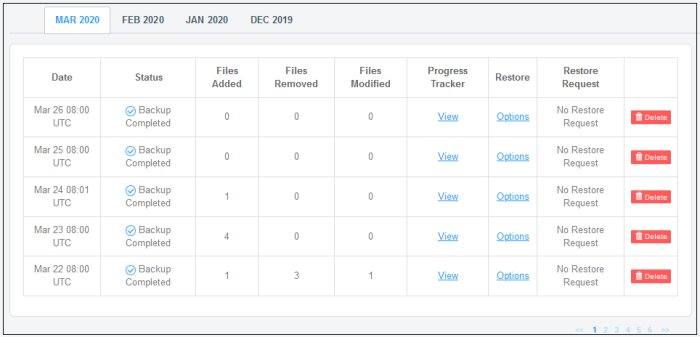
- Locate the row of the backup you want to use
- Click 'Options' in the ‘Restore’ row:
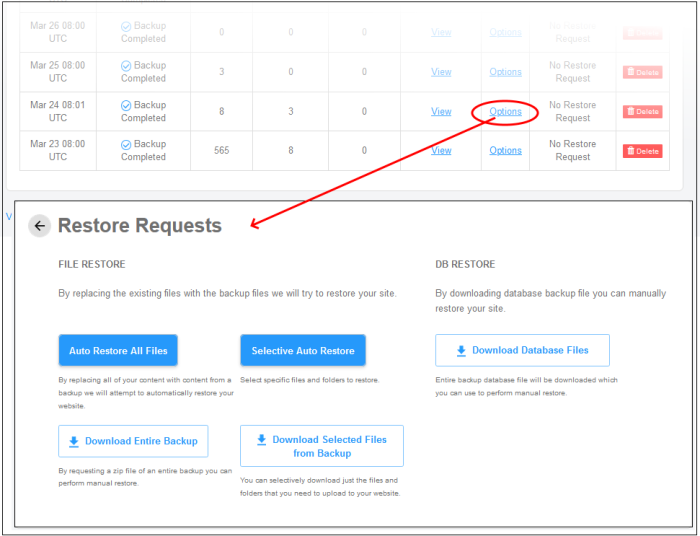
- File Restore:
- Auto Restore all Files - Start the restore process. Files in the destination will be replaced by those in the backup.
- Selective Auto Restore - Restore specific files and folders.
- Download Entire Backup - Download a .zip file of the backup. You can use this to manually restore all files, run a partial restore, or simply retrieve some lost / older versions of files.
- Download Selected Files from Backup - Retrieve specific files from the backup. This is a simple download of files, rather than restoring them to their original location.
- DB Restore:
- Download Database Files - Download a .zip file which contains all database records. You can manually unzip and restore the database as required.
The rest of this section illustrates the processes above with screenshots.
- Click ‘Options’ in the row of the backup you want to use
- Click ‘Auto Restore All Files’:

- Agree to overwriting files and click 'Restore'
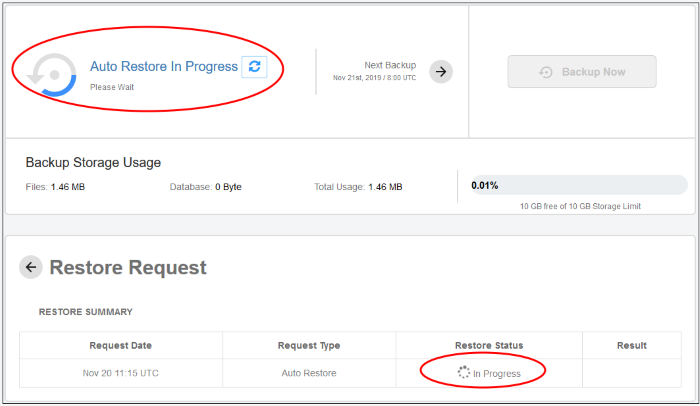
- You will see the following confirmation:
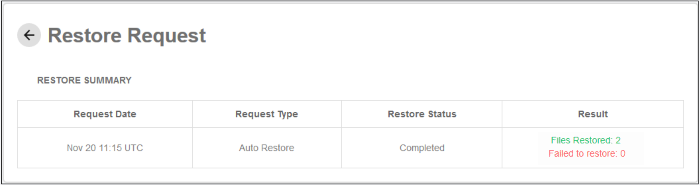
- Results are shown at the end of the operation:
- Click ‘Options’ in the row of the backup you want to use
- Click ‘Selective Auto Restore’:
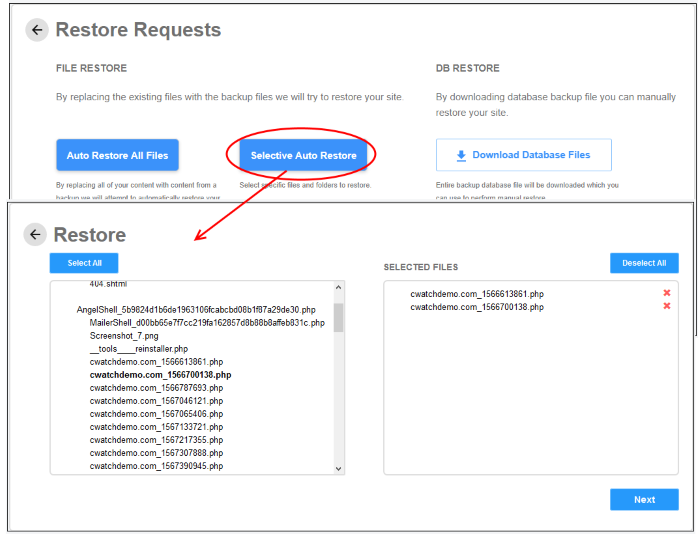
- Select the backed up file(s) on the left and click ‘Next’
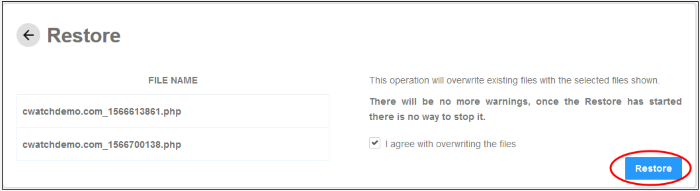
- Check the selected files detail on the left, agree to overwrite the files and click ‘Restore’.
- You will see the following confirmation:
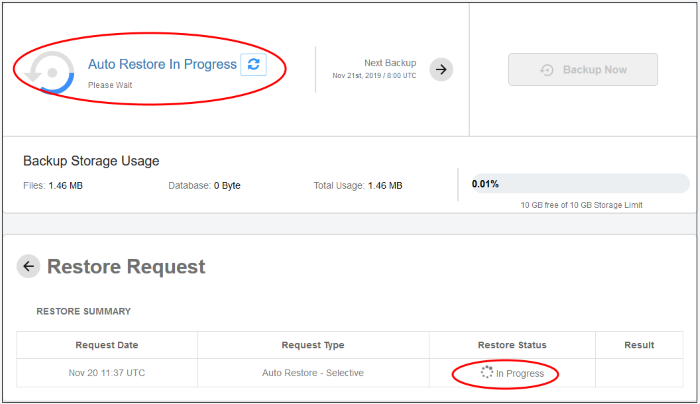
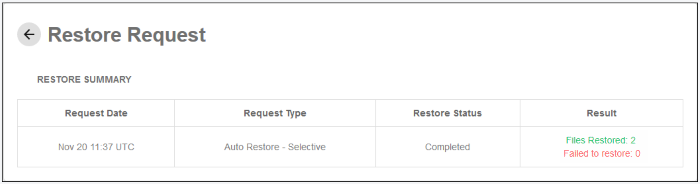
- Results are shown at the end of the operation:
- Click ‘Options’ in the row of the backup you want to use
- Click ‘Download Entire Backup’ > ‘Confirm Download’:
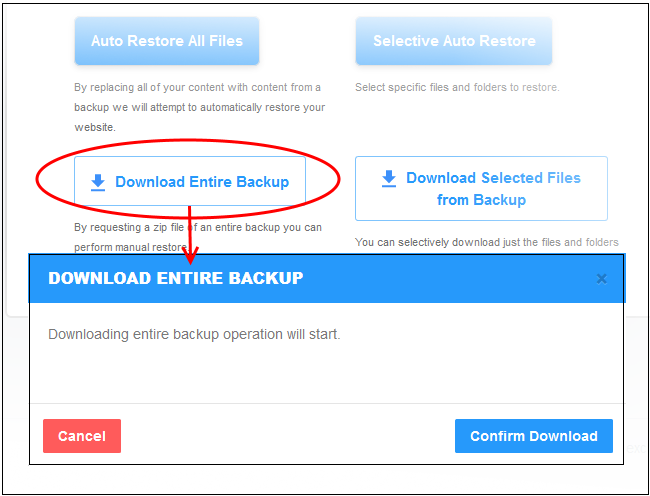
- SOCaaP Web Protection will retrieve your files and create a zip file of them. This process may take a few seconds.
- Once complete, click 'Download' in the ‘Result’ column:

- Click ‘Download’ to save the zip file
Download Selected Files from Backup
- Click ‘Options’ in the row of the backup you want to use
- Click ‘Download Selected Files from Backup’
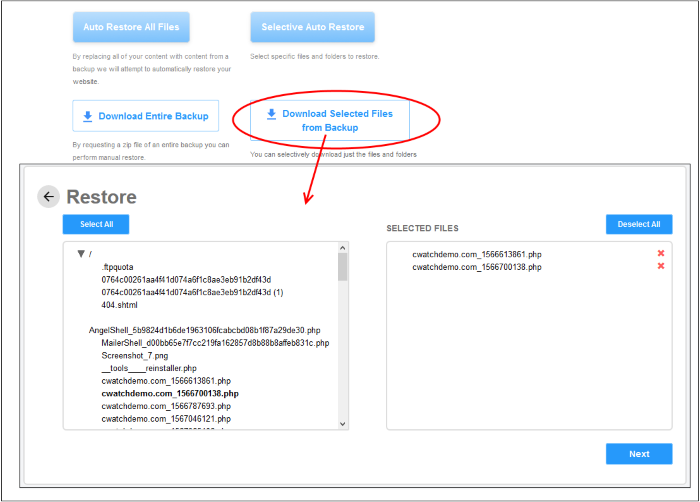
- Select the backed up file(s) on the left and click ‘Next’
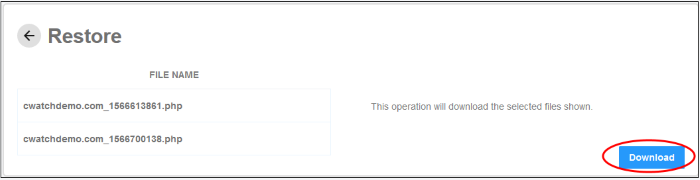
- Check the selected files detail on the left and click ‘Download’.
- SOCaaP Web Protection will retrieve your files and create a zip file of them. This process may take a few seconds.
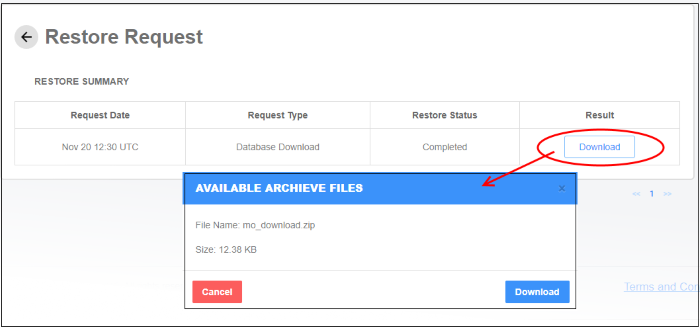
- Once complete, click ‘Download’ in the ‘Result’ column:

- Click ‘Download’ to save the zip file
- Click ‘Options’ in the row of the backup you want to use
- Click ‘Download Database Files’ > ‘Confirm Download’:

- SOCaaP Web Protection will create a zip file containing your database. This process may take a few seconds.
- Once complete, click 'Download' in the ‘Result’ column:
- Click
‘Download’ to save the zip file.