Comodo Help
Find the desired product help
SOCaaP

SOCaaP

Version 2.2

English

Print Help
SOCaaP Web Protection > Website Data And Settings > Firewall > Manage Custom Firewall Rules
  • Introduction
    • Logging-in To The SOCaaP Console
  • Dashboard Overview
    • Summary
    • Alerts,Incidents And Website Vulnerabilities
    • Customer Health
  • SOCaaP Alerts/Escalations
    • Log-in To The Admin Console
    • The Home Screen
    • Service Summary
    • Incidents Overview
      • Incidents
      • Threat Summary
    • Log Collection Summary
    • Threat Communication Graph
    • Tickets
    • Reports
    • Notification Settings
    • Integrate Your Office 365 Account With SOCaaP
  • SOCaaP XDR
    • Log-in To The Admin Console
    • The Main Interface
    • Eveny Query
      • Configure Event Queries
    • Report Generation
    • Administration
      • Event Collection
      • Phantom Settings
      • Manage Users
    • Appendix 1 – Field Groups And Event Items Description
    • Appendix 2 –SOCaaP Supported Logs
  • SOCaaP Web Protection
    • Add Websites
    • The Main Interface
    • The Dashboard
    • Website Data And Settings
      • Website Overview
      • Security Scans
        • Website Scans
        • Website Files Security Scans
          • Malware Scan Settings
            • Automatic Configuration
            • Manual Configuration
          • Run A Scan And View Results
          • Notifications, Malware Removal And Scheduled Scans
        • Vulnerability Scans
          • CMS Vulnerability Scans
          • OWASP Top 10 Vulnerability Scans
      • Content Delivery Network
        • Activate CDN For A Website
        • CDN Settings
        • View CDN Metrics
      • Firewall
        • WAF Statistics
        • WAF Events
        • Configure WAF Policies
        • Manage Custom Firewall Rules
      • SSL Configuration
      • DNS Configuration
      • Add Trust Seal To Your Websites
      • Back Up Your Website
        • Backup Settings
        • On-Demand Backup
        • View Backup Records And File Statistics
        • Restore And Download Website Files
        • Delete Backups
    • Manage Your Profile
  • Sensor Installation
    • Requirements
    • (Option 1) Create Installation Media
    • (Option 2) Deploy Virtual Machine Environment
      • Create A New Virtual Machine
      • Configure Memory Size
      • Configure Hard Disk
      • Configure Hard Disk File Type
      • Configure Storage On Physical Hard Disk
      • Configure Size Of Virtual Hard Disk
      • Configure Network Settings
      • Select VM Startup Disk
    • Sensor Installation Steps
    • Sensor Configuration Steps
      • Login To The Web Portal
      • User Settings
      • Configure Network
      • Configure Timezone
      • Key Activation
      • (Optional) Valkyrie Key Verdict
      • (Optional) Forward Log
  • Frequently Asked Questions
  • About Xcitium Security Solutions

Manage Custom Firewall Rules


  • Select a website from the drop-down at top-left
  • Choose 'Firewall'
  • The firewall page lets you construct custom rules to block or allow specific types of traffic
  • You can create custom rules for individual IPs, IP ranges, countries, organizations, and more
  • Each rule can have multiple conditions. For example, you can configure a rule to block traffic from a specific IP in a certain country

Note - The firewall prioritizes rules by action type. It does not use a 'ladder' system whereby rules are prioritized by their position in the list. Priority is as follows:

  1. Allow


  2. Block


… so in the event of a conflict, 'Allow' rules overrule 'Block' rules


Please use the following links for more help:


Open the rules interface


Add a new firewall rule


Edit a firewall rule


Remove a firewall rule


Open rules interface

  • Open theSOCaaP Web Protection dashboard
  • Select the target website from the menu at top-left
  • Click 'Firewall' then the 'Rules' tab


  • Type - The traffic category targeted by the rule. For example IP, IP range, URL, country
  • Details - The targeted item in the category. For example, if the type is 'Country', this column shows the two letter country code of the target country.
  • Action - The process the firewall will execute on the target if the rule’s conditions are met. Possible values are ‘allow’ or ‘block’.

Please use the following links to find out more:

  • Add a new firewall rule
  • Edit a rule
  • Remove a rule

Add a new firewall rule

  • Select the target website from the menu at top-left
  • Click 'Firewall' then the ‘Rules’ tab
  • Click 'Add New Rule' at top-right


'IF' condition - Choose the source of the traffic:

  • IP - Enter specific IP address(es). For example, 192.168.2.1,192.168.2.2
  • IP Range - Enter start and end IP addresses of the IP range to be covered in the 'From' and 'To 'fields
  • URL - Enter the name of the domain to which you want the rule to apply.
  • The rule will apply to traffic from all domain names which partially match the value entered here.
  • Select 'Exact Match' to apply the rule to only the domain you specify.
  • Header - The HTTP header field.
  • HTTP Method - Options are: Post, Get, Head, Put, Delete, Patch and Options.
  • Country - Select a country from the drop-down

Add Condition - Create another criteria for the action. Conditions are always 'And', so all conditions must be satisfied before the selected action is implemented.


Action - Choose how traffic requests for the target should be dealt with. The available options are:

  • Allow - All traffic from the source is permitted. This includes legitimate traffic, bots etc.
  • Block - No traffic is allowed from the selected source. An error message is shown to users.
    • Click 'Save' to add the new rule.

    Edit a firewall rule

    • Select the target website from the menu at top-left
    • Click the 'Firewall' tab
    Or click the hamburger button and select 'Firewall' 
    • Click the  icon beside the rule to be edited


    • The 'Edit Rule' dialog is similar to the 'Add Rule' dialog
    • See the explanation above for the description of parameters
    • Edit the parameters and conditions and click Save for the changes to take effect

    Remove a firewall rule


    Custom firewall rules that are no longer needed can be removed from the website.

    • Select the target website from the menu at top-left
    • Click the 'Firewall' tab
    • Or click the hamburger button and select 'Firewall' 
    • Click the  icon beside the rule to be removed


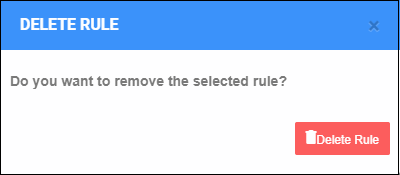
    • Click 'Delete Rule' to confirm
    Our Products
    • Free Antivirus
    • Free Internet Security
    • Website Malware Removal
    • Free Anti-Malware
    • Anti-Spam (Free Trial)
    • Windows Antivirus
    • Antivirus for Windows 7
    • Antivirus for Windows 8
    • Antivirus for Windows 10
    • Antivirus for MAC
    • Antivirus for Linux
    • Free Endpoint Security
    • Free ModSecurity
    • Free RMM
    • Free Website Malware Scanner
    • Free Device Manager for Android
    • Free Demo
    • Network Security
    • Endpoint Protection
    • Antivirus for Android
    • Comodo Antivirus
    • Wordpress Security
    Cheap CDN
    • Bootstrap CDN
    • Semantic UI CDN
    • Jquery CDN
    • CDN Plans
    • CDN
    • Free CDN
    Enterprise
    • Patch Management Software
    • Patch Manager
    • Service Desk
    • Website Down
    • Endpoint Protection Solutions
    • Website Security Check
    • Remote Monitoring and Management
    • Website Security
    • Device Manager
    • ITSM
    • CRM
    • MSP
    • Android Device Manager
    • MDR Services
    • Managed IT Support Services
    • Free EDR
    Free SSL Certificate
    Support Partners Terms and Conditions Privacy Policy

    © Comodo Group, Inc. 2025. All rights reserved.