Manage Departments
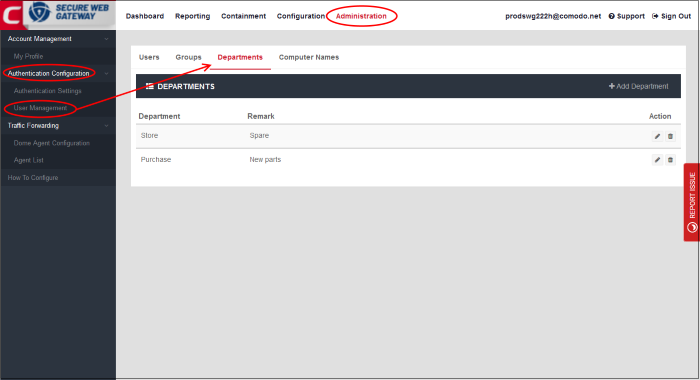
- Click 'Administration' > 'Authentication Configuration' > 'User Management' > 'Departments' to open this interface
- The 'Departments' area lets you create departments and add users to them. You can then add the department to a policy in the 'Policy' area ('Configuration' > 'Policy')
- Department specific policy can be deployed
- Policies are prioritized top-to-bottom according to the list in 'Configuration' > 'Policy'
- In the event of a conflict between policies over a security setting, the setting in the policy nearer the top of the list will prevail
- You can change policy priority in the 'Policy Order' drop-down when editing a policy:
- Click 'Configuration' > 'Policy'
- Locate the policy whose priority you want to change and click the 'Edit' button on the right
- Choose the priority with the 'Priority Order' drop-down. See 'Apply Policies to Network' section for more details.

From the 'Departments' interface, you can:
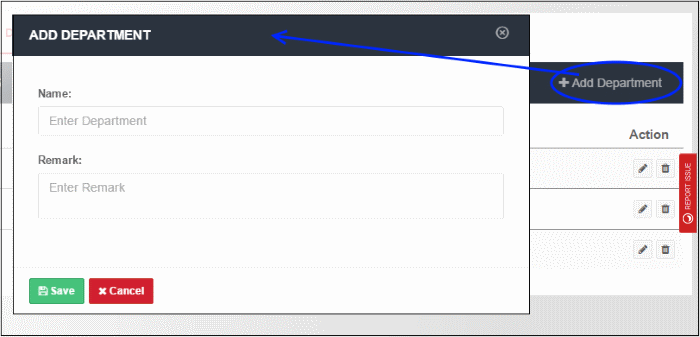
- Click 'Departments' and then 'Add Department' at top-right
The 'Add Department' dialog will be displayed:

- Name – Enter a label for the department
- Remark – Provide appropriate comments for the department
- Click 'Save'
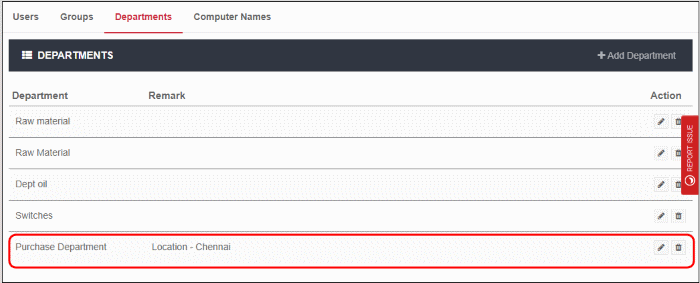
The new department will be added:

You can now apply policies to the department as required. See 'Apply Policies to Networks' for help with this.
-
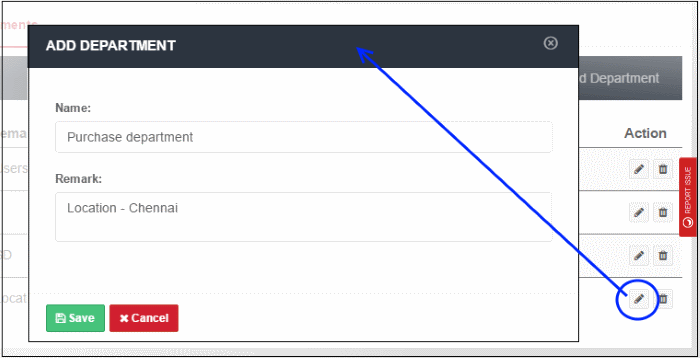
Click the edit icon beside the department

- Update the details as required. The process is similar to adding a department explained above.
- Click 'Save' to apply your changes.
If the department is applied any policies, the changes done here will also be reflected in the Policy List interface.
- Click the trash can icon beside the department
that you want to remove from the list. Note – You cannot delete a department that is assigned a policy.
- Click 'OK' in the confirmation dialog.


