


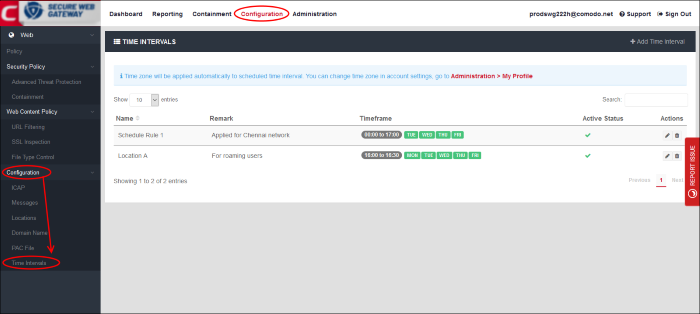
Configure Policy Time-Schedules
- Click 'Configuration' > 'Configuration' > 'Time Intervals'
- You can configure Comodo Secure Web Gateway (SWG) to activate a policy only at specific times. This interface lets you create the schedules which you then add to a policy.
- See 'Apply Policies to Networks' if you need help to configure and apply a policy.
- The
time zone used is as set in 'Administration'
> 'My Profile'.
|
Time Intervals - Table of Column Descriptions |
|
|---|---|
|
Column Header |
Description |
|
Name |
Schedule label. |
|
Remark |
Short description of the schedule. |
|
Timeframe |
The times when a policy is active under this schedule. |
|
Active Status |
Whether or not the schedule is currently active. This status also applies to any policies which use the schedule.
|
|
Actions |
Edit or delete a schedule. |
The interface allows you to:
- Click 'Add Time Interval' at top-right
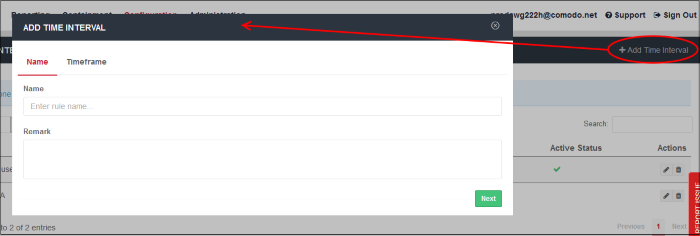
- Name - Enter an appropriate label for the schedule
- Remark - Enter a short description for the schedule
- Click 'Next' or 'Timeframe' to pick the times that the schedule should apply
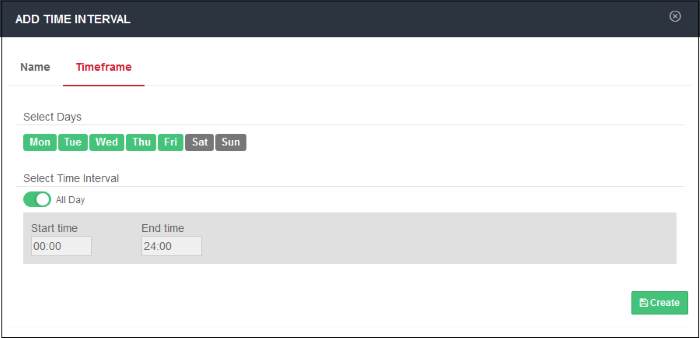
'Saturday' and 'Sunday' are disabled by default. The default interval is 'All Day'.
- Select Days - Click the days that you want the schedule to be active
- Select Time Interval:
- All Day - The schedule will be active 24 hrs for the scheduled days
- To configure a particular time period, switch 'All Day' to disable it and select the period

- Select the time period from the 'Start time' and 'End time' drop-downs. The schedule will be active for the configured period for the scheduled days.
- Click 'Create' when done.
The time-schedules will be added to
the list and will be available for selection when creating a policy.
- Click the 'Edit' button beside the schedule to update it
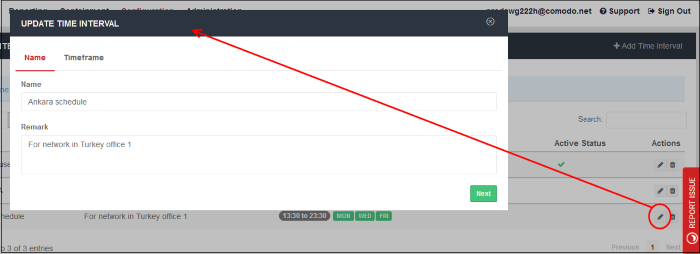
-
Updating a schedule is similar to creating a new schedule explained above.
- Click the trash can icon beside a schedule to remove it from the list
- Click 'OK' to confirm
Note - When a schedule is removed, it will be removed from the policies also.