Comodo Help
Find the desired product help
Comodo Secure Web Gateway

Comodo Secure Web Gateway

Secure Web Gateway Admin Guide

English

Print Help Download Help
Administration > User Management > Manage Users
  • Introduction To Comodo Secure Web Gateway
    • Purchase Licenses
    • Login To The Admin Console
  • The Admin Console
  • The Dashboard
    • Customize The Dashboard
  • Configure Comodo Secure Web Gateway
    • Connect Your Network / Devices To Secure Web Gateway
      • Traffic Forwarding Via Direct Proxy Or PAC
      • Traffic Forwarding Via Proxy Chaining
      • Traffic Forwarding Via Internet Content Adaptation Protocol (ICAP)
      • Traffic Forwarding Via SWG Agent
    • Connect Your Roaming Devices To Comodo Secure Web Gateway
      • View Enrolled Roaming Devices
    • Configure Comodo Secure Web Gateway Messages
    • Configure Domain Name
    • Configure PAC File For Exclusions
    • Configure Data Loss Prevention And View ICAP Service Information
    • Configure Policy Time-Schedules
  • Manage Trusted Networks
  • Manage Policies
    • Security Policy
      • Configure Advanced Threat Protection Settings
      • Configure Containerization Settings
    • Web Content Policy
      • Manage URL Filtering Policies
      • Configure SSL Inspection Settings
      • Manage File Type Control Rules
  • Apply Policies To Networks
  • Administration
    • Configure User Authentication Settings
    • User Management
      • Manage Users
      • Manage User Groups
      • Manage Departments
      • Manage Computers
    • My Profile
  • Reports
    • Custom Reports
    • Scheduled Reports
  • Unknown Threat Statistics
  • About Comodo Security Solutions

Manage Users


  • Click 'Administration' > 'Authentication Configuration' > 'User Management' to open this interface.
  • The 'Users' interface lets you add end-users in order to apply user-specific policies.
  • User-based policy is supported by the SWG agent, proxy chain and ICAP traffic forwarding methods.
  • You can import users in bulk from a CSV file.
  • The 'Add User' dialog depends on the type of end user authentication type selected.
  • If 'Active Directory' is configured then only the user name needs to be completed.
  • Policies are prioritized top-to-bottom according to the list in 'Configuration' > 'Policy'.
    • In the event of a conflict between policies over a security setting, the setting in the policy nearer the top of the list prevail.
        • Click 'Configuration' > 'Policy' > 'Edit' > 'Policy Order' to change the priority of a policy. See 'Apply Policies to Network' section for more details.
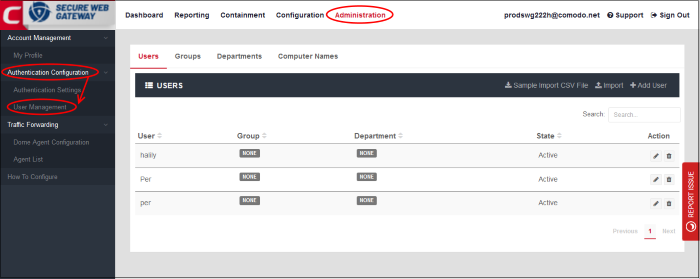


              The 'Users' interface allows you:

              • Add a new user
              • Import users from a CSV file
              • Edit an existing user
              • Delete a user


              Note – You can also enroll users by syncing with Active Directory:


              Sync via Active Directory

              • Relevant if you chose 'Active Directory' as the method of user authentication.
              • After installation and configuration, AD users and groups will be automatically added to SWG and will be visible under 'User Management'.
              • The SWG agent will automatically synchronize with AD every 3 hours.
              • This method is explained in 'Active Directory'.


              Add a new user

              • Click 'Users' and then 'Add User' at top-right

              The 'Add User' dialog will open:
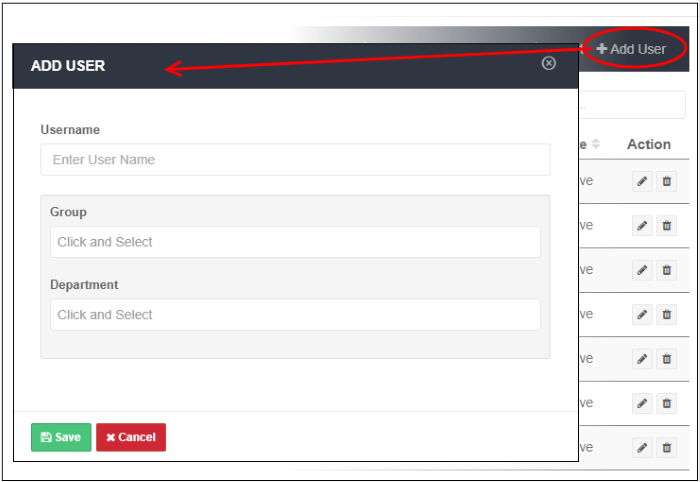


              • Username - Enter the username of the user. Please make sure this is same as in 'Users' in Windows.
              • Group - Relevant only if 'Hosted DB' is selected in the 'Authentication Settings' interface. Click on the field and select the appropriate group for the user. The groups added in the 'Groups' interface will be listed here. See 'Manage Groups' for details.
              • Department - Relevant only if 'Hosted DB' is selected in 'Authentication Settings' interface. Click on the field and select the appropriate department for the user. The departments added in the 'Departments' interface will be listed here. See 'Manage Departments' for details.
              • Click 'Save' when done

              The 'User' will be added and displayed in the list.
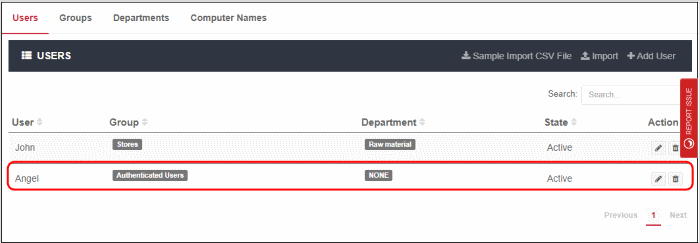


              You can now apply policies to this user according to your requirements. Make sure 'User Authentication' is selected in the 'Locations' interface. See 'Apply Policies to Networks' to learn more about deploying polices.


              Import users from a CSV file


              Comodo SWG allows you to add users in bulk from a CSV file.

              • There is a sample .csv file in 'Administration' > 'Authentication Configuration' > 'User Management' > 'Users' > 'Sample Import CSV File'.
              • Enter user data separated by commas, as follows:

              username,group,department

              • Username is mandatory. Other fields are optional.
              • Each user should be on a separate line
              • Each user can be member of one, several or no groups. They may also be a member of one or no departments.
              • If a user is a member of more than one group, the groups should be listed as a comma-separated string and enclosed in double quotes. An example is given below:
              • user1,"group1,group2,group3",dept1
              • If you want add only the username, then add two commas after the username. See example below:
              • user2,
              • If you add a non-existent group or department to the .csv, then the group/department will be auto-created in the interface. Click 'Administration' then 'Groups' or 'Departments' to view these items.

              Import users from a CSV file

              • Click 'Import' at the top


              • Navigate to the CSV file location, select the file and click 'Open'

              The 'Users' will be imported and displayed in the list.
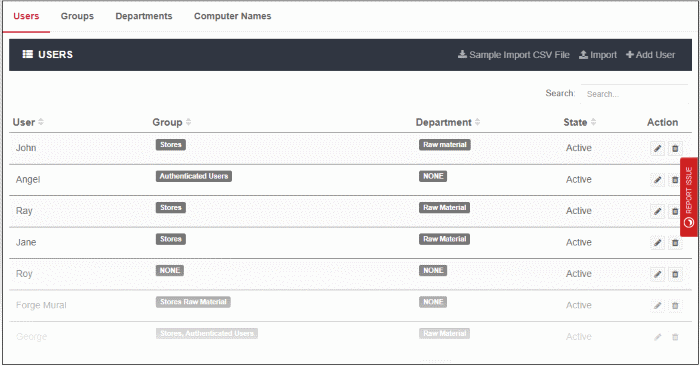


              You can now apply policies to this user according to your requirements. Make sure 'User Authentication' is selected in the 'Locations' interface. See 'Apply Policies to Networks' to learn more about deploying polices.


              Edit an existing user

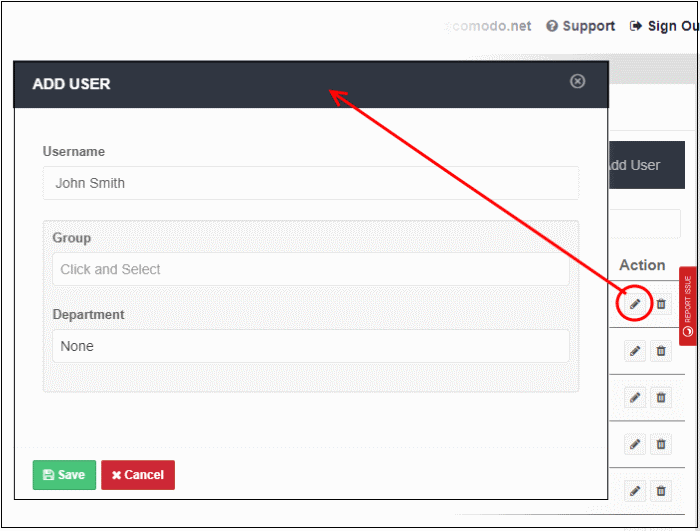
              • Click the edit icon beside the user


              • Update the details as required. The process is similar to adding a user explained above. Please note that you cannot change the username
              • Click 'Save' to apply your changes.

              Delete a user

              • Click the trash can icon beside the user that you want to remove from the list. Note – You cannot delete a user that is assigned a policy
              • Click 'OK' in the confirmation dialog.
              Our Products
              • Free Antivirus
              • Free Internet Security
              • Website Malware Removal
              • Free Anti-Malware
              • Anti-Spam (Free Trial)
              • Windows Antivirus
              • Antivirus for Windows 7
              • Antivirus for Windows 8
              • Antivirus for Windows 10
              • Antivirus for MAC
              • Antivirus for Linux
              • Free Endpoint Security
              • Free ModSecurity
              • Free RMM
              • Free Website Malware Scanner
              • Free Device Manager for Android
              • Free Demo
              • Network Security
              • Endpoint Protection
              • Antivirus for Android
              • Comodo Antivirus
              • Wordpress Security
              Cheap CDN
              • Bootstrap CDN
              • Semantic UI CDN
              • Jquery CDN
              • CDN Plans
              • CDN
              • Free CDN
              Enterprise
              • Patch Management Software
              • Patch Manager
              • Service Desk
              • Website Down
              • Endpoint Protection Solutions
              • Website Security Check
              • Remote Monitoring and Management
              • Website Security
              • Device Manager
              • ITSM
              • CRM
              • MSP
              • Android Device Manager
              • MDR Services
              • EDR Services
              • Ransomware Prevention
              • Managed IT Support Services
              • EDR
              Free SSL Certificate
              Support Partners Terms and Conditions Privacy Policy

              © Comodo Group, Inc. 2023. All rights reserved.