


Manage Archived Mails
CASG can store copies of all incoming mail for all domains on an account. You can purchase storage space in Comodo Accounts Manager (CAM) at https://accounts.comodo.com
Open the archived mail area:
- Click
‘Incoming’ > ‘Archive’:
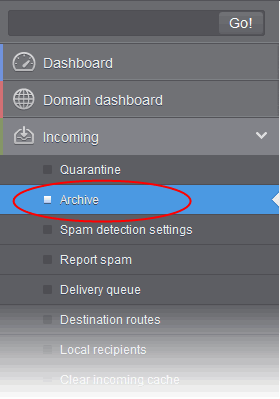
The archived email area of the selected domain will open:

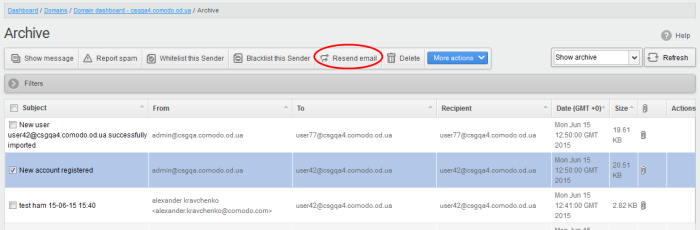
Page Filter
The page filter on the top-right has three options:
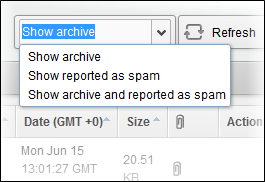
- Show archive: Lists only the archived mails
- Show reported as spam: Lists mails that are reported as spam
- Show archive and reported as spam: Lists both archived mails and mails that are reported as spam
Use filters option to search archived emails
- Click anywhere on the 'Filters' to open the filters area.

- Choose the filter by which you want to search from the first drop-down, then a condition in the 2nd text box. Some filters have a third box for you to type a search string.
- Click ‘Apply Filter’.
You can filter results by the following parameters:
- Subject: Type the email subject in the text box (column 3) and select a condition in column 2.
- From: Enter the sender name or address in the text box (column 3) and select a condition in column 2.
- To: Enter the percipient name or address in the text box (column 3) and select a condition in column 2.
- Date: Search by date and time mails archived. Select the date (column 3) and select a condition in column 2.
- Size (KB): Search archived mails by their size. Select or enter the mail size in column 3 and select a condition in column 2.
- Attachments: Enable or disable the checkbox (column 3) and select the condition in column 2.
- Marked as retained: Enable or disable the checkbox (column 3) and select the condition in column 2.
You
can add multiple filters to the same search by clicking  .
.
View
Details of Archived Mails
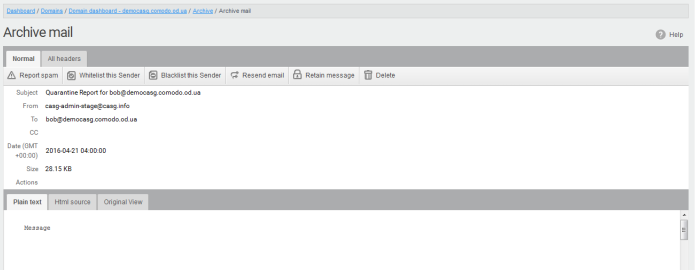
There are two ways you can view the details of an archived mail:
View details in the same window
- Select the mail that you want to view in the 'Archive' area
- Click the 'Show Message' button
OR
- Click on the email link in the subject column that you want to view its details.
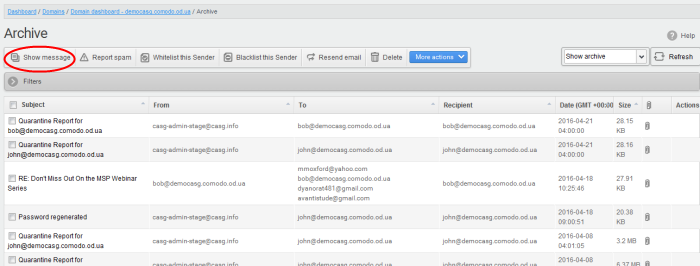
The details of the selected email will be displayed.
- Click 'All headers' to view the email headers which contain the tracking information of the mail detailing the path it has crossed before reaching the recipient. The headers give full details of the sender, route, recipient, sent date, mail type and so on and enable you to check the authenticity of the mail.
- Select the mail that you want to view in the 'Archive' area
- Right-click on the email link in the subject column and select to open in a new tab or new window.
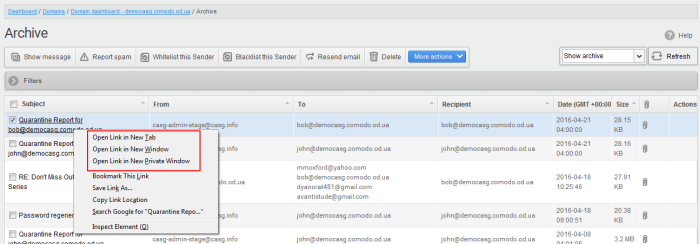
The browser may display a warning pop-up window notification. Click the 'Options'> then select 'Allow pop-ups for...' to allow to open new message in a new window. Click again 'Show message in new window'.

The details of the selected mail will be displayed in a new CASG window.
Report archived mails as spam
After viewing the details and ensuring that the selected email is a spam you can choose to report it as a spam.
-
Select the mail that you want to report as spam and click 'Report spam'.

An alert will be displayed to confirm selected email as spam.
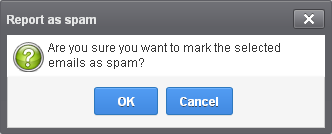
- Click 'OK' to confirm.

A success message will be displayed and the icon  indicating the email is reported as spam will be shown under the 'Actions' column. The mail will
be forwarded to the spam email address displayed in the Incoming Spam
Detection Settings interface for analysis by experts. Refer to the
explanation under Incoming
Spam Detection Settings for more
details.
indicating the email is reported as spam will be shown under the 'Actions' column. The mail will
be forwarded to the spam email address displayed in the Incoming Spam
Detection Settings interface for analysis by experts. Refer to the
explanation under Incoming
Spam Detection Settings for more
details.
Add a sender to whitelist
Administrators can choose to add the email senders to 'Sender Whitelist' from this interface. Once added to whitelist, emails sent by these senders will not be quarantined.
-
Select the mail that you want to add the sender to whitelist and then click 'Whitelist this Sender'

An alert will be displayed to confirm adding the sender to whitelist.

-
Click 'OK' to confirm to add the sender to whitelist. Refer the section 'Sender Whitelist' for more details.
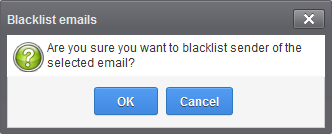
Add a sender to blacklist
Administrators can choose to add the email senders to 'Sender Blacklist' from this interface. Once the selected senders are added to blacklist, all emails from them to the selected domain will be automatically blocked.
-
Select the mail that you want to add the sender to blacklist and then click 'Blacklist this Sender'

An alert will be displayed to confirm adding the sender to blacklist.
-
Click 'OK' to confirm to add the sender to blacklist. Refer the section 'Sender Blacklist' for more details.
Resend emails from archive
The archived mails can be sent to the recipients if required. CASG will still retain a copy of mails in the archive even after they are sent.
-
Select the mail that you want to resend and click 'Resend email'.
An alert will be displayed to confirm resending emails.
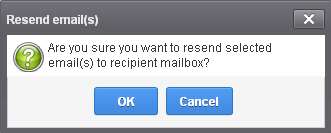
-
Click 'OK' to confirm.
A success message will be displayed.

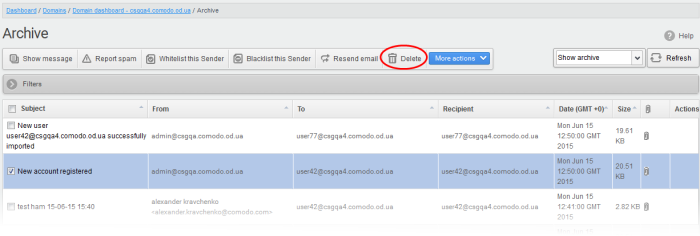
Delete archived mails
-
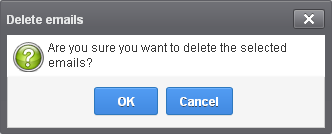
Select the mail that you want to delete and click the 'Delete' button
An alert will be displayed to confirm deletion.
-
Click 'OK' to confirm.
The selected mail will be deleted and will no longer be in archive.
-
To delete all the archived mails, click 'More actions' > 'Delete all'.
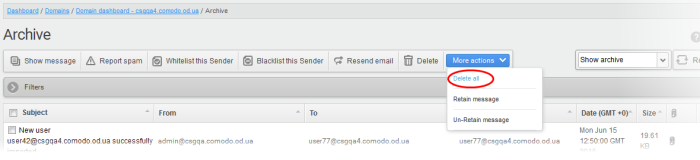
An alert will be displayed to confirm the deletion. Click 'OK' to delete all archived emails.
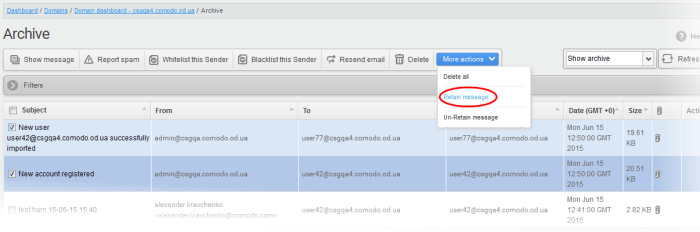
Exclude mails from auto-clean operations
CASG can be configured in the Domain Settings area to automatically purge emails from archive after the configured period. If administrators wants to retain email(s) from being cleared, then these mails can be marked as 'Retain message'.
-
Select the mail(s) that you want to retain and then click 'More actions' > 'Retain Message'.
An alert will be displayed to confirm retain selected email(s).
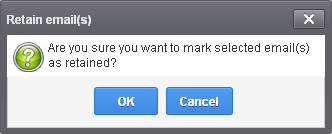
-
Click 'OK' to confirm.
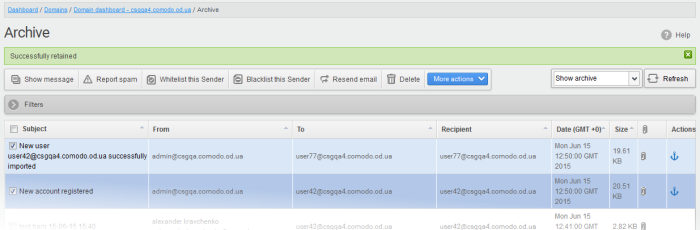
A confirmation dialog will be displayed and the retained messages are indicated by the anchor icons under the Actions column.
-
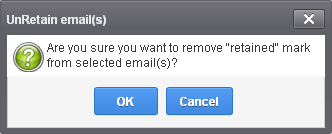
To remove the retained status for a mail, select the retained message and then click 'More actions' > 'Un-Retain Message'.
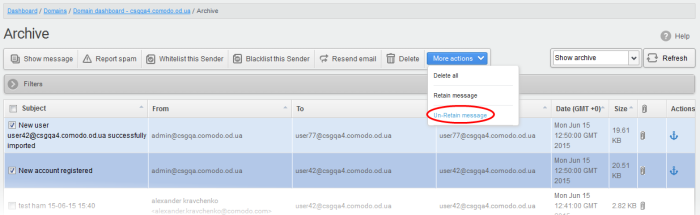
An alert will be displayed to confirm selected email(s) from retain status.
-
Click 'OK' to confirm.
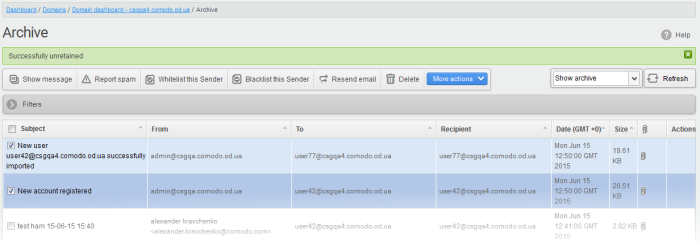
A confirmation
dialog will be displayed and the anchor icons under the Actions
column are no longer displayed indicating their unretained status.