


Installation
Note - Before beginning installation, please ensure you have uninstalled any other antivirus products that are on your server. More specifically, remove any other products of the same type as those Comodo products you plan to install. For example, if you plan to install only the antivirus then you do not need to remove 3rd party firewall solutions and vice-versa. Failure to remove products of the same type could cause conflicts that mean CAVS will not function correctly.
TheComodo Antivirus For Server application can be installed on your server in two ways, through:
To install CAVS via the command line interface
After the installation is complete, the server will restart automatically. So please make sure that the installation does not interrupt other server activities. The command line for installing CAVS is given below:
For example:
C:CISCIS_Setup_R60AUG_6.3.291358.2908_x86.msi AV_FOR_SERVERS=1 INSTALLFIREWALL=0 -quiet
The virus database will be updated automatically for the first time after installation.
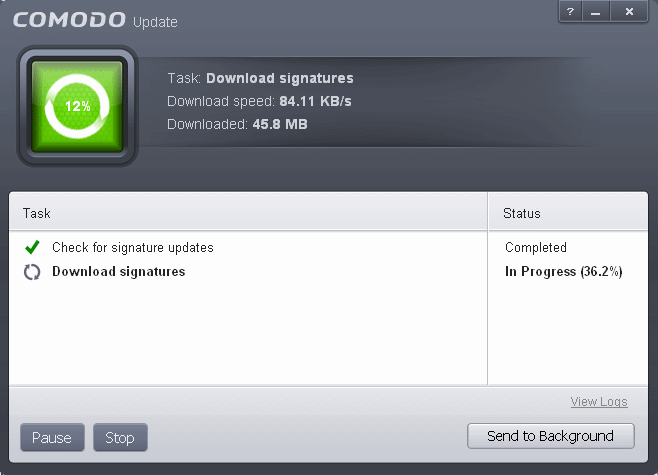
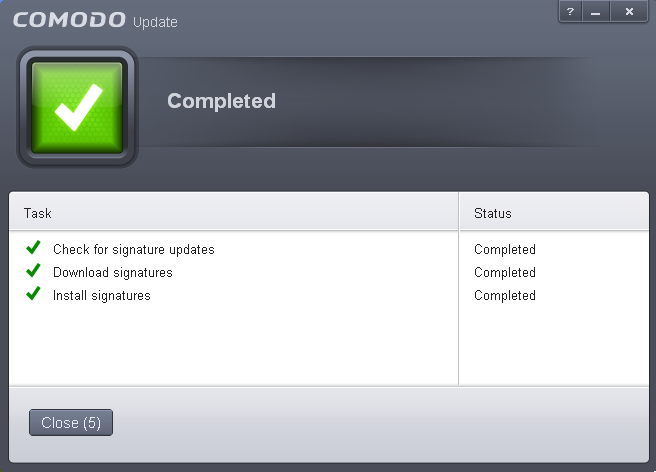
The screen will display details such as download speed, how much has been downloaded and the progress of the process. You can also send this task to the background by pressing the 'Send to Background' button and retrieve it in the 'Task Manager' interface. Refer to the section 'Manage CAVS Tasks' for more details. When the virus database has been downloaded, the 'Completed' dialog will be displayed.
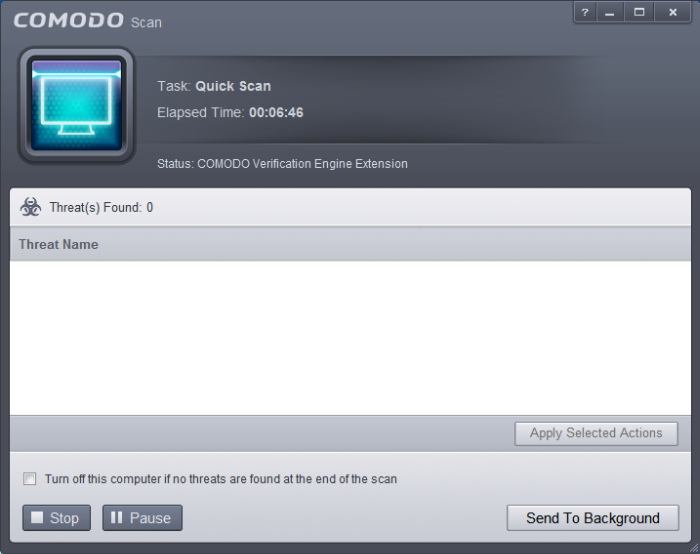
CAVS will commence a Quick Scan of system memory, autorun entries, hidden services, boot sectors and other critical areas automatically after the virus database has been updated.
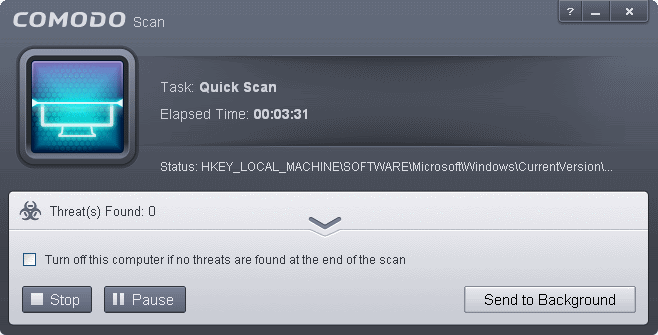
If you do not want the scan to continue at this time, click the ‘Stop’ button.
After the scanning is complete, the results screen will be displayed.

The scan results window will display any threats discovered during the scan (Viruses, Rootkits, Malware and so on). Refer to the section 'Processing Infected Files' for more details.
To install CAVS using installation wizard
After downloading the required Comodo Endpoint Security setup file to your local hard drive, double click on it to ![]() start the installation wizard.
start the installation wizard.
Step 1 - Choosing the Interface Language
The installation wizard starts automatically and the 'Select the language' dialog is displayed. Comodo Endpoint Security is available in several languages.
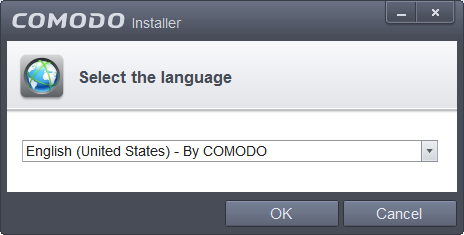
- Select the language in which you want Comodo Endpoint Security to be installed from the drop-down menu and click 'OK'.
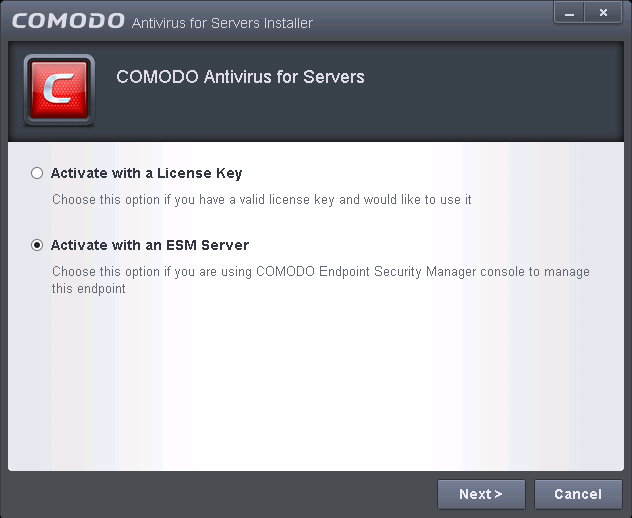
Step 2 – CAVS Activation
You have the option to activate CAVS using the license keys or via the ESM server that you want to connect the endpoint to.
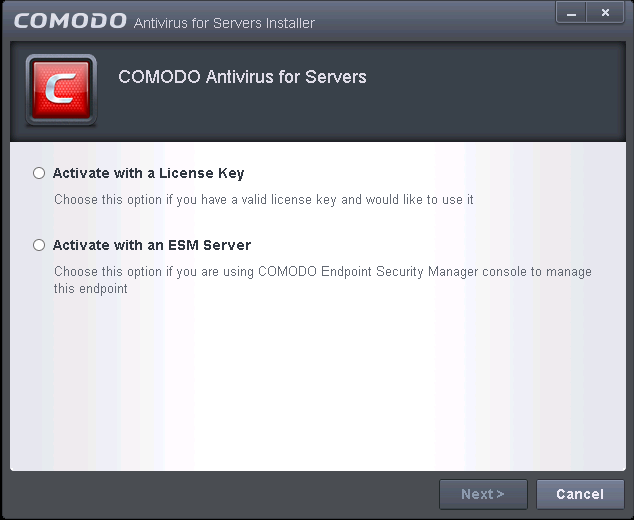
Option 1 – Using the license key:
- Choose Activate with a License Key and click 'Next'
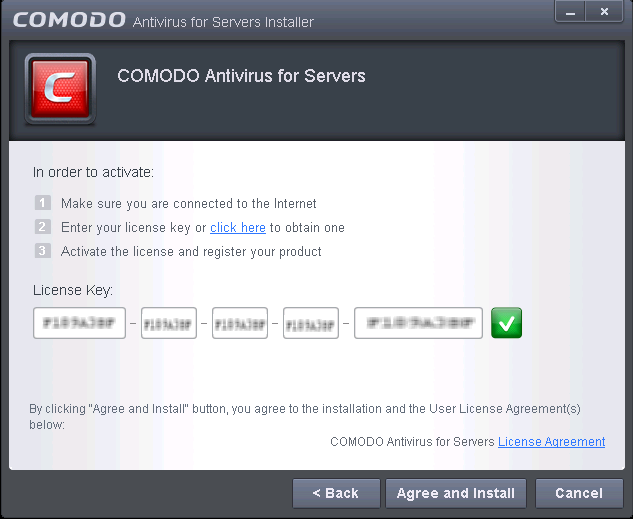
- Click the 'License Agreement' link, read the License Agreement fully and click 'Back'.
- Click 'Agree and Install'
The installation progress will be displayed...
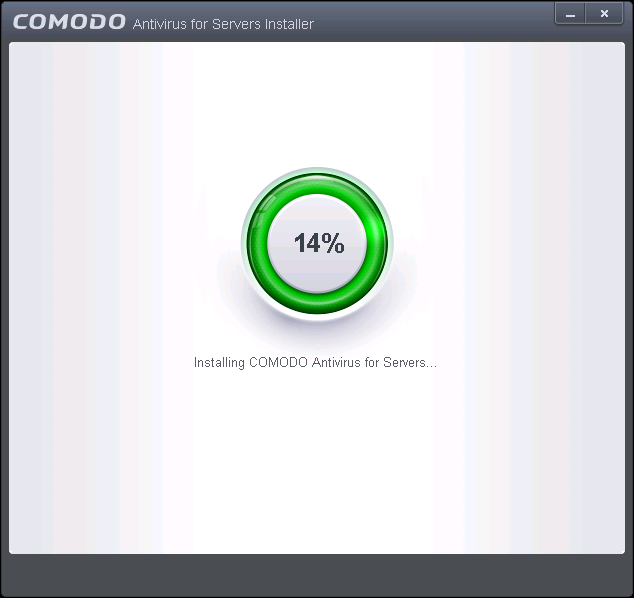
...and after completion, the application will start automatically.

The virus database will be updated automatically for the first time after installation.
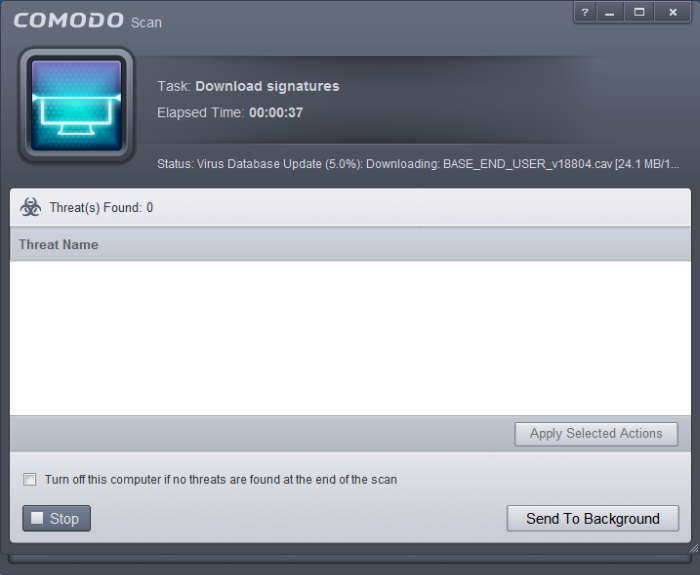
The screen will display details such as download speed, how much has
been downloaded and the progress of the process. You can also send this
task to the background by pressing the 'Send to Background' button and
retrieve it in the 'Task Manager' interface. Refer to the section 'Manage CAVS Tasks' for more details. When the virus database has been downloaded, the 'Completed' dialog will be displayed.
If you do not want the scan to continue at this time, click the ‘Stop’ button.
After the scanning is complete, the results screen will be displayed.
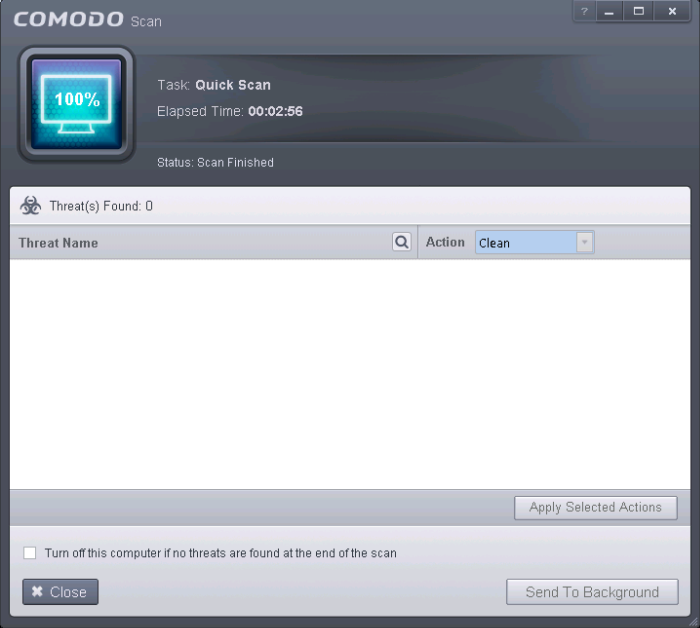
The scan results window will
display any threats discovered during the scan (Viruses, Rootkits,
Malware and so on). Refer to the
section 'Processing Infected Files' for more details.
Step 4 - Restarting Your System
In order for the installation to take effect, your computer needs to be restarted.
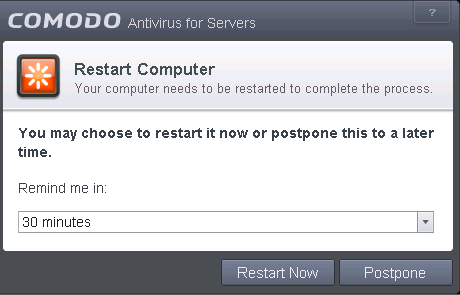
Please save any unsaved data and click 'Restart Now' to restart the system. If you want to restart the system at a later time, click 'Postpone'. You will be reminded to restart the system as selected from the 'Remind me in:' option.
Option 2 – Activating via CESM
-
Choose 'Activate with an ESM Server' and click 'Next'
The ESM server details that you want to connect the endpoint and
the components that you want to activate screen will be displayed.
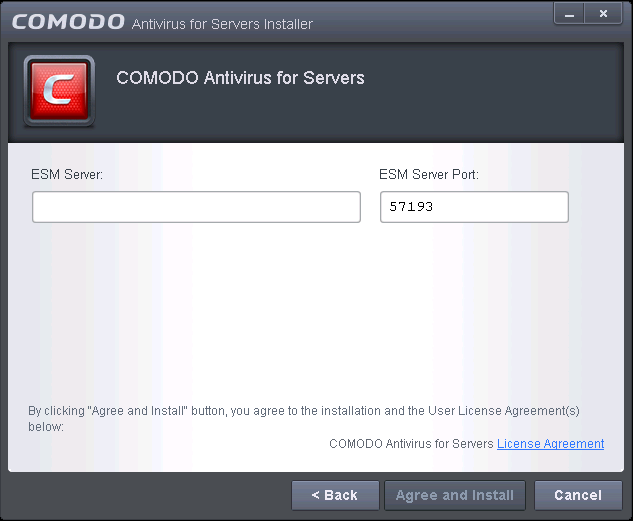
- Click the 'License Agreement' link, read the Subscriber Agreement fully and click 'Back'.
- Enter the host name or IP Address of the CESM server in the ESM server text box and enter the port through which the server listens for endpoint connections in the ESM server Port text box. (Default = 57193)
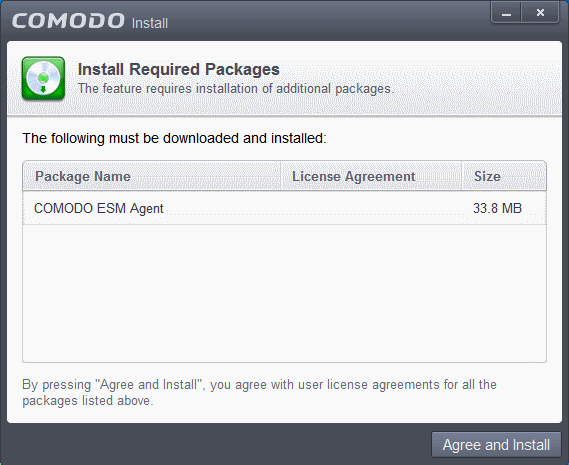
- Click 'Agree and Install'

and after successful completion, the CESM agent installation screen will be displayed.
|
Background Note on CESM Agent: The CESM agent is a small application installed on every managed endpoint to facilitate communication between the endpoint and the CESM central server. The agent is responsible for receiving tasks and passing them to the endpoint’s installation of Comodo Security Software (CES, CAS OR CAV for Mac). Example tasks include changes in security policy, an on-demand virus scan, updates to the local antivirus database or gathering reports that have been requested by the central service. As an additional security feature, endpoint agents can only communicate with the specific instance of the central service which provisioned the agent. This means the agent cannot be reconfigured to connect to any other CESM service. The agent also acts as a tool for endpoint users to interact with the administrators for resolving any issues in their systems. |
-
Click 'Agree and Install'.
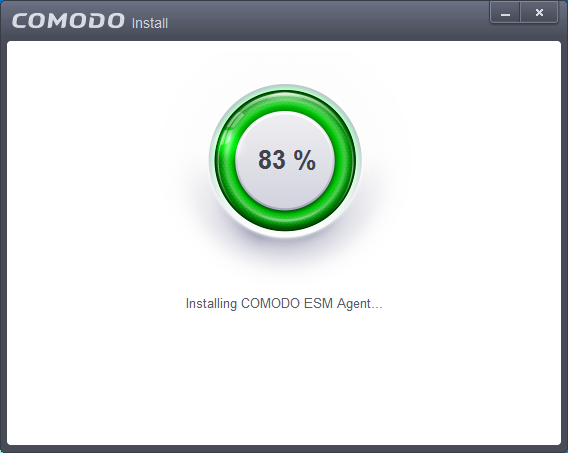
The downloading and installing progress will be displayed.
After the agent installation, it will initiate communication with the CESM server from which it was downloaded.
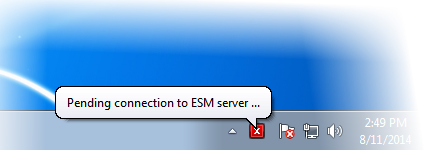
On completion, the agent icon will be displayed in the system tray....
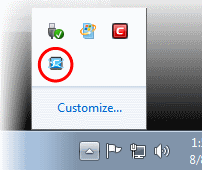
… and the license will be activated from the CESM server. Your CAVS installation can be remotely managed by the CESM Server now.
- Clicking the CESM Agent system tray icon will open a support chat window that enables you to interact with your administrators for resolving any issues in your system. Refer to the section Instance User Assistance for more details.
|
Note: CAVS 8.0+ features additional functionality that are not supported by Comodo Endpoint Security Manager version 3.1 and lower versions. Please make sure to activate the CAVS 8.0 license from CESM 3.2 and higher versions for full compatibility. The CAVS 8.0 features that are not supported by CESM 3.1 and lower versions are: |