


Installing Comodo Internet Security 2012 Complete
Click 'Install Internet Security Complete 2012' from the main Comodo Internet Security 2012 Complete Installer screen. The installation wizard for CIS 2012, GeekBuddy and Dragon will start immediately.
Step 1 – Validating your License and Installation Configuration
The initial phase of installation requires validating your license and configuring the installation of CIS Complete.
The License key is printed on the DVD itself or printed on an insert included in the box packaging.
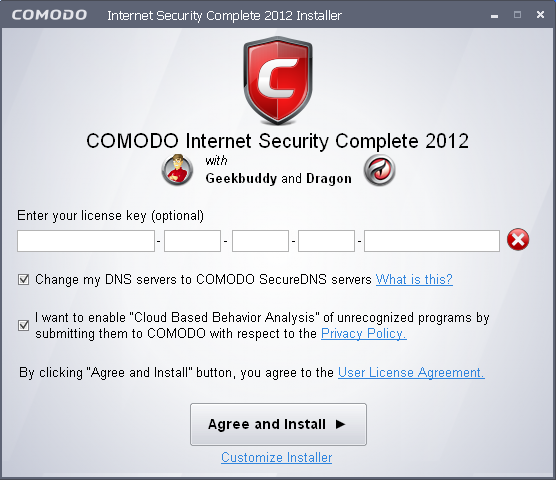
Enter the license key fully.
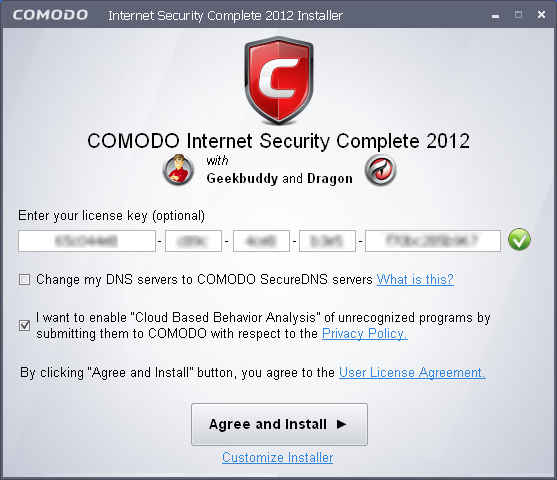
Your License key will be validated immediately. On successful validation of the entered key, a green check mark will be displayed.
|
Tip: You can skip this step if you don't have the subscription key handy or you are not connected to Internet at the time of installation. In order to continue the installation without entering the key, proceed with configuring the installation as explained below and clicking 'Agree ans Install'. You can activate your subscription and guarantee at a later time from the main interface of CIS. For more details refer to Activating your CIS Pro and CIS Complete Services after Installation'. |
DNS Settings
Comodo Secure DNS service replaces your existing Recursive DNS Servers and resolves all your DNS requests exclusively through Comodo's proprietary Directory Services Platform. Comodo's worldwide network of redundant DNS servers provide fast and secure Internet browsing experience without any hardware or software installation.
In addition, Comodo's Secure DNS ensures safety against attacks in the form of malware, spyware, phishing etc., by blocking access to malware-hosting sites, by any program running in your system.
For more details on Comodo Secure DNS Service and to know how to enable or disable the service, refer to Appendix 2 Comodo Secure DNS Service.
In this step of installation of CIS Complete, the DNS settings of your computer can be changed automatically to direct to our DNS servers. You can disable the service at anytime and revert to your previous settings. To enable Comodo Secure DNS, select ‘Change my DNS Servers to COMODO SecureDNS Servers. Click the 'What is this' link to know more about Comodo Secure DNS servers.
Cloud Based Behavior Analysis
Any file that is identified as unrecognized is sent to the Comodo Instant Malware Analysis (CIMA) server for behavior analysis. Each file is executed in a virtual environment on Comodo servers and tested to determine whether it contains any malicious code. The results will be sent back to your computer in around 15 minutes. Comodo recommends users leave this setting enabled. Read the privacy policy by clicking the 'Privacy Policy' link.
End User License Agreement
Read the complete User License Agreement by clicking the 'User License Agreement' link before proceeding with the installation.
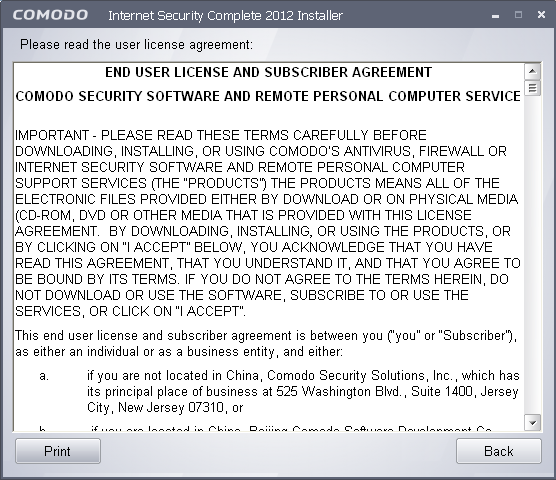
After reading the agreement, click the 'Back' button to return to the installation configuration screen.
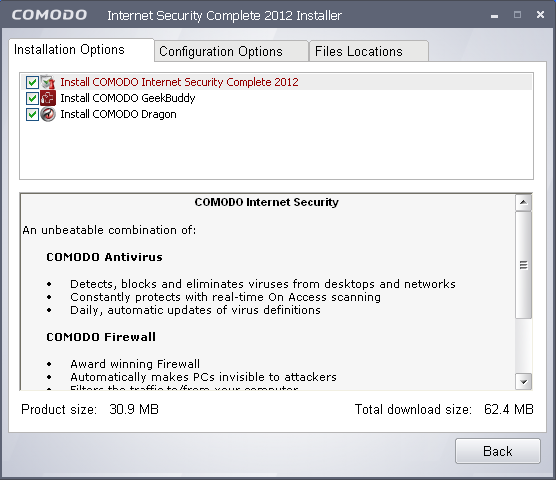
Customizing Installation
Click the 'Customize Installer' link to select the components to be installed, enable security popup alerts to be minimized and choose installation path.
Selecting Components to Install
Click the 'Installation Options' tab to select the components to be installed.
-
Install COMODO Internet Security Complete 2011 - Selecting this option installs full internet security suite consisting of Comodo Antivirus, Comodo Firewall and Defense+ components.
-
Install COMODO GeekBuddy - Selecting this option installs a version of GeekBuddy, a 24 x 7 Remote assistance support service in which Comodo experts remotely access your computer when you need it for getting help with computer related problems. Refer to the section Comodo GeekBuddy for more details.
-
Install COMODO Dragon - Selecting this option installs Comodo Dragon, a fast and versatile Internet browser based on Chromium technology and infused with Comodo's unparalleled level of security. Refer to the section Comodo Dragon for more details.
Configuration Options
Click the ‘Configuration Options’ tab to configure Defense+ and pop-up alert options.
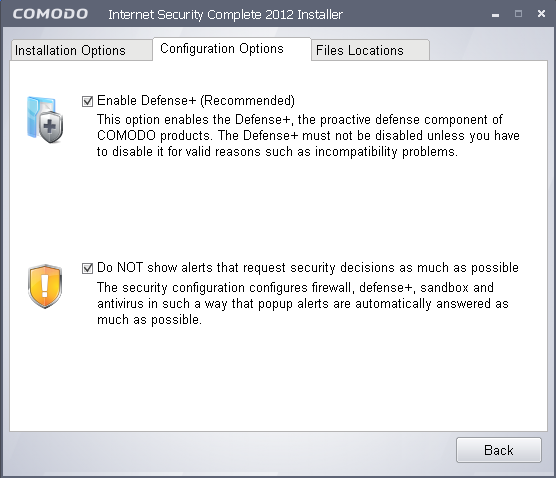
-
Defense+ - The Defense+ component of Comodo Internet Security is a host intrusion prevention system that constantly monitors the activities of all executable files on your PC. With Defense+ activated, the user is warned EVERY time an unknown application executable (.exe, .dll, .sys, .bat etc) attempts to run. The only executables that are allowed to run are the ones you give permission to. Comodo recommends this option be enabled.
-
Security Popup alerts - When this option is selected, CIS is configured to automatically deal with most issues in a secure manner without raising a popup alert - thus minimizing user intervention. Most users should leave this option at the default state of enabled. Advanced users wishing to gain greater insight into CIS actions and/or to have more control over security decisions may wish to disable this option.
Choosing Installation Location
Click the 'Files Locations' tab to choose the installation path.
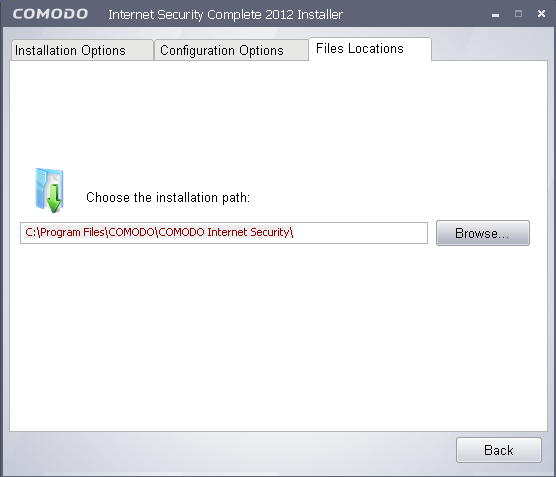
This interface allows you to set the installation folder for Comodo Internet Security. The default path is C:Program FilesCOMODOCOMODO Internet Security. If you want to install the application in a location other than the default location, click 'Browse' to choose a different location.
After customizing your installation, click the 'Back' button to return to the installation configuration screen.
Click the 'Agree and Install' button to proceed with the installation.
Step 2 – Installation progress
The next step is installation of the product and activation of the license. The progress will be displayed...
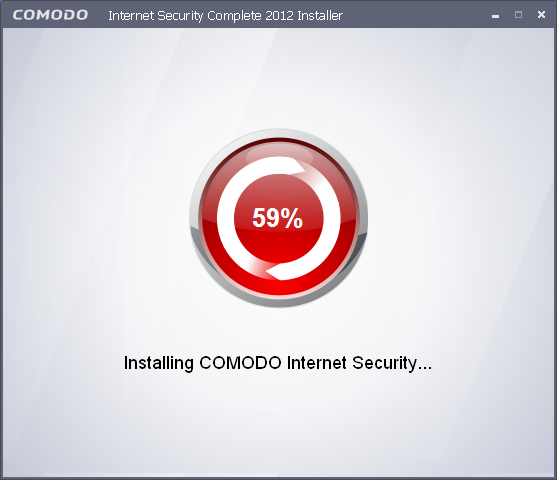
...and on completion, the restart dialog will be displayed.
Step 3 - Restarting Your System
In order for the installation to take effect, your computer needs to be restarted.
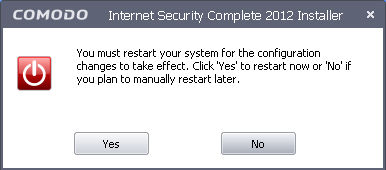
Please save any unsaved data and click 'Yes' to restart the system. If you want to restart the system at a later time, click 'No'.
|
Note: The installation will take effect only on the next restart of the computer. |
Step 4 - After Restarting Your System
After restarting, a ‘thankyou’ screen will appear. This contains a summary of the components you chose to install as well as some friendly advice.
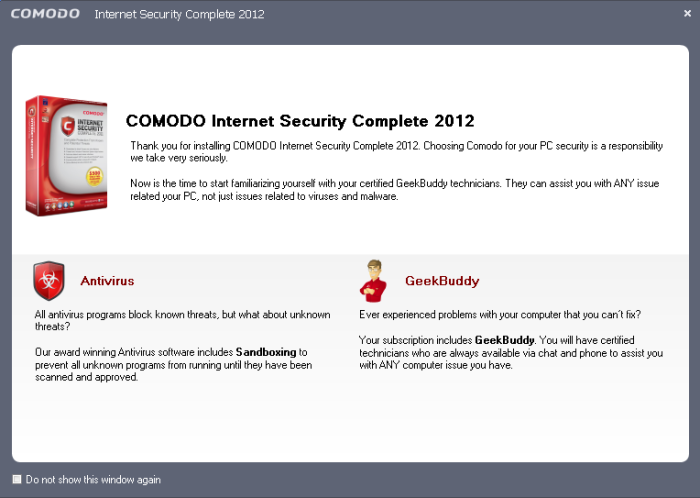
This screen will appear every time you start your system. If you do not want the screen to be displayed on every start up, select the check box 'Do not show this window again' before closing the window.
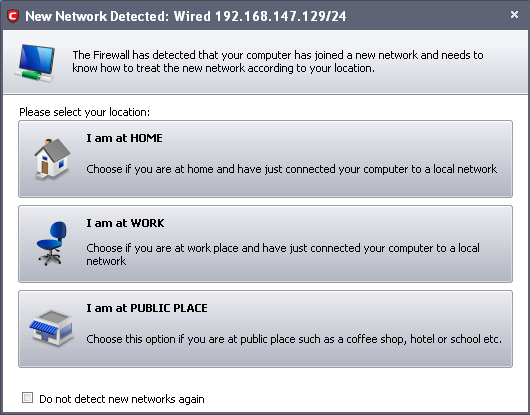
If your computer is connected to a home or work network, then you are prompted to configure it at the 'New Network Detected!' dialog. At the top of the dialog, the connectivity mode will be displayed, whether wired or wireless.
-
Select your location from the three options above
-
Select 'Do not automatically detect new networks' If you are an experienced user that wishes to manually set-up their own trusted networks (this can be done in 'Network Zones' and through the 'Stealth Ports Wizard')
CIS checks if the new network is an unencrypted WIFI network or not and if it is, the following warning will be displayed:
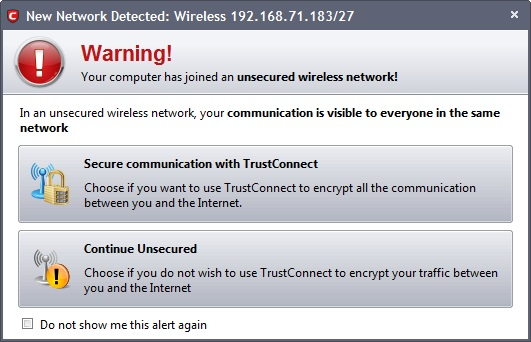
Select your choice from the two options above. If you select, 'Secure communication with TrustConnect', you will be presented with the opportunity to login into your existing account or create a new account:
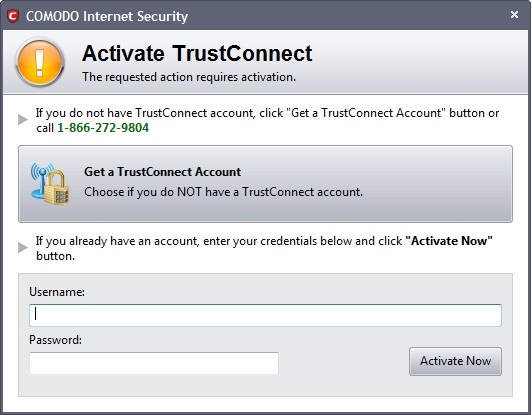
Refer to the section TrustConnect Overview for more details.
If you do not want to encrypt your traffic between you and the Internet using TrustConnect, select the second option, 'Continue Unsecured'.
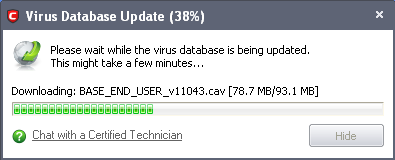
The virus database will be updated automatically for the first time after installation.
The antivirus scanning will commence automatically after the virus database has been updated.
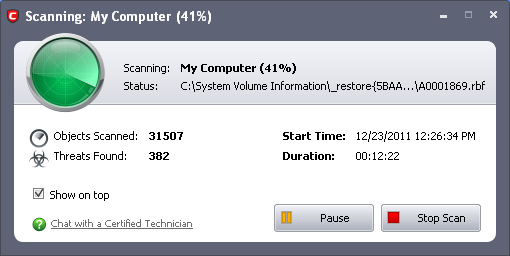
If you do not want the scan to continue at this time, click the ‘Stop Scan’ button.
After the scanning is complete, click the 'Results' button to view the scan results.
Comodo Internet Security User Guide | © 2012 Comodo Security Solutions Inc. | All rights reserved