Password Protection
- In a corporate setup, XCS settings are determined by the Dragon Enterprise profile applied to the endpoint.
- One of these settings is the ability to password protect access to the client interfaces. This stops unauthorized users from opening the local clients and making potentially damaging changes.
- Password protection blocks access to the settings area, the various ‘Tasks’ areas, and the right-click options of the XCS tray icon.
- Local users can, however, still run certain tasks. See Exceptions at the end of this section for more details.
There are two password options you can set in Dragon Enterprise:
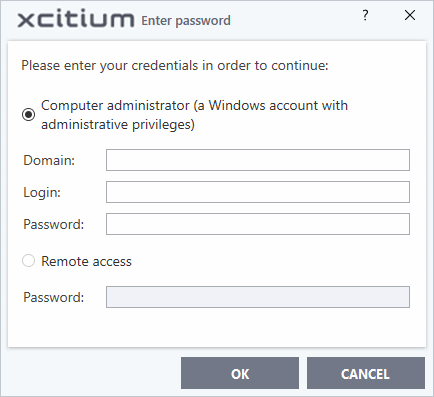
- Computer administrator - XCS requires a local admin password to access the settings area.
- Admins that are already logged-in can access the settings area without a password.
- All other users need to enter the admin username/password.
- Custom password - An unique key which is set in the Dragon Enterprise profile.
- See Client Access Control settings in the Dragon Enterprise admin guide for details on the difference between these passwords.
- XCS will request a password if a user tries to access a protected area:

Users can run the following tasks even if password protection is enabled in the Endpoint Manager profile:
On-demand antivirus scans
- Click 'Scan' on the XCS home screen and choose a scan option.
- Click 'Tasks' > 'General Tasks' > 'Scan' > Choose a scan option.
- Right-click on an item and choose 'Scan with Xcitium antivirus'.
- See Scan and Clean Your Computer and Instantly Scan Files and Folders for more details
Virus signature database updates
- Click Tasks > 'General Tasks' > 'Update'.
- See Manage Virus Database Updates for more details.
Manually run programs inside the container
- Click 'Tasks' > 'Containment Tasks' > 'Run Virtual'.
- Right-click on an item and choose 'Run in Xcitium container'.
- See Run an Application in the Container for more details
Run Virtual Desktop
- Click 'Tasks' > 'Containment Tasks' > 'Run Virtual Desktop'.
- See Start the Virtual Desktop for more details.
Create Xcitium Rescue Disk
- Click 'Tasks' > 'Advanced Tasks' > 'Create Rescue Disk'.
- See Create a Rescue Disk for more details.


