

Device
Control Settings
- Click 'Settings' > 'Advanced Protection' > 'Device Control'
- The 'Device Control' panel lets you specify types of external devices that are to be blocked and define exclusions to it
Open the Device Control panel
- Click 'Settings' on the XCS home screen
- Click 'Advanced Protection' > 'Device Control'
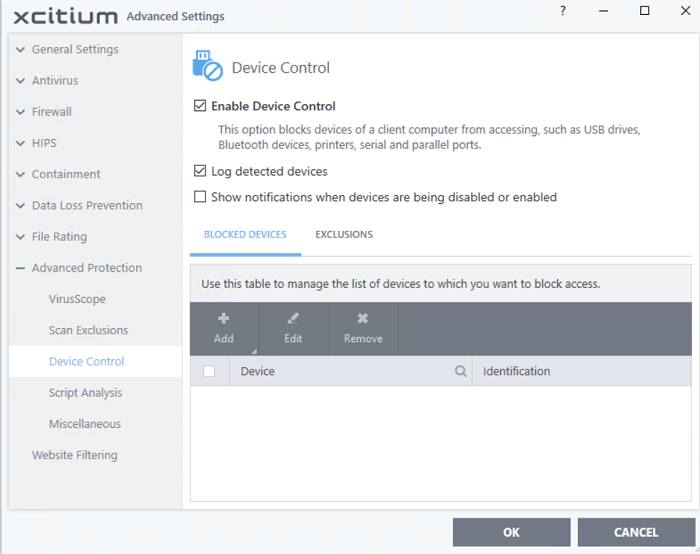
- Enable
Device Control – Activate the device
control functionality to selectively prohibit access to external
devices. You should specify devices to be banned in the 'Blocked
Devices' pane. (Default =
Enabled)
- Log Detected Devices - XCS logs events like connection attempts of external devices. (Default = Enabled)
- Show Notifications when devices are being disabled or enabled – XCS displays an alert whenever an external device is connected or disconnected. (Default = Disabled)
- Blocked Devices – List of external device classes which are not allowed to connect to the endpoint. Example classes include 'USB Storage Devices', 'CD/DVD Drives', 'BlueTooth Devices' and 'Firewire Devices'.
- Exclusions - Add exceptions to a blocked class. For example, if you wish block the class 'USB Devices' but wish to allow access for your company's authentication tokens, then you should add those USB tokens as exceptions.
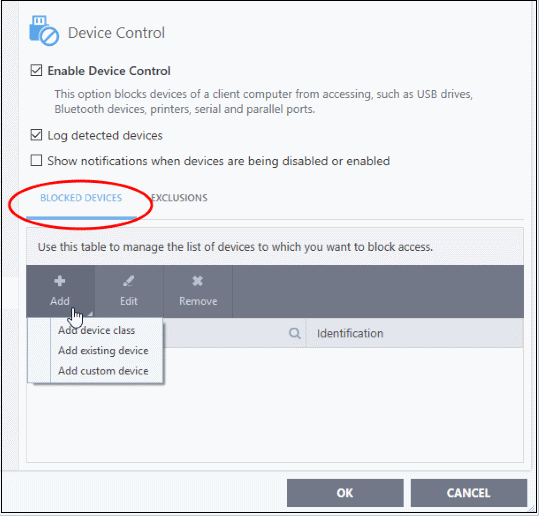
You can specify devices to be blocked in three ways:
- Click 'Settings' on the XCS home screen
- Click 'Advanced Protection' > 'Device Control'
- Open the 'Blocked Devices' tab then click the 'Add' button
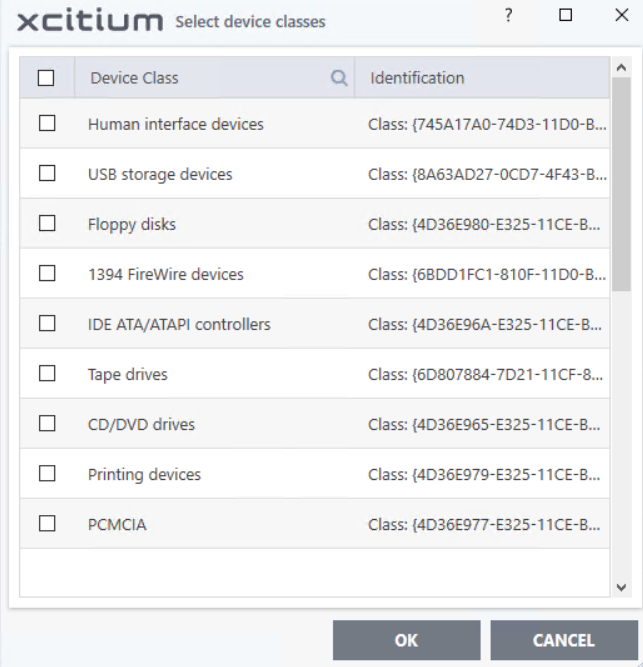
- Click 'Add device class' from the options:
- Choose the device class you wish to block.
- For example, to block all USB devices that are plugged to your computer, select “Portal devices” from the list
- If you want to exclude any specific device from this class, enter the device name in the exclusion list.
- Click the '+' sign next to the class to which your device belongs
- Select the device(s) you wish to block
- Click 'OK' in the screen and again 'OK' in the 'Advanced Settings' interface.
Select devices from currently connected devices
- Click 'Settings' on the XCS home screen
- Click 'Advanced Protection' > 'Device Control'
- Open the 'Blocked Devices' tab then click the 'Add' button
- Click 'Add existing device' from the options
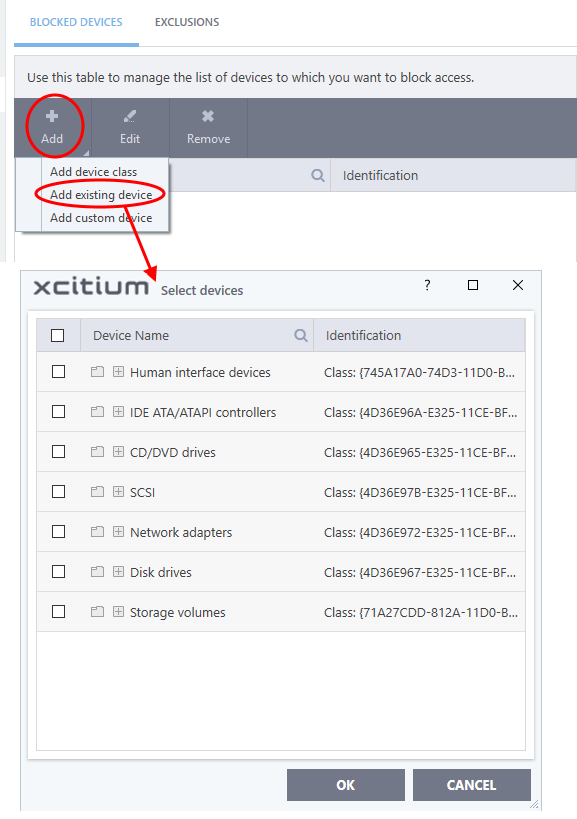
- Choose the device class you wish to block. For example, Network adapter devices, CD/DVD drives, Storage devices or Disk drives.
- Click the '+' sign of the class to which your device belongs
- Select the device(s) you wish to block
- Click
'OK' and again click 'OK' in the 'Device Control' panel to save your settings.
Specify a custom devices to be blocked
- Click 'Settings' on the XCS home screen
- Click 'Advanced Protection' > 'Device Control'
- Open the 'Blocked Devices' tab then click the 'Add' button
- Click 'Add custom device' from the options
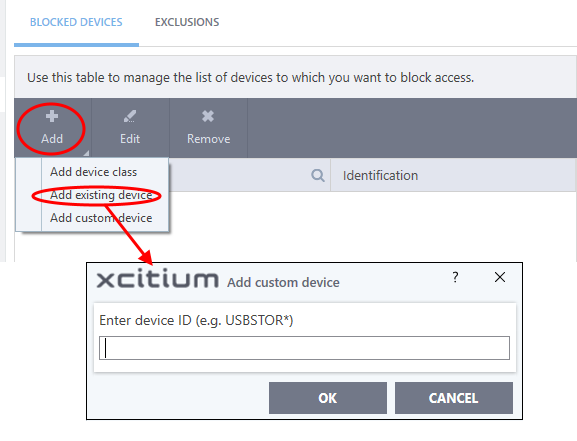
- Enter the device ID and click 'OK'.
The 'Exclusions' tab lets you allow access to specific devices that fall within a blocked device class.
You can specify the exceptions in two ways:
Add exclusions from currently connected devices
You need to add the device to the exclusion list before blocking the device class.
- Make sure the external device is connected to the computer
- Click 'Settings' on the XCS home screen
- Click 'Advanced Protection' > 'Device Control'
- Open the 'Exclusions' tab then click the 'Add' button
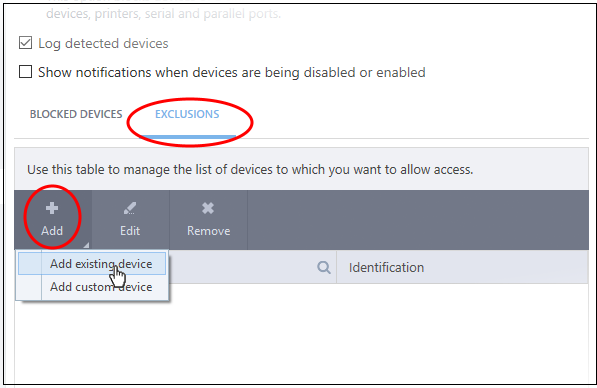
- Click 'Add existing device' from the options
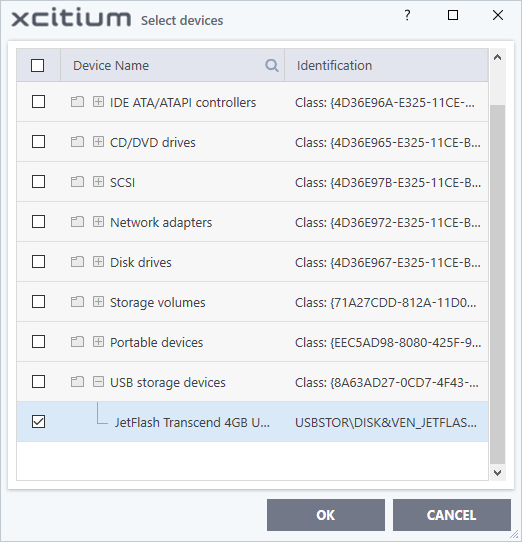
- Click the '+' sign of the class to which your device belongs
- Select the device(s) you wish to exclude
- Click 'OK' in the screen and again 'OK' in the 'Advanced Settings' interface.
Add custom device to be excluded
- You can also add exclusions by specifying the device Ids.
- For example, you want to block all USB storage devices apart from the type of SANDISK devices used by your company, you could specify a device exclusion ID of 'USBSTOR/DISK&VEN_SANDISK/4C5310*'.
- You can also use the wildcard character - ' * ' to cover a range of devices
Specify custom devices to be excluded
- Click 'Settings' on the XCS home screen
- Click 'Advanced Protection' > 'Device Control'
- Open the 'Exclusions' tab then click the 'Add' button
- Select 'Add custom device' from the options
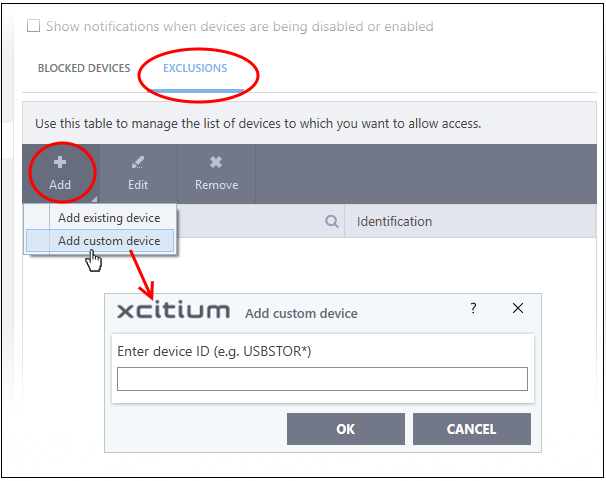
- Enter the unique device identifier in the 'Device ID' field, for example to exclude all USB storage devices whose device IDs start with "4C5310", you could enter: USBSTOR/DISK&VEN_SANDISK/4C5310*
- Click 'OK' in the screen and again 'OK' in the 'Advanced Settings' interface.