Running Your PCI Scan
Comodo Web Inspector PCI features a built-in Setup wizard for PCI scanning that provides the fastest and easiest way to add devices and to commence a PCI scan. The wizard is accessible from the interface after you login to your account.
1. Logging-in to Web Inspector PCI
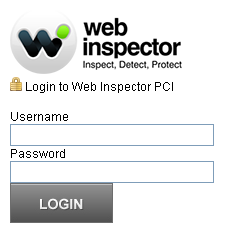
To login in to the WI PCI interface, click the 'PCI Scanning' tab in WI main interface.

You will be taken to the Web Inspector PCI login page at https://pci.webinspector.com/sas/login.jsp
-
Enter the same credentials that you are using for Web Inspector and click 'Login'.
After your username /password has been verified, you will be logged into the Web Inspector PCI administrators interface.
2. Launch Setup Wizard for PCI Scanning
Click the 'Help' tab from the Navigation bar to access the 'Help area'...
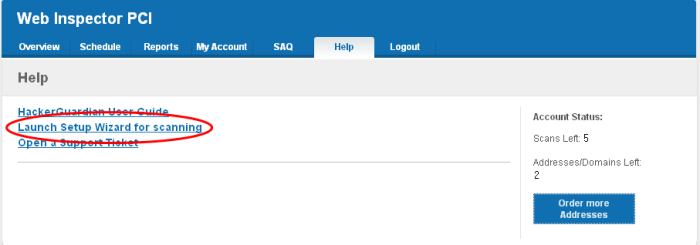
...and then click the link 'Launch Setup Wizard for scanning'. The wizard allows you to configure and start the scan in just five simple steps.
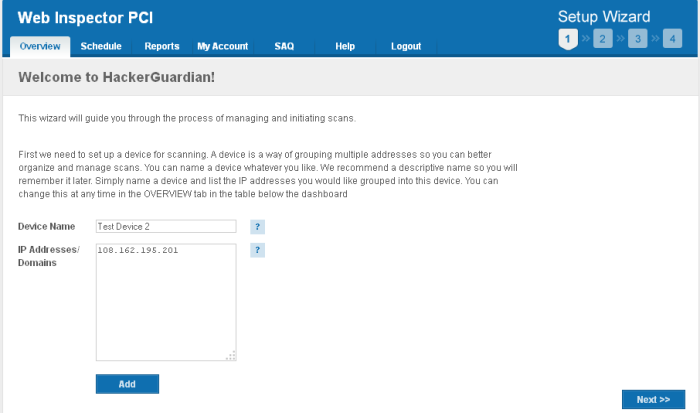
In order to run a PCI scan, you must first create a Device.
A Web Inspector PCI 'Device' is an umbrella term that describes a grouping of IP addresses and/or domains that are to be used as the target for a PCI scan. Web Inspector 'Devices' can be used to 'mirror' a real life device. For example, a single machine in your organization's infrastructure may have multiple IP addresses (and domains) which host different services. The PCI DSS guidelines state that all these IP addresses and services must be scanned. By associating multiple IP addresses and domains to a single Web Inspector 'Device', you can simulate your real-life device and scan it for PCI compliance in one pass. All customers must create a 'device' before PCI scanning can commence.
| Note: The
Web Inspector PCI is powered by Comodo Web Inspector PCI and so WI PCI
will be accessing HG technology wherever required. |
-
When creating a device, Web Inspector PCI requires that you specify all the externally facing IP addresses/Domains belonging to your target server, host or other device.
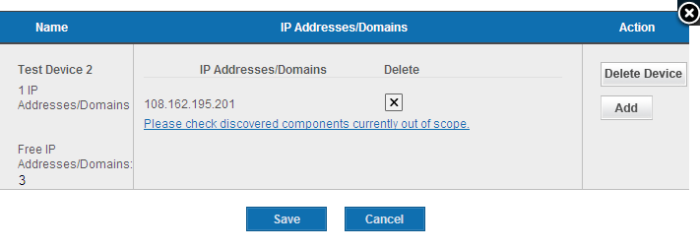
| Note: You can check for the IP addresses and the domains, which have been previously entered and deleted, or the IP Addresses that were detected through reverse lookups on the domains or common hostnames for the domains included previously, by clicking the link 'Please check discovered currently out of scope'. This helps you to identify the out of the scope components to be scanned and add to the created device. |
-
Click 'Save'
The device will be added to your Web Inspector PCI account and accessible from the Overview area.
- Click 'Add' if you want to add the next device. The device will be
added to your Web Inspector
PCI account and accessible from the Overview area.
- If you have finished adding new devices, click 'Next' to continue the wizard.
| Note: You can also add new devices and edit existing devices from the Overview area of the interface. Click here for more details. |
Step 2 - Schedule the PCI Scan
The next step is to schedule the scan if you wish to run the scan at a later time or periodically. This is optional. If you do not want to schedule the scan and want to run the scan instantly, just click 'Next' button to skip this step and go to Step 3.
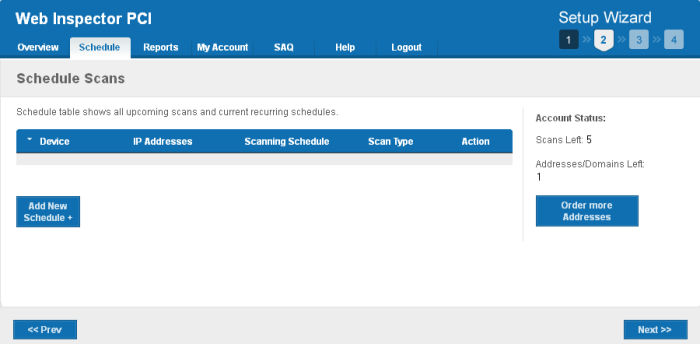
If you want to schedule the scan, click 'Add New Schedule +' button.
-
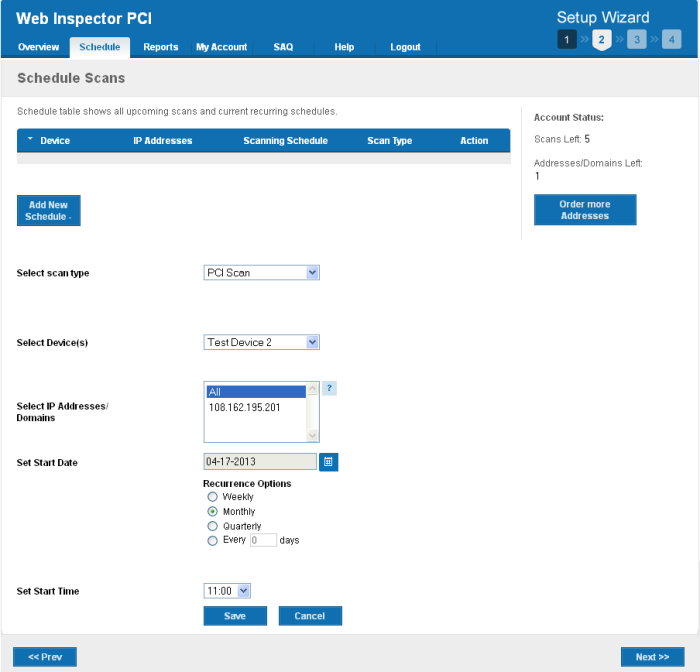
Select the device on which you wish to schedule the scan from Select Device(s) drop-down box.
-
Select the IPs/Domain pertaining to the selected device from Select IP(s) box. If you wish to scan all the IPs/Domains, select 'All'.
-
Select the start date for the scan schedule by clicking the calendar icon beside 'Set Start Date' text box.
-
Select the recurrence period.
- Weekly - The scan will be performed once in a week on the specified day and time.
- Monthly - The scan will be performed once in a month on the specified date and time.
- Quarterly - The scan will be performed once in three months on the specified date and time.
- Every N days - Scan will be performed once for every n days from the start date. For example, if you specified 2 then the scan will be performed on alternate days.
-
Select the start time from the 'Set Start Time' drop-down combo box and select your time zone from the Time Zone drop-down box. The scan will be started on the set time at the scheduled dates according to your time zone.
-
Click 'Save' to to apply your schedule.
-
Click 'Next' to continue the wizard.
| Note: You can always view/modify/delete the schedules from the Scheduled Scans area of Web Inspector PCI interface. Click here for more details. |
Step 3 - Configure PCI Scan Email Alert Options
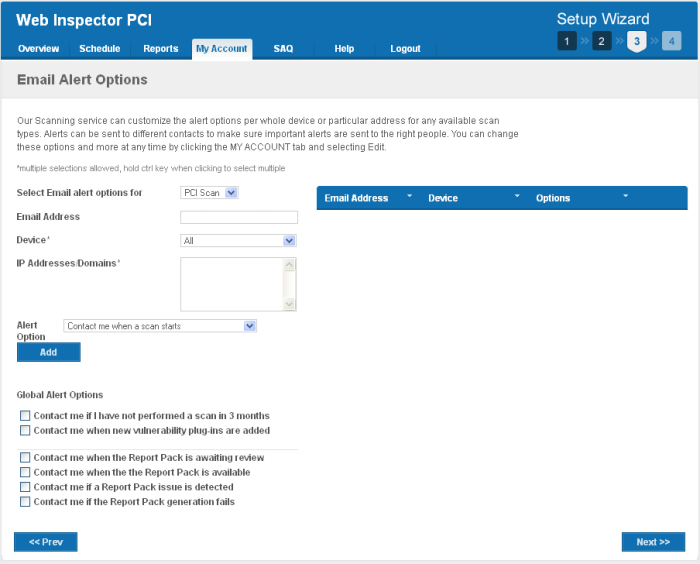
Web Inspector PCI sends automated email notifications to administrators on events like commencement of manual/scheduled scans, results of scan and failure of scans. You can set your preferences for receiving the emails as you wish. If you do not want to have email alerts at this moment, Click 'Next' to go to Step 4. You can configure the alert notifications later by accessing the My Account area.
-
Select the Email Alert Options as given in the table below:
|
Form Element |
Description |
|---|---|
|
Select Email alert options for |
Select the option 'PCI Scan' from the drop-down |
|
Email Address |
Enter the email address to which you wish to receive the scan alert message in the text box below 'Email Address'. This address can be different from the Account Email and can belong to the administrator for the specific device/domain. |
|
Device |
Select the Device for which you wish to receive the scan alert message from the drop-down box below 'Device'. If you wish to have the alert message for all the devices, select 'All'. |
|
IP Addresses/Domains |
Select the IPs/Domains pertaining to the device selected, for which you wish to receive the scan alert message from the text box below 'IP Addresses'. If you wish to have the alert message for all the IPs/Domains, select 'All'. |
|
Alert Option |
Select the event for which you wish to have email notification from the drop-down box below 'Options'. |
-
Select the Global Alert Options
- Contact me if I have not performed a scan in 3 months - Selecting this option instructs Web Inspector PCI to send a remainder message for an on-demand scan to the Account Email address if the administrator has missed to perform a scan for three months.
- Contact me when new vulnerability plug-in are added - Selecting this option instructs Web Inspector PCI to send a notification email to the Account Email address whenever a new vulnerability plug-in is added to Web Inspector PCI , enabling the Administrator to deploy the plug-in in future scans.
- Contact me when the Report Pack is awaiting review - Selecting this option instructs Web Inspector PCI to send a notification email to the Account Email address whenever the administrator has attempted to download the Web Inspector PCI Scan Report pack by clicking the 'Generate Report Pack' in the Reports area and the Report is under review by a PCI CSS approved staff of Comodo. The Report will be available for download upon completion of the Review and approval by the Comodo staff. Refer to Downloading Report Pack for more details.
- Contact me when the Report Pack is available - Selecting this option instructs Web Inspector PCI to send a notification email to the Account Email address whenever the administrator has attempted to download the Web Inspector PCI Scan Report pack by clicking the 'Generate Report Pack' in the Reports area and the Report is ready for download after review by a PCI CSS approved staff of Comodo. Refer to Downloading Report Pack for more details.
- Contact me if a Report Pack issue is detected - Selecting this option instructs Web Inspector PCI to send a notification email to the Account Email address whenever the administrator has attempted to download the Web Inspector PCI Scan Report pack by clicking the 'Generate Report Pack' in the Reports area, Report has been reviewed by a PCI CSS approved staff of Comodo and an issue has been detected in the generated report. Refer to Downloading Report Pack for more details.
- Contact me if a Report Pack generation fails - Selecting this option instructs Web Inspector PCI to send a notification email to the Account Email address whenever the administrator has attempted to download the Web Inspector PCI Scan Report pack by clicking the 'Generate Report Pack' in the Reports area and the Report generation has failed for some reasons. Refer to Downloading Report Pack for more details.
3. Click 'Add' if you want to configure email settings more devices/events.
4. Click 'Next' to continue the wizard.
| Note: You can always view/modify the email alert options from the My Account area of HackerGaurdian interface. Click here for more details. |
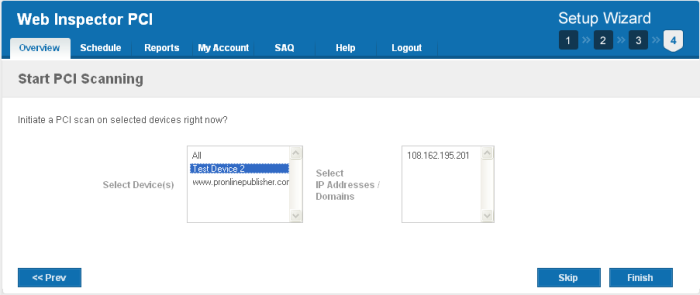
The next step is to commence the PCI scan on a device.
-
Select the device on which you wish to commence the scan from the 'Select Device(s)' box. If you want to run the scan for all the devices at once, select 'All'.
-
Select the IPs/Domains in the next box. If you want to run the scan for all the IPs/Domains associated with the selected device at once, select 'All'.
-
Click 'Finish' to commence the scan. The scan will be initiated and you can see the progress in the 'Overview' area.
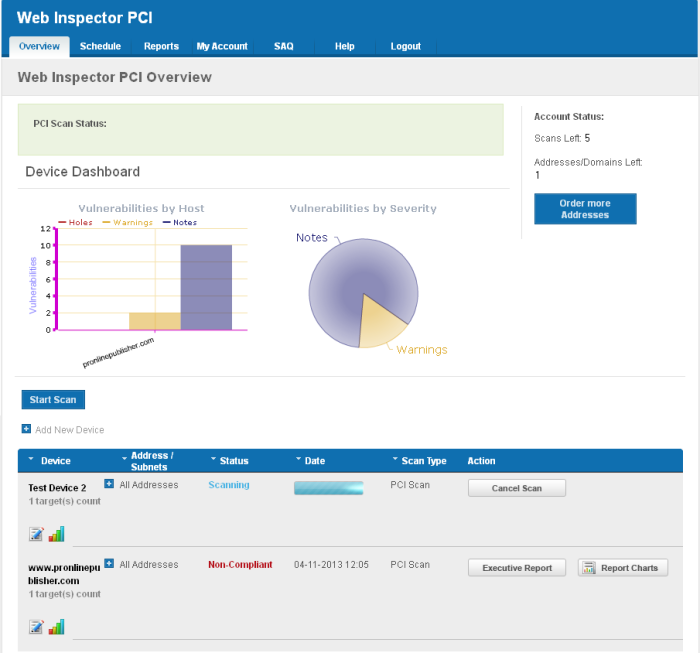
| Note: You can also start scanning on any existing device from the 'Overview' area of the interface. Click here for more details. |


