


Configure Advanced SSL VPN Server Settings
The 'Advanced' tab lets you configure the connection port and protocol for the VPN server. You can also configure global push options and authentication settings.
- Click 'VPN' > 'SSLVPN Server' in the left-hand side navigation
- Click the 'Advanced' tab.
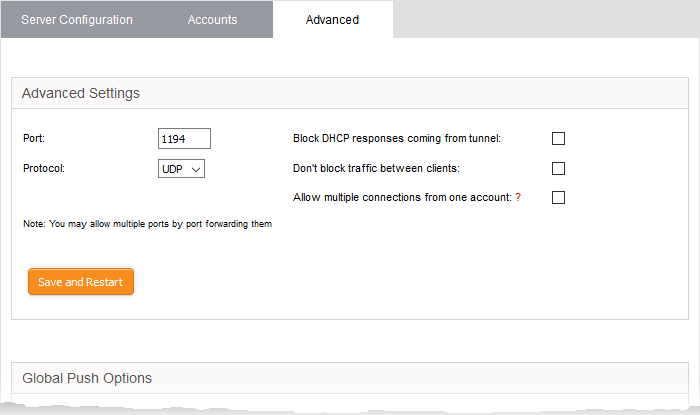
The 'Advanced' interface contains three areas:
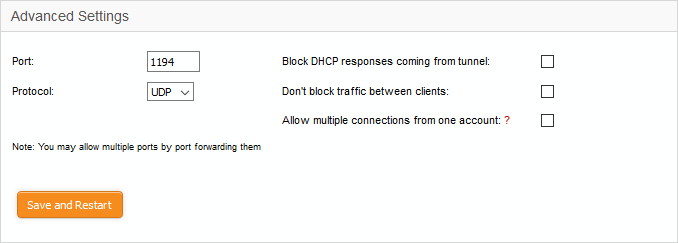
- Port - Specify the port for listening for VPN client requests. (Default = 1194). Admins can also create port forwarding rules under Firewall > SNAT, to allow multiple ports to listen to the requests and forward them to the default port.
- Protocol – Choose the protocol to be used for VPN connections. (Default = UDP)
- Block DHCP responses coming from tunnel - Select if you wish to block DHCP responses from the network at the other side of the VPN tunnel that conflict with the local DHCP server.
- Don't block traffic between clients - By default, the VPN server does not allow traffic between the VPN clients connected to it. Enable this option if you wish to allow data transfer among clients.
- Allow multiple connections from one account - By default, only one client can connect to the VPN server for a single user account. Enable this option if you want to allow several clients at different locations to connect to the server using the same account. However, if several clients are using a single account, the VPN firewall rules will not be applied.
- Click 'Save and restart'. The VPN server will be restarted for your configuration changes to take effect.
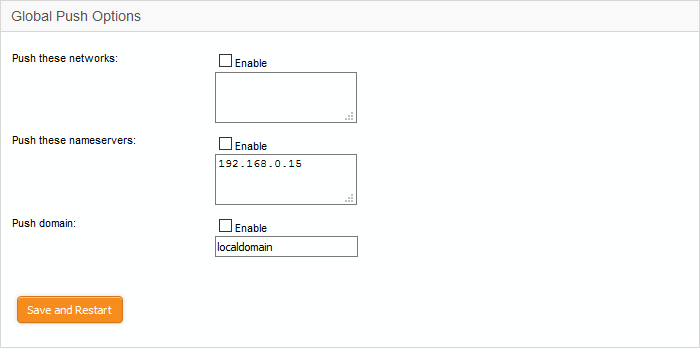
- Push these networks – If you wish the routes to specific networks are to be pushed to all the clients that connect to the VPN server. Select the 'Enable' checkbox and enter the network addresses/subnet masks in the text field.
- Push these nameservers – If you wish the clients to use specific name servers for DNS resolution, select the 'Enable' checkbox and enter the IP addresses of the name servers in the text box.
- Push domain - If you wish to specify a specific search domain for all the clients, to identify the servers and network resources in the VPN network, select the 'Enable' checkbox and enter the domain name in the text box.
- Click 'Save and restart'. The VPN server will be restarted for your configuration changes to take effect.
The SSL VPN server allows three types of authentication for the clients to authenticate themselves to the server.
- Public Shared Key (PSK) (Default)
The PSK authentication type requires the CA public certificate to be installed onto the clients and entering username and password of the account created for the client under 'Accounts' tab, for the client to authenticate itself to the server.
On selecting the PSK type, the administrator can download the public certificate generated by the VPN server for deployment onto the clients. The interface also allows the administrator to export the certificate for deployment onto other SSL VPN server configured as fall back server and import the certificate from primary SSL VPN server, if this DFW virtual appliance is configured as fallback server.
-
To select the PSK authentication type, select the PSK radio button.
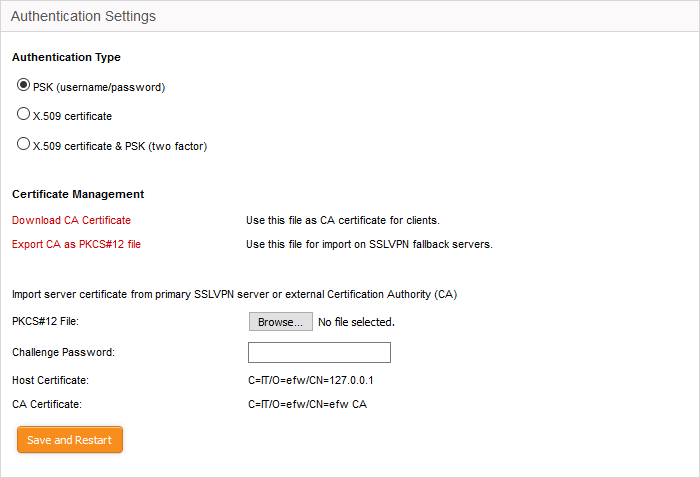
Certificate Management
-
To download the public certificate in .cer format for deployment on to the clients, click 'Download CA certificate' and save the certificate.
-
To export the certificate as a PKCS#12 certificate in .p12 format, click 'Export CA as PKCS#12 file' and save the file. This file can be transferred and imported on to other SSL VPN appliance configured as fallback server.
Importing the certificate
If the SSL VPN server is configured as fallback server for a different primary SSL VPN server, the administrator needs to import the public certificate generated by/issued for the primary server.
|
Prerequisite - The certificate needs to be exported as a PKCS#12 certificate from the server or to be downloaded from the CA that has issued the certificate and stored locally in the computer from which the DFW virtual appliance administrative console is accessed. |
To import the certificate
- Click 'Browse' beside the PKCS#12 file text box and navigate to the location of the certificate stored in the local computer or the network and click Open.
- Enter the challenge password to access the certificate in the 'Challenge password' text box.
- Click 'Save and restart'.
The certificate will be imported and the VPN server will be restarted for your configuration to take effect.
- A Server certificate with the fields C = IT, O = efw and CN = 127.0.01 from an external CA for uploading to the SSL VPN server configured in the DFW virtual appliance
- A Client certificate for each client with the Common Name field = The 'username' of the client account configured under the 'Accounts' tab, for installation at the SSL VPN client.
- To select the X.509 authentication type, select the X.509 radio button.
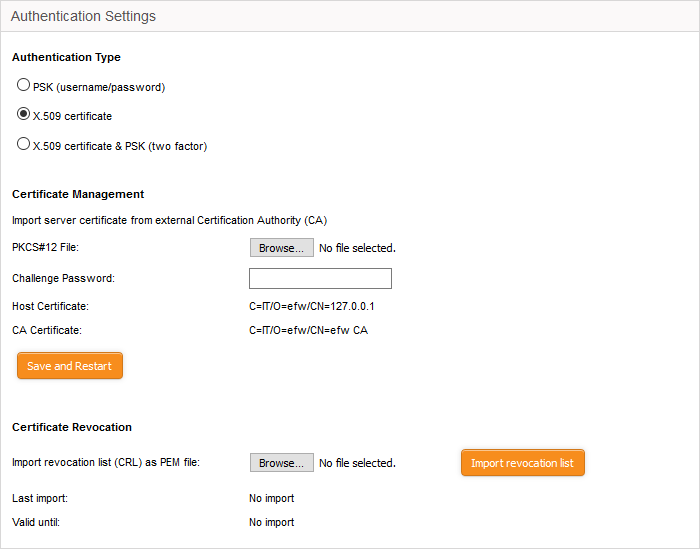
Certificate Management
| Prerequisite - The certificate needs to be downloaded as a X.509 certificate from from the CA that has issued the certificate and stored locally in the computer from which the DFW virtual appliance administrative console is accessed. |
- To import the server certificate obtained from an external CA click 'Browse', navigate to the location on your computer where the certificate is stored in X.509 format and click Open, enter the password entered for storing the private key of the certificate in the challenge password field and click 'Save and restart'. The certificate will be installed automatically and the VPN Server will restart for the installation to take effect.
- Certificate Revocation - The administrator can specify a certificate revocation list to confirm that the imported certificate is valid.
X.509 certificate and PSK (two factor)
See PSK (Username/Password) and X.509 certificate above.