Data Loss Prevention Settings
The data loss prevention section of a profile lets you search endpoints for confidential data. For example, credit card numbers, social security numbers, bank accounts, etc.
There are two tabs:
Discovery - Discovery rules let you specify the areas you want to scan and the type of data you want to search for.
- You create the discovery rules at 'Configuration Templates' > 'Data Loss Prevention'.
- You then come to this section to add the rules to a profile.
- See Data Loss Prevention Rules if you want help to configure the rules themselves.
Monitoring - Monitoring rules let you block endpoint users from copying data to external devices like USB sticks and storage drives.
Add a discovery scan to a profile
- Click 'Configuration Templates' > 'Profiles'
- Open the Windows profile you want to configure
- Click 'Add Profile Section' > 'Data Loss Prevention'

- Click the ‘Discovery’ tab if not already open
- Click 'Add'
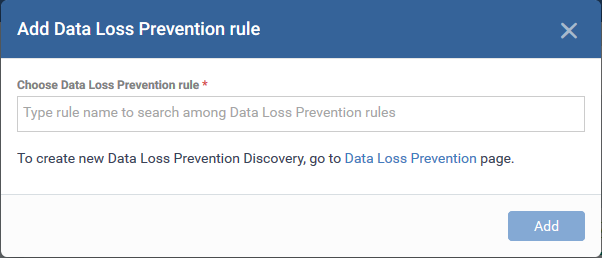
Choose Data Loss Prevention rule - Add an existing discovery rule to the profile.
- Start typing the first few letters of a rule name then select from the suggestions
- Repeat the process to add more rules to the profile.
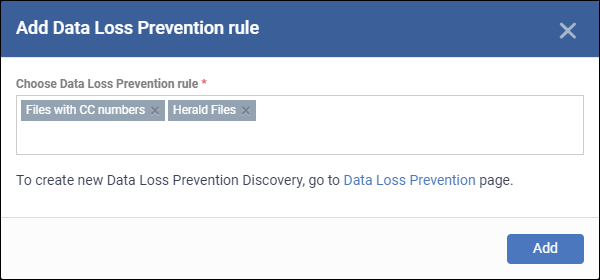
- Note. Go to 'Configuration Templates' > 'Data Loss Prevention' to create new rules and view existing rules.
- Click ‘Add’
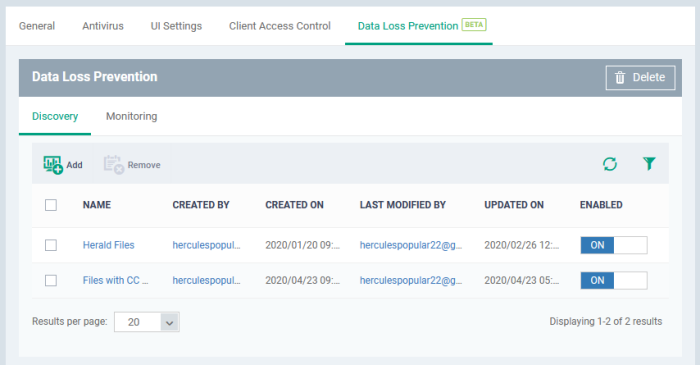
The interface shows all discovery rules you have added:
|
Column Heading |
Description |
|---|---|
|
Name |
The rule label.
|
|
Created by |
The admin who added the rule. Click the name to view their details. |
|
Created On |
Date and time the rule was created. |
|
Last Modified By |
The admin who most recently edited the rule. |
|
Updated On |
Date and time the rule was last edited. |
|
Enabled |
Use the switch beside a rule to activate / deactivate it. |
|
Controls |
|
|
Add |
Add rule to the profile. See the explanation above for help with this. |
|
Remove |
Remove rules from the profile. Use the check-boxes to select the rules you want to delete. |
Monitoring rules let you prevent users from copying files to external devices, take screenshots of sensitive information and so on.
- Click 'Configuration Templates' > 'Profiles'
- Open the Windows profile you want to configure
- Click 'Add Profile Section' > 'Data Loss Prevention'
- Click the ‘Monitoring’ tab:
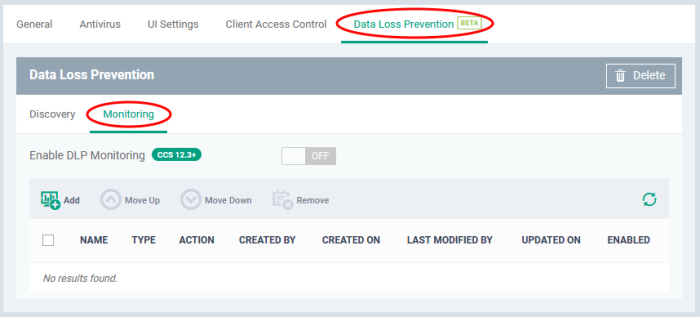
- Click ‘Add'
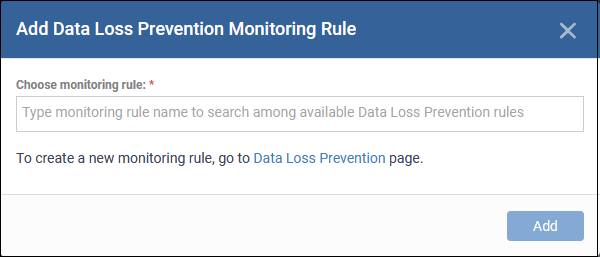
Choose monitoring rule - Add an existing monitoring rule to the profile.
- Start typing the first few letters of a rule name then select from the suggestions
- Repeat the process to add more rules to the profile.
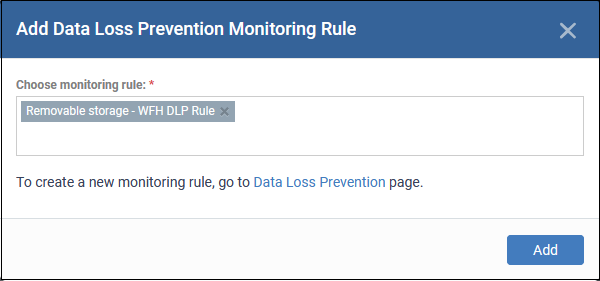
- Note. Go to 'Configuration Templates' > 'Data Loss Prevention' to create new rules and view existing rules.
- Click ‘Add’
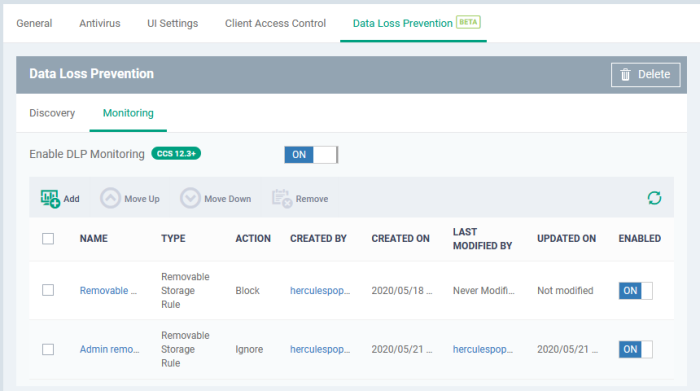
The interface shows all monitoring rules you have added:
|
Column Heading |
Description |
|---|---|
|
Name |
The rule label.
|
|
Type |
Indicates what kind of monitoring rule. |
|
Action |
What EM should do if the rule is triggered. |
|
Created by |
The admin that added the rule. |
|
Created on |
Date and time the rule was configured. |
|
Last Modified by |
The admin who most recently edited the rule. |
|
Updated on |
Date and time the rule was last edited. |
|
Enabled |
Use the switch beside a rule to activate / deactivate it. Use the master switch above to enable / disable all the rules. |
|
Controls |
|
|
Add |
Add rule to the profile. See the explanation above for help with this. |
|
Remove |
Remove rules from the profile. Use the check-boxes to select the rules you want to delete. |
|
Move up / Move down |
Re-order the rule priority. Select a rule and use the buttons to re-order. |
The monitoring rules are applied immediately on all devices to which the profile is applied.


