Installation
Xcitium Client Security (XCS) provides best-in-class threat prevention for Windows endpoints. The product is part of Xcitium Enterprise.
You can deploy Xcitium Client Security on to your endpoints, through the Xcitium Enterprise interface.
-
Sign up for Xcitium Enterprise at https://platform.xcitium.com/signup, if you haven't done so.
OR
-
Login to your Xcitium Enterprise account at https://enterprise.platform.xcitium.com/login for US and https://enterprise-eu.platform.xcitium.com/login for EU.
The following tutorial covers user and device enrollment before moving onto XCS installation:
You must add users to Xcitium Enterprise before you can deploy XCS to their endpoints.
Add a user
-
Click 'Assets' > 'User Management' > 'User List'
-
Click the 'Create User' button
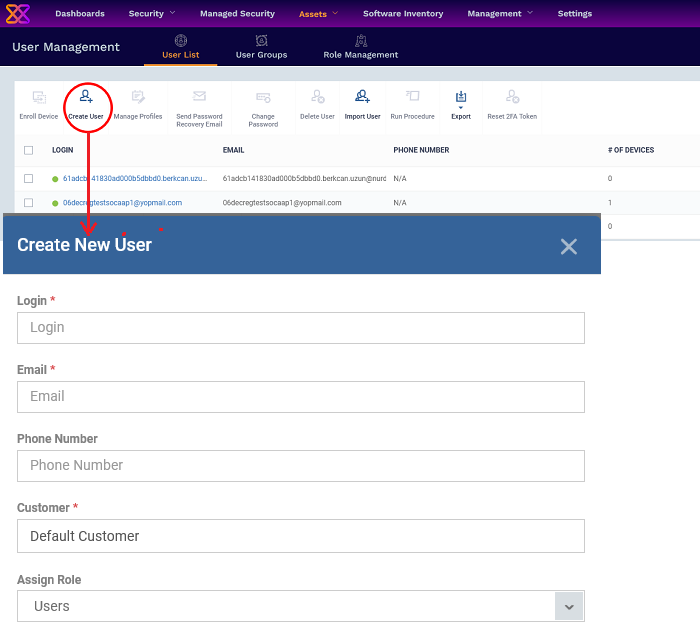
Complete the new user form:
-
Type a login username (mandatory), email address (mandatory) and phone number for the user
-
Customer - The company to which the user belongs. Leave the customer as 'Default Customer'
-
Role
A 'role' determines user permissions within the Xcitium Enterprise console itself. Xcitium Enterprise ships with four default roles:
Administrators - Can login to Xcitium and access all management interfaces. This role can be edited as required.
Technician - Can login to Xcitium and access all management interfaces. The technician role has fewer privileges than the administrator role. This role can be edited as required.
Login permission - Can login to Xcitium. Users with role cannot access any management interface by default. You can edit the role to assign access to required management interfaces.
Users - In most cases, a user is simply an owner of a managed device. They should not require access to the Xcitium Enterprise console. Under default settings, users cannot login to Xcitium Enterprise.
Users assigned with roles that provide login to the Xcitium console will receive an account activation mail for activating their account. See Configure Role Based Access Control for Users for more details.
-
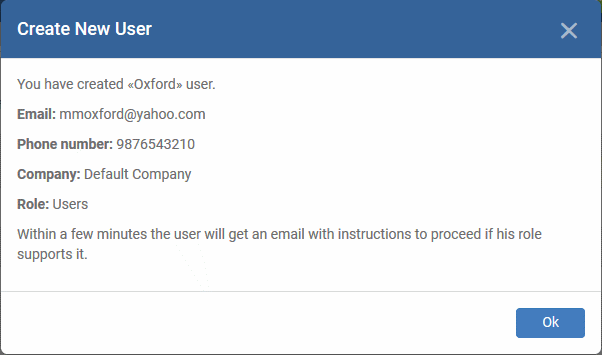
Click 'Submit' to add the user to Xcitium Enterprise.
A confirmation is shown:
-
Repeat the process to add more users.
-
New users are added to the 'Users' interface (click 'Assets' > 'User Management' > 'User List')
|
Tip: You can also bulk import users from a .csv file. Seehttps://help.xcitium.com/topic-463-1-1029-15558-Import-Users-from-a-CSV-File.html for more details. |
The next step is to add user devices so you can manage them with Xcitium Enterprise.
-
Click 'Assets' > ''User Management' > 'User List'
-
Select the users whose devices you want to add then click 'Enroll Device'.
This starts step 1 of the device enrollment wizard:
Step 1 - Device Options
-
Enroll by customer - Enrolls the device you are currently using. You may disregard this option at this stage as we are adding multiple devices with the 'Other device' option.
-
Enroll by user - Add devices owned by the users you selected previously. Those users should already be listed in the 'Specify User' box:
_1.png)
-
You can add additional, existing users by simply typing their email address in the box. Xcitium will auto-suggest users that have already been created.
-
Create New User - Click if you want to add a new user to Xcitium. You cannot add devices unless you have first added the users that own them. The add-user process is explained here.
-
Click 'Next' to proceed to step 2.
.png)
TLDR -
-
Click 'Not Specified' if you only want to install the communication client on target devices. The wizard will detect the target operating system and send the appropriate client to the device user.
-
Click one of the operating system tiles if you also want to install the security client. Make sure the target devices use the operating system you selected.
There are two broad ways you can enroll devices:
Option 1 - Enroll + Protect - Single Operating System
-
Click one of the operating system boxes to enroll devices of that type. Please make sure all your target devices use this operating system.
-
The wizard will send enrollment mails that only provision the OS you choose. For example - If you select the 'Windows' box, then the wizard will send enrollment mails which only contain download links for the Windows clients.
-
Once you have chosen the OS, you can customize enrollment options as required. You can configure items such as enrollment type, reboot policy, client version, configuration profile and device name.
Option 2 - Enroll Only - Multiple Operating Systems
-
Click the 'Not Specified' box. This option installs only the communication client, and doesn't install the security client.
-
Your target devices can be a mix of operating systems rather than a single OS. This option auto-detects the OS of the device and emails the appropriate client link to the user.
-
The latest version of the communication client is installed on each device. The MDM profile is installed on MAC devices
-
Note - You can use this option to quickly connect devices to Xcitium, then go back later and install the security client if required.
Enrollment Type
Applies to Windows, Mac and Linux devices.
-
Enroll and Protect - Installs both the communication client and the security client.
-
Just Enroll - Installs only the communication client.
Background. There are two types of clients:
-
Communication Client - Connects the device to Xcitium Platform for central management. It is mandatory to install this client.
-
Security Client - This is the security software. Depending on the operating system, it includes antivirus, firewall, threat-containment, web-filtering, and more. It is optional to install this client.
Windows
|
Setting |
Description |
|---|---|
|
Choose platform. |
Select Window OS version. 64-bit, 32 bits, or hybrid. |
|
Use default Communication Client version. |
This client enrolls the endpoint for central management.
|
|
Use default Communication Client Security version. |
This client installs security software such as antivirus, firewall and auto-containment.
|
|
Additional options |
AV Database - Choose whether to include the latest virus database with the installation package. This increases the size of the package. If disabled, the client will download the latest database anyway when you run the first virus scan. |
|
Configuration Profile |
A configuration profile is a collection of settings which specify a device's network access rights, security settings, antivirus scan schedule, and more. The default is 'Windows - Security Level 1' profile. Choose a different profile if required.
|
|
Set Reboot Options |
Endpoints need to be restarted to complete xCS installation. You have the following restart options:
|
|
Device Name Options |
|
Step 3 - Installation Instructions
The final step is to send out the enrollment emails to the device owners:
_3.png)
-
Send - Click this to send enrollment mails to users with the settings you choose in steps 1, 2 and 3.
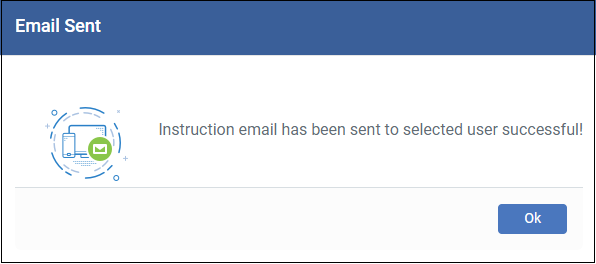
-
Enroll Another Device - Takes you back to step 1.
-
Go to Bulk Installation Package - Takes you to bulk installation package screen to configure and enroll users in bulk. See 'Bulk Enrollment of Devices'.
-
Click 'Finish' to close the window.
An example mail that is sent to users is shown below:
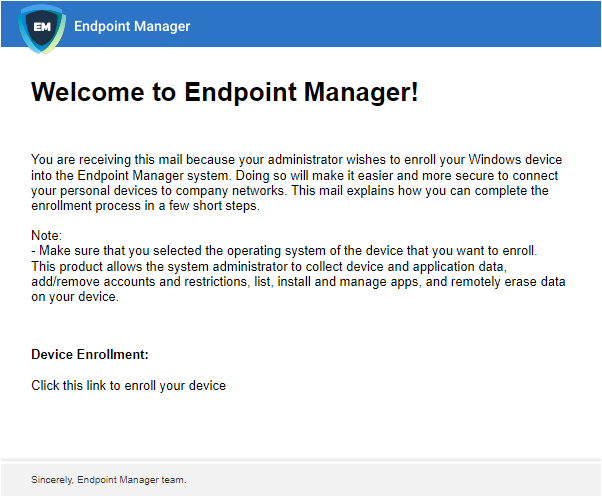
The User Experience is as follows:
- User opens the email on the Windows endpoint you want to enroll.
- Click the enrollment link in the email to open the device enrollment page.
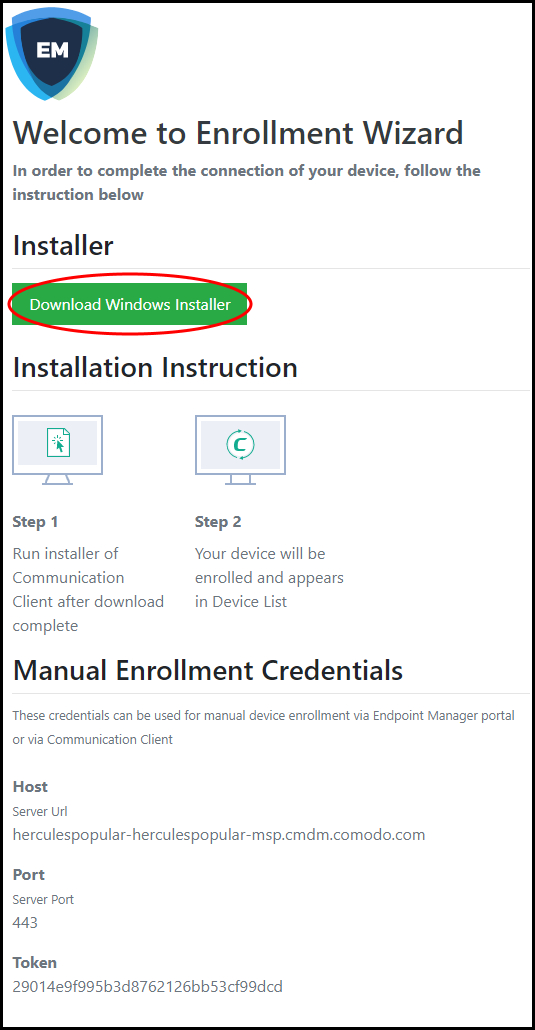
- Click the 'Download Windows Installer' button:
-
The Xcitium client setup file gets downloaded.
-
Run the setup file to install the client on the endpoint.
-
The device is automatically added to Xcitium Enterprise once installation is complete. The Xcitium Enterprise communication client icon
 appears at the
bottom-right of the endpoint screen.
-
If the client is not automatically enrolled after installation, you can manually enroll the device at a later time. This might happen if, for example, there are connectivity issues.
-
You will need to enter the host, port and token ID to manually enroll. You can find these items at the end of the device enrollment page.
-
Protection is effective immediately after the computer restarts.
A Xcitium Enterprise security profile is applied to the device.
-
If the user is already associated with a configuration profile in Xcitium Enterprise, then those profiles will be applied to the device. See 'Assign Configuration Profile(s) to User Devices' and 'Assign Configuration Profiles to a User Group' for more details.
-
If no profiles are defined for the user then the default Windows profile(s) will be applied to the device. See Manage Default Profiles for more details.
The device can now be remotely managed from the Xcitium Enterprise console.


