Manage Default Profiles
- Default'
profiles are automatically assigned to new devices which match their
operating system IF no user / user-group profile exists for the OS.
Default profiles are only applied if no user or user-group profile exists for the operating system.
If you remove all user profiles from a device then they will be replaced by the appropriate default profiles.
You can mark any profile you want as a 'default' profile. You can also apply multiple default profiles to the same devices.
-
Xcitium ships with the following default profiles:
Windows - Security Level 1 Profile
Mac OS - Security Level 1 Profile
Android - Security Level 1 Profile
iOS - Security Level 1 Profile
Linux - Security Level 1 Profile
-
Xcitium also ships with three, non-default, profiles for Windows:
Each of the profiles above provides good, baseline security for managed devices. These profiles cannot be modified or deleted, but may be replaced on devices by another profile.
Windows - Security Level 1 Profile [Former Standard Profile]
Windows - Security Level 2 Profile
Windows - Security Level 3 Profile
-
You can remove 'default' status from any profile, including the 'built-in' profiles mentioned above. However, it is mandatory to have at least one default profile per operating system.
-
You can turn any profile you want into a default profile. You can also clone a default profile to use as a template for a new profile.
View and manage default profiles
-
Click 'Assets' > 'Configuration Templates' > 'Profiles'
-
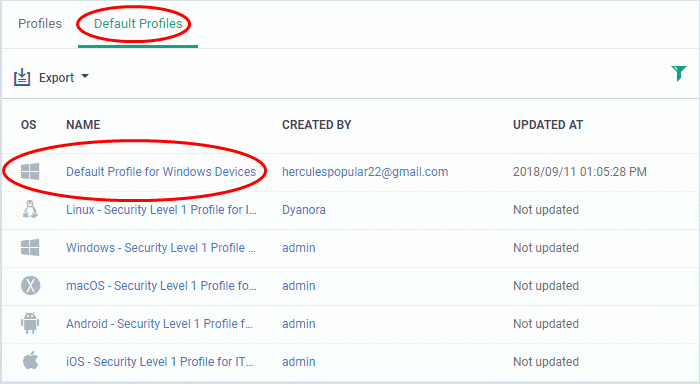
Select the 'Default Profiles' tab at the top.
The image above shows the default
profiles shipped with Xcitium.
Click the following links for more help:
You can turn any profile into a 'default' profile. You can do
this when you create a new profile, or by editing an existing
profile.
-
Click 'Assets' > 'Configuration Templates' > 'Profiles'
-
Click the 'Profiles' tab
-
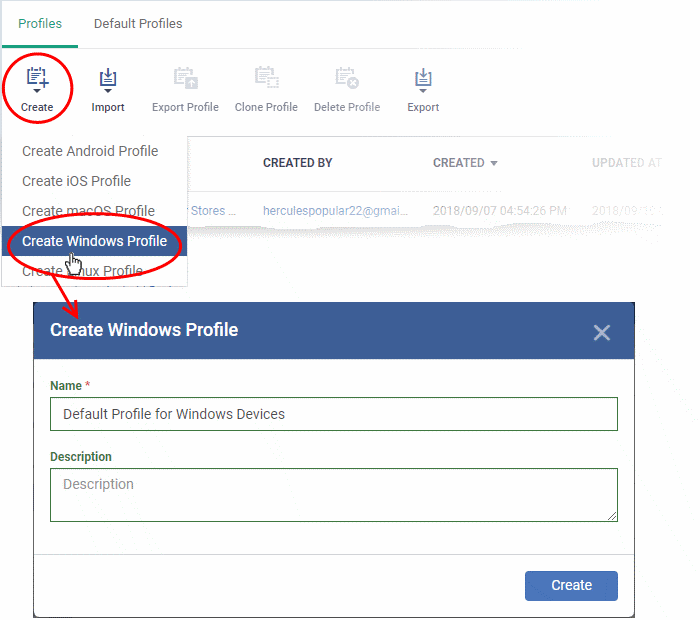
Click 'Create' and choose the OS of the profile:
-
Enter a name and description for the profile
-
Click the 'Create' button
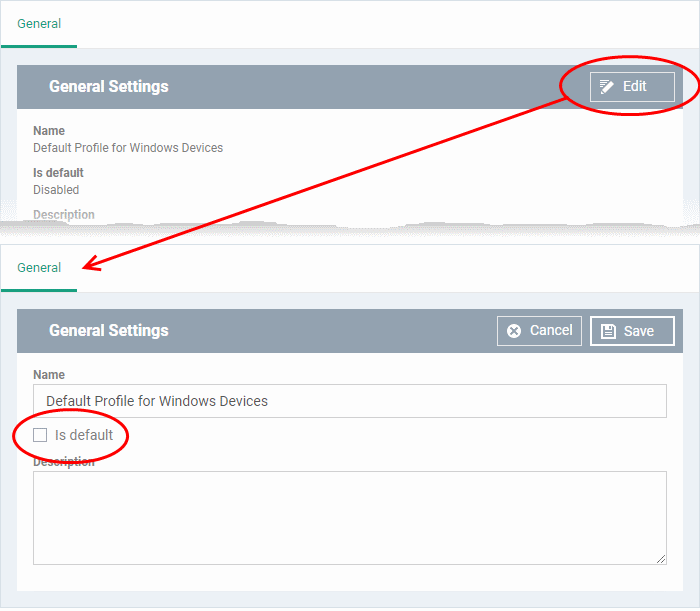
The profile will open at the 'General Settings' screen.
-
Click 'Edit' at the top right and enable 'Is Default':
-
Click 'Save'.
The new profile will be listed in the 'Default Profiles' area:
You can edit the profile and add profile components (sections) as required. See Edit Configuration Profiles for more details.
Turn an existing profile into a default profile
-
Click 'Assets' > 'Configuration Templates' > 'Profiles'
-
Click the 'Profiles' tab
-
Click the name of the profile that you want to set as a default:
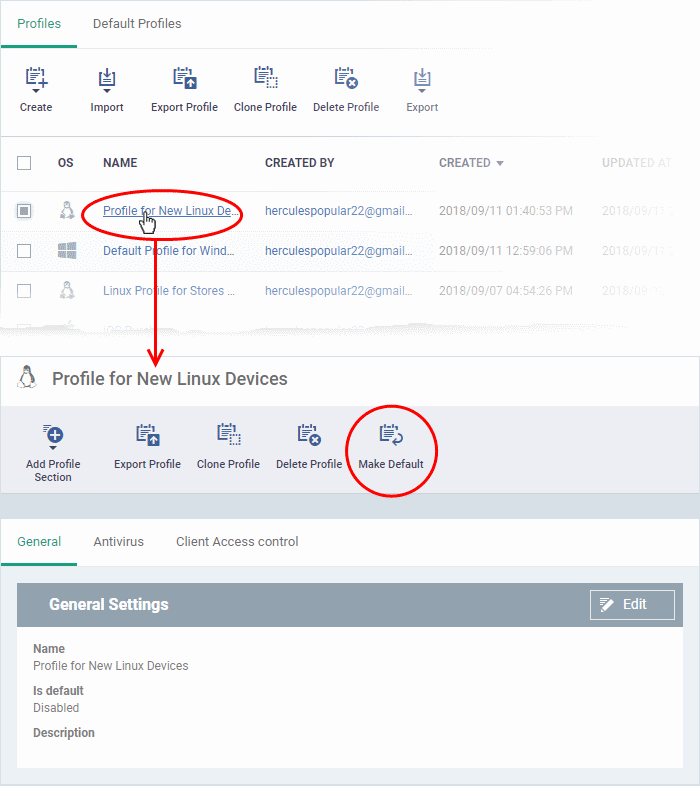
Click the 'Make Default' button in the profile details screen.
Or
- Click the 'Edit' button then enable 'Is Default'
-
Click 'Save'.
The profile will be listed in the 'Default Profiles' screen:
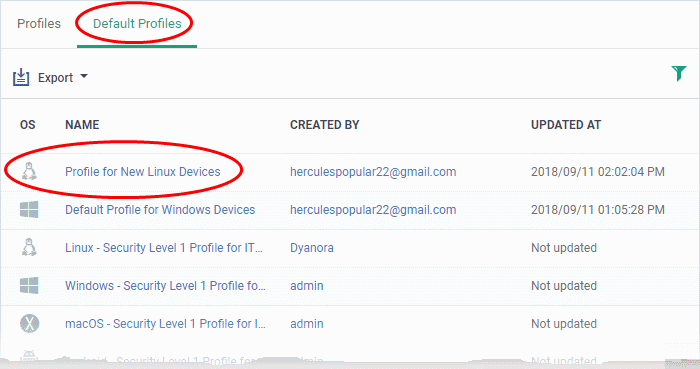
The 'Default Profiles' interface
|
Default Profiles - Column Descriptions |
|
|---|---|
|
Column Heading |
Description |
|
OS |
The operating system of the devices to which the profile is applied. |
|
Name |
The label of the profile
|
|
Created by |
The admin who created the profile.
|
|
Updated at |
Date and time the profile was most recently edited. |
-
Click any column header to sort items in ascending/descending order of the entries in that column.
-
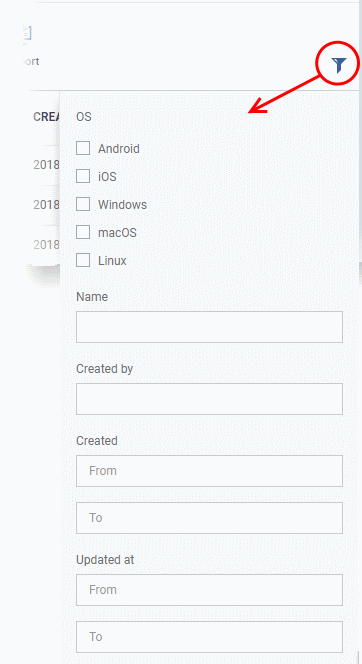
Click the funnel icon to filter by OS, profile name, author or date:
Assign
default profiles to devices
-
New devices are automatically given the default profiles for their operating system IF there are no user/user group profiles for the device owner.
-
Conversely, if you remove all user/user-group profiles from a device, then the default profiles are automatically deployed to take their place.
-
You can cancel the default status of built-in profiles so they are not applied to new devices on enrollment. They will also be removed from any existing devices.
-
For devices with no profiles applied, you can carry out on-demand functions such as run antivirus scans, run a procedure and so on. For Windows devices with XCS installed, when there are no profiles applied, the default XCS settings will apply.
-
To open the default profiles screen, click 'Assets' > 'Configuration Templates' > 'Profiles' on the left then choose the 'Default Profiles' tab.
-
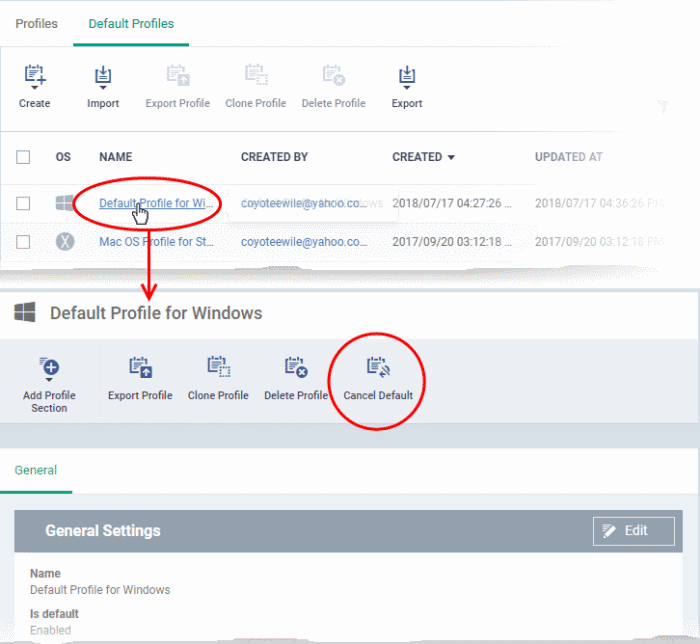
Click the name of the default profile from the list
-
Click 'Cancel Default' button at the top
Or
-
Click 'Edit' on the right, deselect 'Is Default' check box and click 'Save'
The 'Edit' button is not available for built-in default profiles. You can remove default status only by clicking the 'Cancel Default' button at the top.
|
Notes:
|
Export the list of Default Profiles to a CSV file
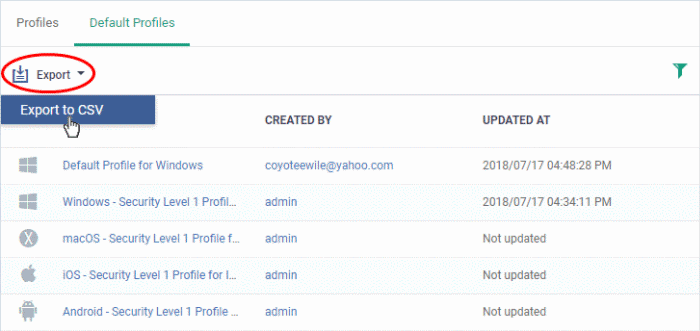
You can export the list of default profiles to a comma-separated values (CSV) file as follows:
-
Click the 'Export' button above the table then choose 'Export to CSV':
-
The CSV file will be available in 'Dashboards' > 'Reports'
-
See Reports in The Dashboards for more details.


