Create and Manage Registry Groups
-
Click 'Settings' > 'System Templates' > 'Registry Variables'
-
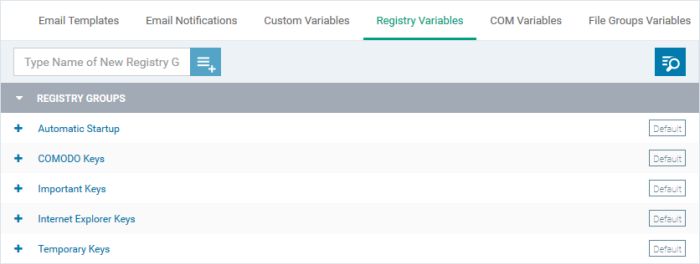
The 'Registry Variables' tab contains references to pre-defined and custom registry groups.
A registry group is a collection of registry keys with similar attributes or scope.
For example, the 'Important Keys' group contains keys which are essential to the security and stability of the operating system. The 'Automatic Startup' group contains keys which load at Windows boot.
-
Registry groups are useful when you want to apply an action to an entire class of keys. For example, you can exclude a registry group from containment when creating a profile.
-
You can add new groups and edit existing groups as required.
-
Groups in this interface are available for selection when configuring a Windows profile.
Open the 'Registry Groups' interface
-
Click 'Settings' > 'System Templates'
-
Click the 'Registry Variables' tab
Add a new Registry group
-
Enter the name of the group in the 'New Registry Group' field and click the '+' button.

The new group is added to the list. The next step is to add registry keys to the group.
-
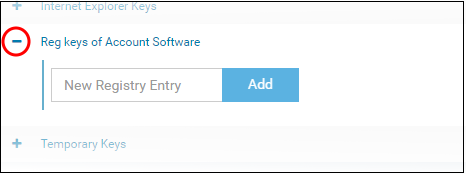
Click '+' at the left of the group name
-
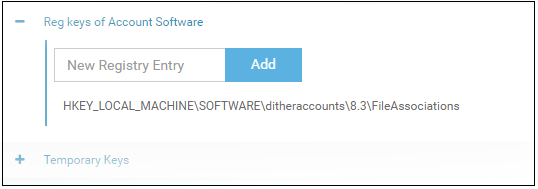
Enter the path of the registry key/value in the new registry entry field and click 'Add'
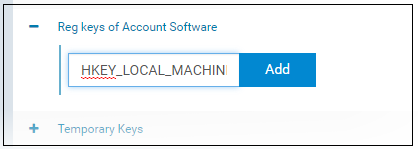
The key is added to the group.
-
Repeat the process to add more keys and values to the group.
-
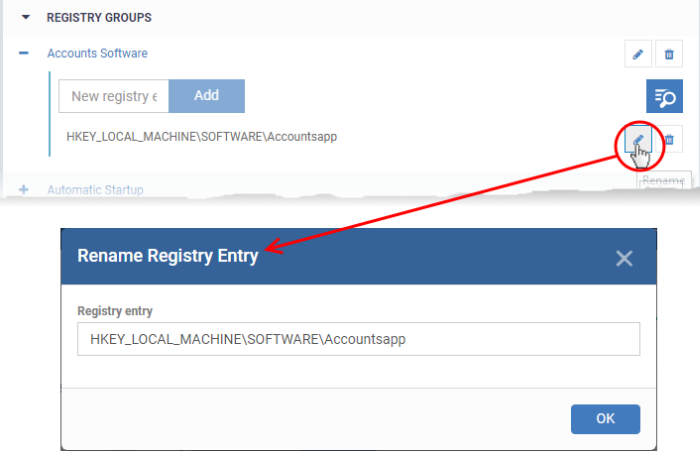
Click the 'Edit' icon if you want to modify the value:
-
Edit the entry and click 'OK' to save your changes
-
Click the trash can icon to remove a key:
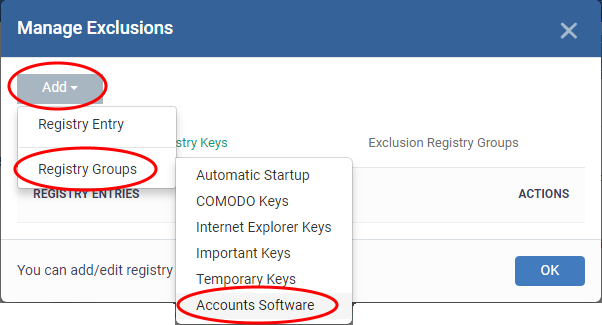
The new registry group is now available for selection when configuring a Windows Profile. For example, in 'Containment' > 'Settings' > 'Do not virtualize access to the specified registry keys/values' > 'Exclusions'.
Edit the name of a Registry Group
-
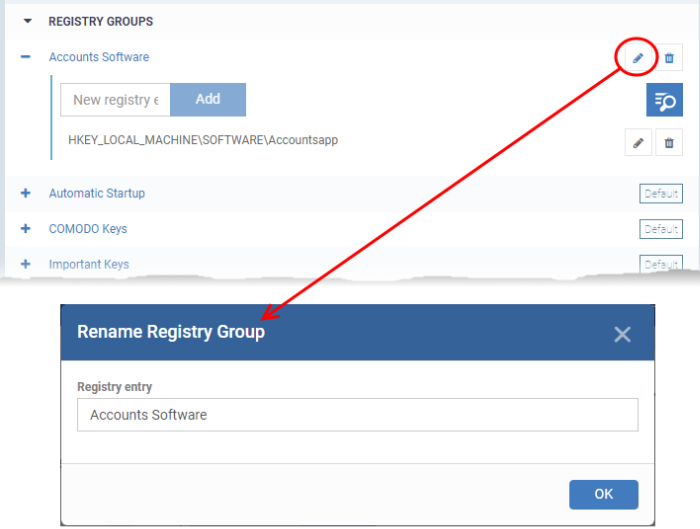
Click the 'Edit' icon beside the Registry Group
-
Enter the new name for the group in the 'Rename Registry Group' dialog and click 'OK'
Remove a Registry Group
-
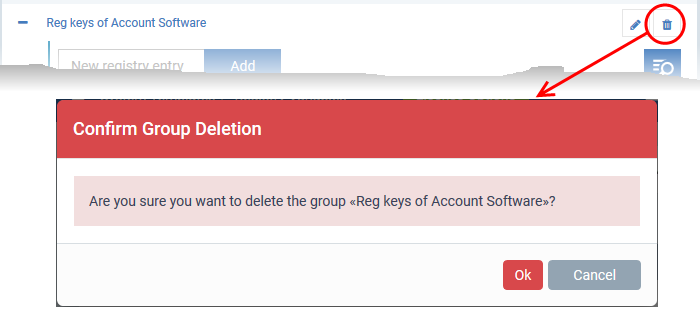
Click the trash can icon beside the Registry Group
