Create a New Role
-
Click 'Assets' > 'User Management' > 'Role Management'
-
Click the 'Roles' tab
-
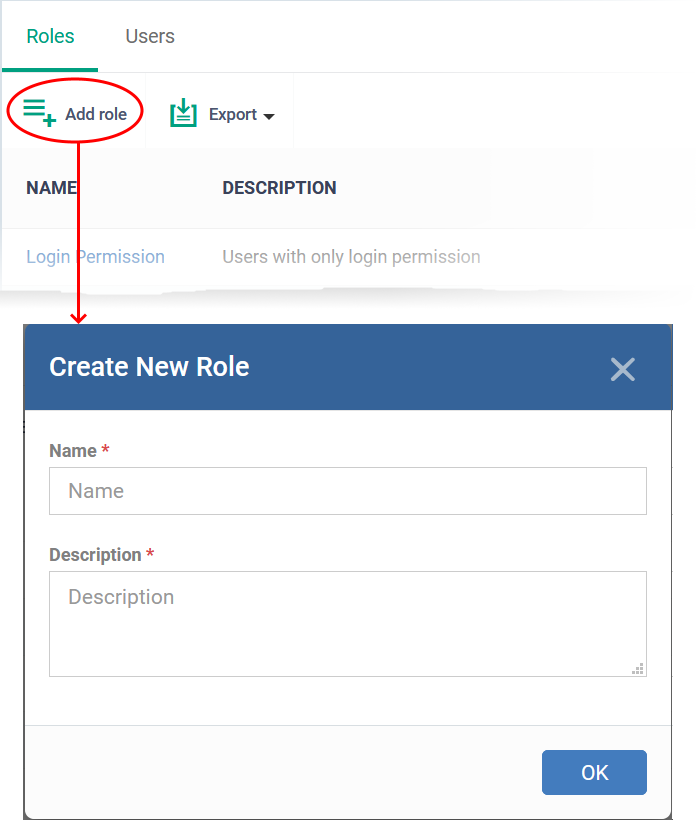
Click 'Add Role':
-
Enter a name and description for the role then click 'OK'.
The new role is added to the list in the 'Roles' screen.
-
Click on the new role to edit its permissions, assign users, and specify which entities the role is allowed to manage.
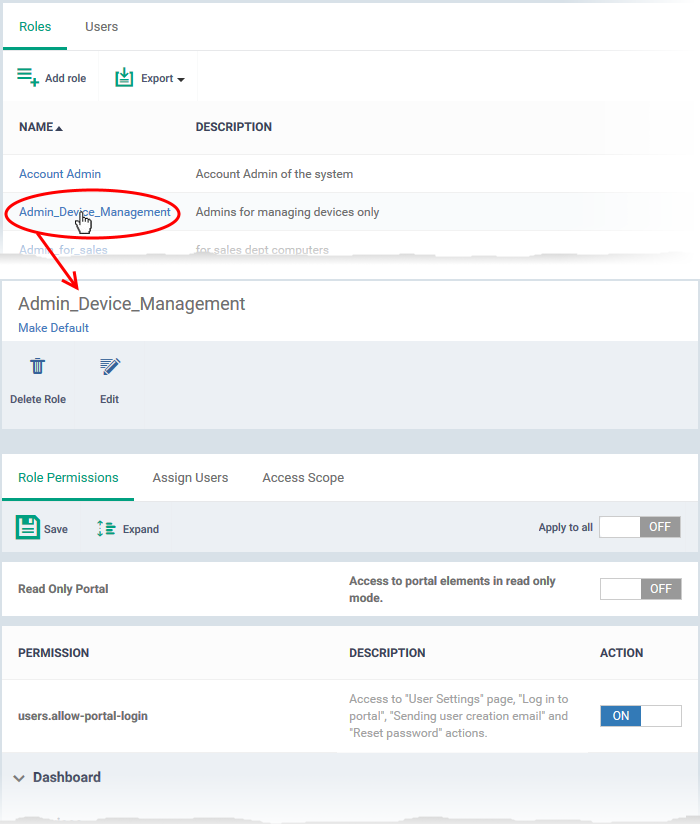
The edit screen has three tabs:
-
Role Permissions - Define access rights and privileges for the role.
-
Assign Users - Select users who should have the role.
-
Access Scope - Select which companies and groups can be accessed by role members.
Select access rights and privileges for the role
-
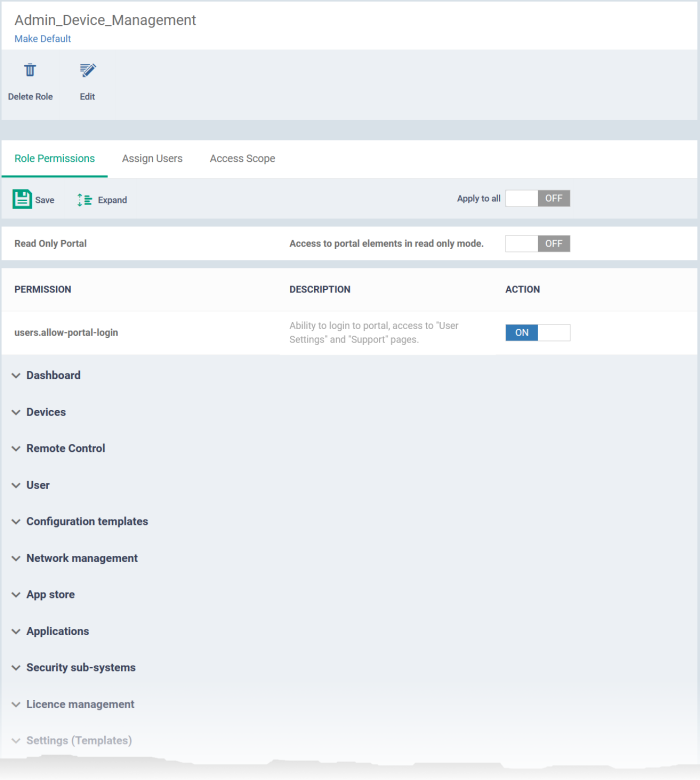
Click the 'Role Permissions' tab if it is not open
-
Read Only Portal - Role-members can view areas to which you assign them permission, but cannot make changes.
The read-only switch applies to every permission you enable in the list below.
-
Users.allow-portal-login - Role-members can login to the Xcitium console. Xcitium sends an account activation mail to users assigned to the role. The user can login to the Xcitium console and manage as per the permissions you assign below.
Each item in the list lets you choose permissions for a specific area.
-
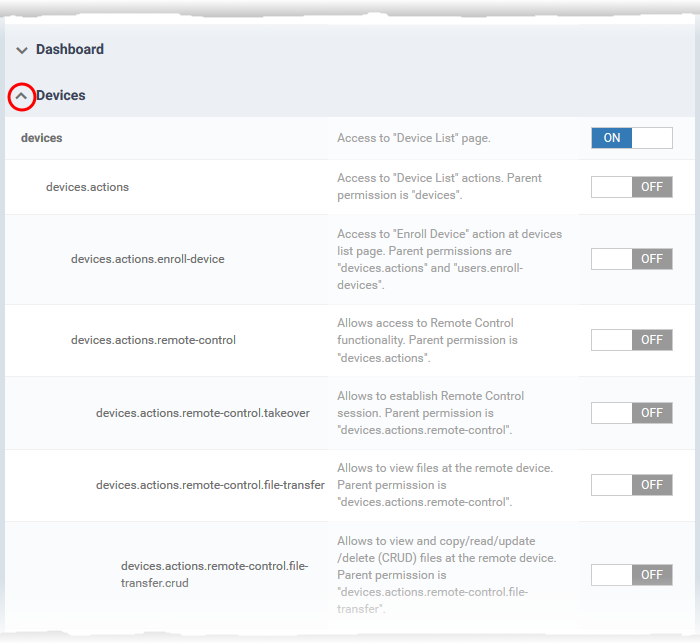
Click the down arrow next to a module name to view its permissions
OR
-
Click 'Expand' at the top to view all permissions
-
Use the switches on the right to enable or disable specific permissions
-
Use the 'Apply to all' switch to enable or disable all permissions
-
Click 'Save' for your settings to take effect
Assign the new role to selected users
-
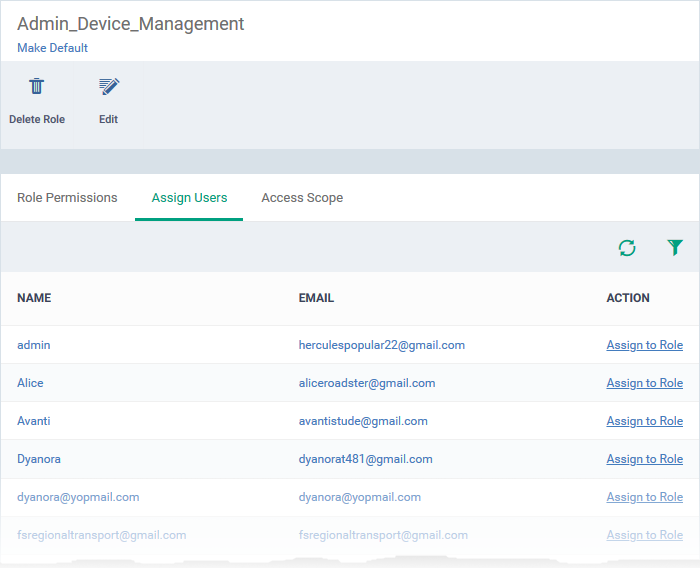
Click the 'Assign Users' tab.
This opens a list of all enrolled users:
-
Assign to Role - Click to place the user in a particular role.
|
Tip: You can search for specific users by clicking the funnel icon at top-right. |
Select which device groups are granted access to the role
-
Click the 'Access Scope' tab.
This opens a list of all device groups created for your company in Xcitium.
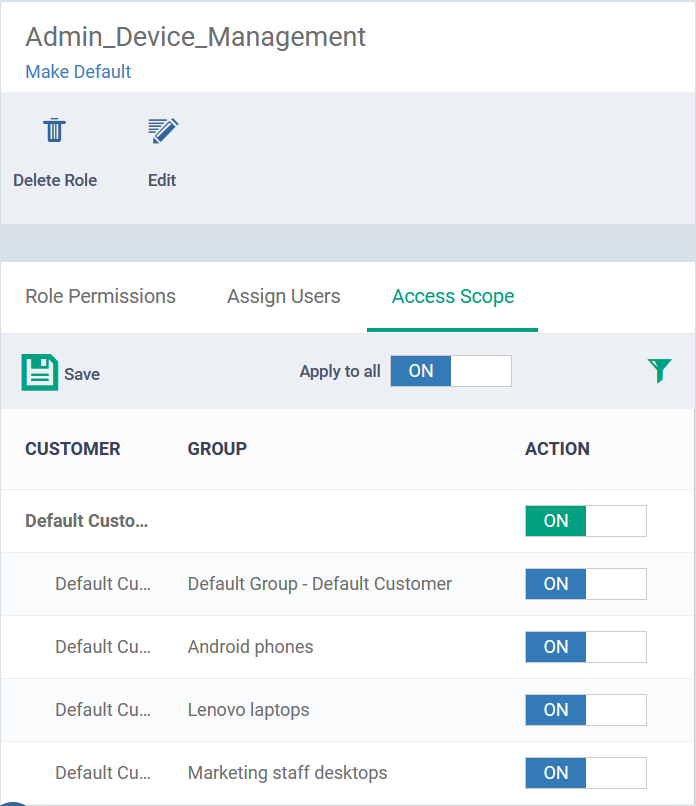
Configure the access scope of the role as follows:
-
Use the green 'master' switch next to default customer to enable/disable the ability to manage groups under the company.
-
Use the switch next to a device group to control access to a specific group.
-
Apply to All - Enable or disable access to all companies and groups on the page.
-
Click 'Save' for your settings to take effect.
-
Click the edit button
 to modify the role's name and description.
-
Click 'Make Default' if you want this to be the role that is initially assigned to new users.


