Manage Cluster
In this section, onboarded cluster can be viewed and managed. We have options to delete and modify the clusters, provide name of the cluster and region where the cluster is present.
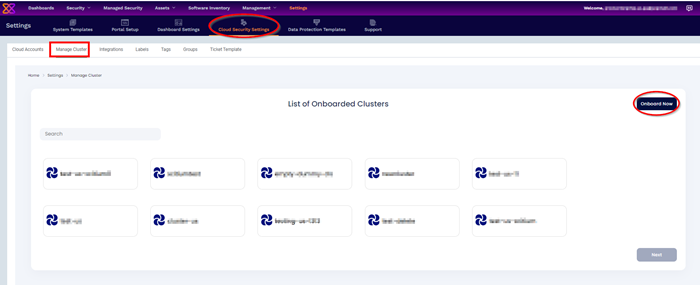
- Click 'Settings' > 'Cloud Security Settings'
- Select 'Manage Cluster' tab
In Manage Cluster, we can perform two operations
The cluster onboarding steps are the same for both managed and unmanaged clusters as follows:
Step 1: From this page we can onboard the clusters running in various cloud platforms like GCP, AWS and Azure. We can also onboard unmanaged clusters set up locally in the on-premises environment or virtual machines.
To onboard cluster select 'onboard now' option.
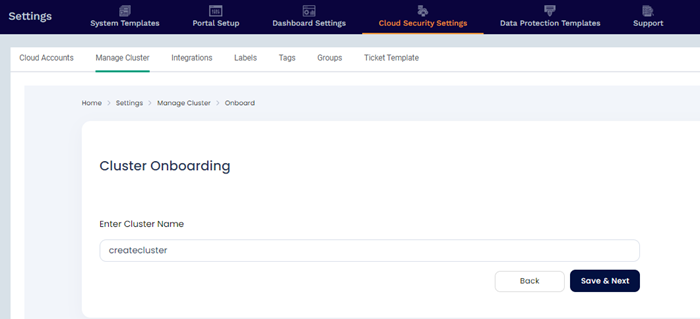
Step 2: In this screen, give any name to the cluster that you are going to onboard now.
Step 3: Installing KubeArmor and AccuKnox agents:
We are going to install KubeArmor and AccuKnox-agents to connect to the Xcitium application in Kubernets or VM whichever required.
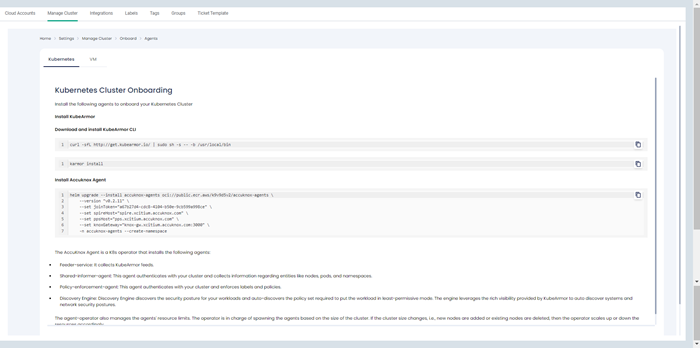
Step 3.1: KubeArmor Installation
KubeArmor:
KubeArmor is a cloud-native runtime security enforcement system that restricts the behavior (such as process execution, file access, and networking operation) of containers and nodes at the system level. With KubeArmor, a user can:
- Restrict file system access for certain processes
- Restrict what processes can be spawned within the workload
- Restrict the capabilities that can be used by the processes within the workload
KubeArmor differs from seccomp-based profiles, wherein KubeArmor allows to dynamically set the restrictions on the workload. With seccomp, the restrictions must be placed during the workload startup and cannot be changed later. KubeArmor leverages Linux Security Modules (LSMs) to enforce policies at runtime.
KubeArmor is installed using the following commands:

Step 3.2: Accuknox-Agents Installation
After installing KubeArmor we are going to install AccuKnox Agents in the cluster.
AccuKnox Agents:
1. KubeArmor: KubeArmor is a cloud-native runtime security enforcement system that restricts the behavior (such as process execution, file access, and networking operation) of containers and nodes at the system level. KubeArmor dynamically set the restrictions on the pod. KubeArmor leverages Linux Security Modules (LSMs) to enforce policies at runtime.
2. Feeder Service: It collects the feeds from KubeArmor and relays to the app.
3. Shared Informer Agent: It collects information about the cluster like pods, nodes, namespaces etc.,
4. Policy Discovery Engine: It discovers the policies using the workload and cluster information that is relayed by a shared informer Agent.

Note: In the above command joinToken is specific to this example and it will vary based on the cluster.
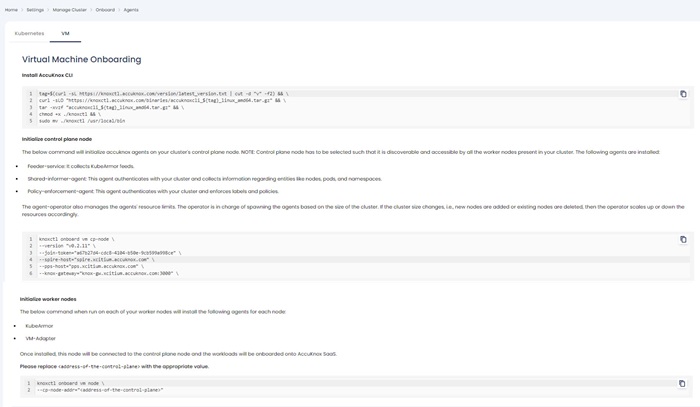
Step 3.3: Accuknox CLI Installation

Initialize control plane node
The below command will initialize accuknox agents on your cluster's control plane node.
NOTE: Control plane node must be selected such that it is discoverable and accessible by all the worker nodes present in your cluster.
The following agents are installed:
- Feeder-service: It collects KubeArmor feeds.
- Shared-informer-agent: This agent authenticates with your cluster and collects information regarding entities like nodes, pods, and namespaces.
- Policy-enforcement-agent: This agent authenticates with your cluster and enforces labels and policies.
The agent-operator also manages the agents' resource limits. The operator is in charge of spawning the agents based on the size of the cluster. If the cluster size changes, i.e., new nodes are added or existing nodes are deleted, then the operator scales up or down the resources accordingly.

Initialize worker nodes
The below command when run on each of your worker nodes will install the following agents for each node:

- kubeArmor
- VM-Adapter
Once installed, this node will be connected to the control plane node and the workloads will be onboarded onto Xcitium.
Please replace <address-of-the-control-plane> with the appropriate value.
Step 4: Onboarded Cluster
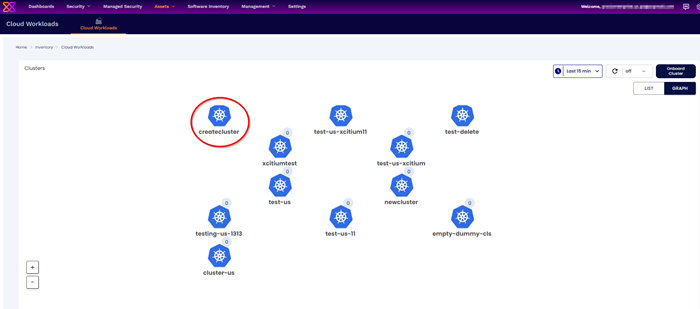
After installing all the AccuKnox agents the cluster is onboarded successfully into the Xcitium application.
We can see the workload details of the onboarded cluster by Navigating to Assets > Cloud Workloads option
Cluster Offboarding is process to be followed for Agent uninstallation from your cluster CLI and Deleting cluster from Xcitium.
Select the cluster and click Delete to delete the cluster
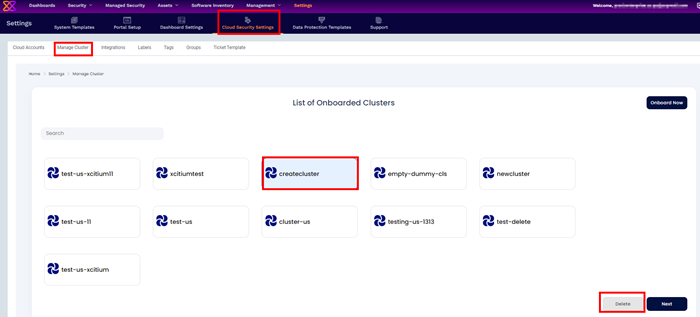
A confirmation dialog will appear to delete the cluster

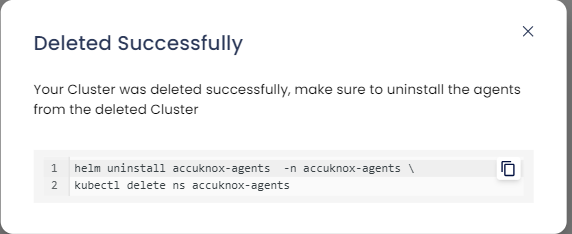
Once cluster is deleted, we need make sure to uninstall the agent from the deleted cluster
