Manage Isolate and Release from Isolation
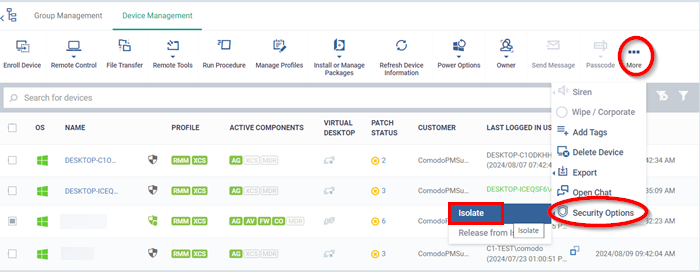
- Click 'Assets' > 'Devices' > 'Device List' > 'Device Management'
- Select target devices
- Click 'Security Options' > 'Isolate'.
Isolate from Network
- Click 'Assets' > 'Devices' > 'Device List'
- Click the 'Device Management' tab
- Select a group to view only its devices
Or
- Select 'Show all' to view every device added to Xcitium
- Select the devices you want to isolate
- Click 'Security Options' > 'Isolate' from the options at the top. If ''Security Options' is not available, click 'More' at top-right then 'Security Options' from the options.

- This feature helps you block the network communication of the affected endpoints in case of violation, so that further damage can be restricted.
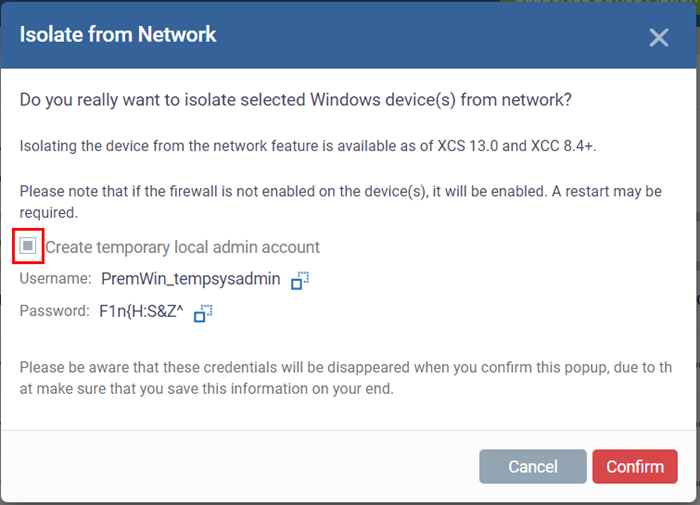
- Once 'Isolate' option is selected, if firewall is not enabled, it will be enabled automatically and a system restart is required to complete the changes.
Note: Isolating the device from the network feature is available as of XCS 13.0 and XCC 8.4+ .

Create temporary local admin account
- Selecting this option will create a local admin account in the affected device and please note the password for the admin account before closing the popup.
- Once popup is closed, password cannot be retrieved.
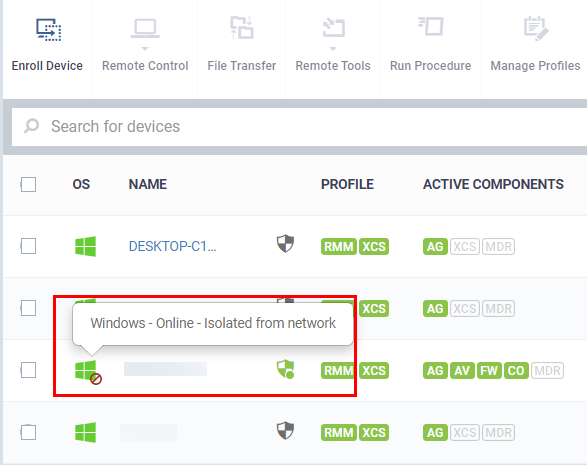
After Isolation command sent, the status of the device will be changed

Release from Isolation
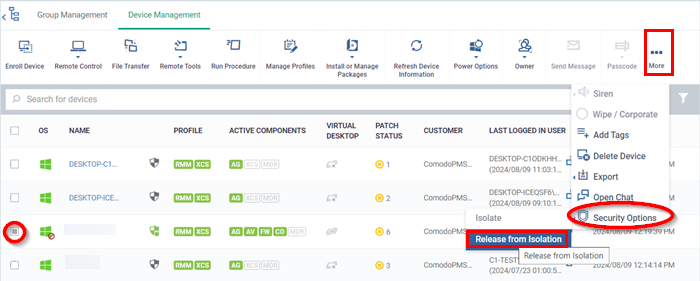
To release the affected device from Isolation after investigating the breach, select the affected device and click 'Release from Isolation'

- A confirmation popup will be appeared to proceed the 'Release from Isolation' operation

- Select 'Confirm' to continue
- The selected device will be released form Isolation and we can continue the operations normally.


