Create and Manage COM Groups
-
Click 'Settings' > 'System Templates' > 'COM Variables'
-
Xcitium Enterprise ships with a set of predefined COM Groups that are available for use in configuration profiles, for example to add a COM group to the 'Protected Objects' list in the HIPS settings of a Windows profile. If required, You administrators can add new COM Groups, edit and manage them.
-
The 'COM Variables' tab in the 'System Templates' interface lets you view and manage pre-defined and custom COM groups.
-
The groups added to this interface will be available for selection while configuring Windows profiles from the 'Profiles' interface.
Open the 'COM Groups' interface
-
Click 'Settings' > 'System Templates'
-
Click the 'COM Variables' tab
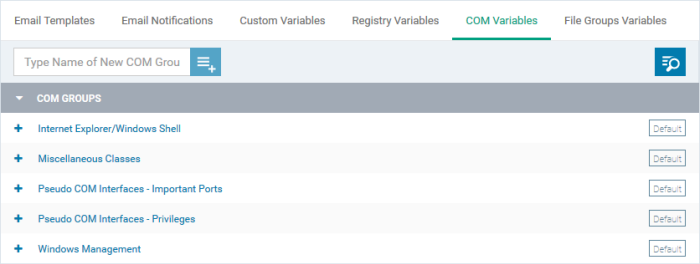
The list of pre-defined and user-defined COM groups will be displayed. The default groups are indicated by 'Default' at their right and cannot be edited or deleted.
-
Click the 'COM Groups' column header to sort the items in ascending/descending order of the names of the groups.
-
To filter or search for a specific COM group, click the search icon at the top right and enter the name of the group on part or full

Add a new COM group
-
Enter the name of the new COM group and click the '+ ' button:

The new group is added to the list. The next step is to add COM classes to the group.
-
Click the '+' at the left of the group name

-
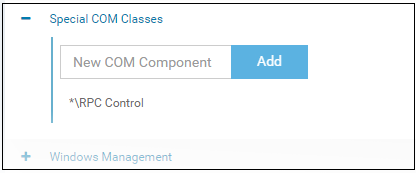
Enter the COM classes to be added to the group, in the 'New COM Component' field and click 'Add'

The COM class is added to the group.
-
Repeat the process to add more COM classes to the group.
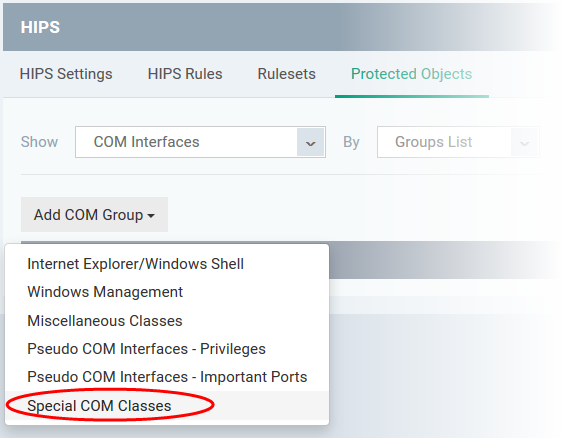
Once a COM group is added, it will be available for selection while configuring a Windows Profile, for example in the 'HIPS' > 'Protected Objects' > 'Groups List' interface.
-
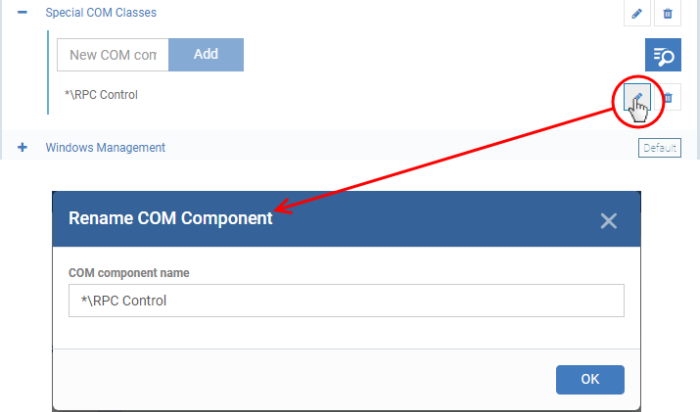
Click the pencil icon beside the class name to edit a class in the group
-
Edit the entry and click 'OK' to save your changes
-
Click the trash can icon beside the COM component name to remove the COM class added by mistake or an unwanted class
Edit the name of a COM Group
-
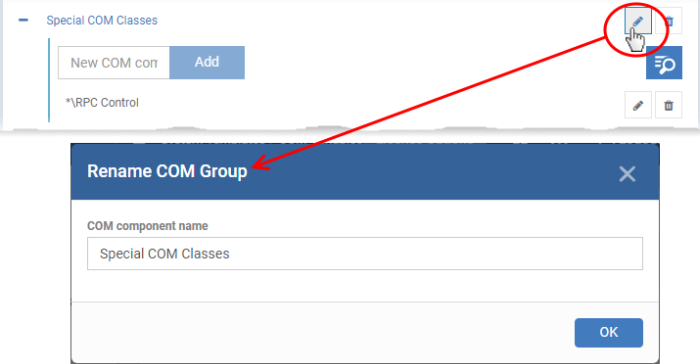
Click the pencil icon beside the COM Group
-
Enter the new name for the group in the Rename COM Group dialog and click 'OK'
Remove a COM Group
-
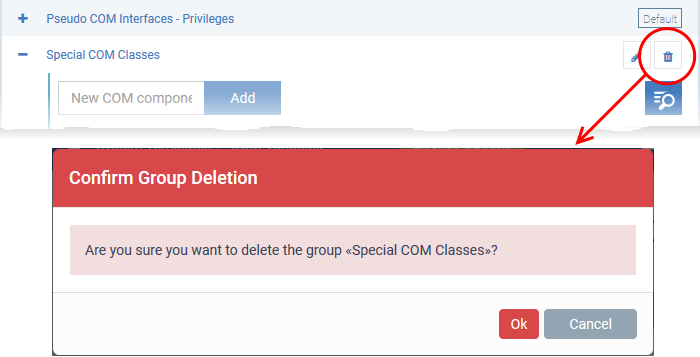
Click the Trash can icon beside the COM Group
