


Endpoint Security Status
- Click 'Security' > 'Endpoint Security Status' to open this area.
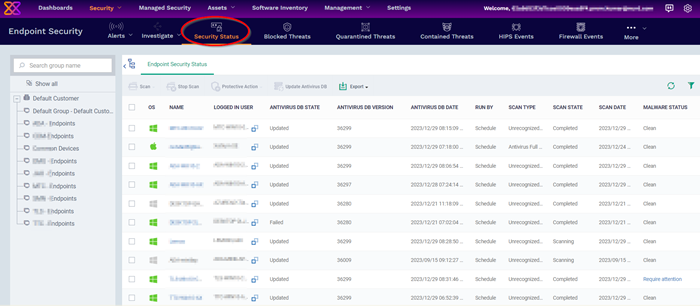
The 'Endpoint Security Status' screen displays the infection status of Android, Mac OS, Windows and Linux devices. From here you can:
- Run on-demand antivirus scans on selected devices
- Run file rating scans on Windows devices
- Choose the action to be taken on malware discovered by scans.
- Update the AV database on endpoints
Note: You can run virus scans on specific areas of a device and setup ongoing, scheduled scans. These tasks are configured in the 'Antivirus' section of the device's configuration profile. See:
|
Open the 'Endpoint Security Status':
- Click 'Security' > 'Endpoint Security Status'
- Select a company and group on the left to view all devices in it
Or
- Select 'Show All' to view all devices enrolled to EM
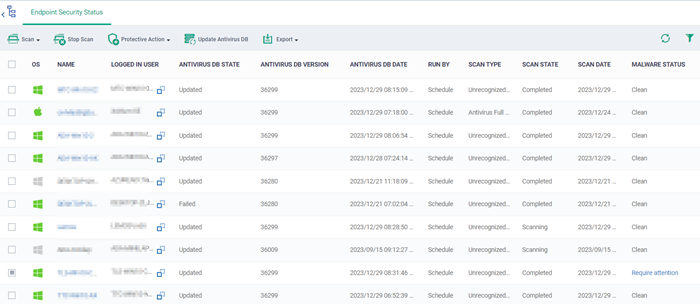
The list shows all Android, Windows, Mac OS and Linux devices along with their last scan details, infection status and antivirus database update state.
| Endpoint Security Status - Column Description | |
| Column Heading | Description |
| OS | The Operating system of the device. |
| Name | The label of the device on which the threat was found.
|
| Logged in User | The name of the user currently signed-in to the device.
|
| Antivirus DB State | The current update status of virus signature database on the device. |
| Antivirus DB Version | The version number of the virus signature database on the device. |
| Antivirus DB Date | The date and time at which the AV database was last updated. |
| Run by | The source that initiated the last scan. An antivirus scan or a file rating scan can be initiated in the following ways:
|
| Scan Type | Indicates the kind of the last scan ran on the device. The possible types of scan are:
|
| Scan State | Status of the last scan run on the device. Possible states are:
|
| Scan Date | The date and time at which the last scan was run. |
| Malware Status | The infection status of the device.
|
| Controls | |
| Scan | Run a manual scan on selected devices. See Run Antivirus and/or File Rating Scans on devices for more details. |
| Terminate any type of on-going scans on selected devices. This includes on-demand scans run from the EM console, scheduled scans run by the security profiles active on the device and any on-demand scan run by the local user from the Xcitium Client Security (XCS) application on the device. See Run Antivirus and/or File Rating Scans on devices for more details. |
|
| Protective Action | Remove, quarantine or ignore threats found on infected devices. See Handle Malware on Scanned Devices for more details. |
| Update Antivirus DB | Manually run a virus signature update on selected devices. See Update virus signature database on Windows, Mac OS and Linux Devices for more details. |
| Export | Save the device list, including current status as a .csv file. The exported .csv is available in 'Dashboard' > 'Reports'. See Export the List of Devices for more details. |
The 'Security' > 'Endpoint Security Status' interface allows you to:
Sorting, Search and Filter Options
- Click any column header except 'Antivirus DB version' to sort items in ascending/descending order of the column header.
- Click the funnel icon
 on the right to filter items by various criteria.
- Start typing or select the search criteria in the search field to find a particular item and click 'Apply'.
- To display all items again, clear any filters and search criteria and click 'Apply'.
- By default EM returns 20 results per page when you perform a search. Click the arrow next to the 'Results per page' drop-down to increase results up to a maximum of 200.
- Use the left and right arrows and the page numbers to navigate to the page you want to view.
Export endpoint security status records as a CSV file
- Click 'Security' > 'Endpoint Security Status'
- Click the funnel icon to filter which records are included in the report.
- Click the 'Export' button and choose 'Export to CSV':
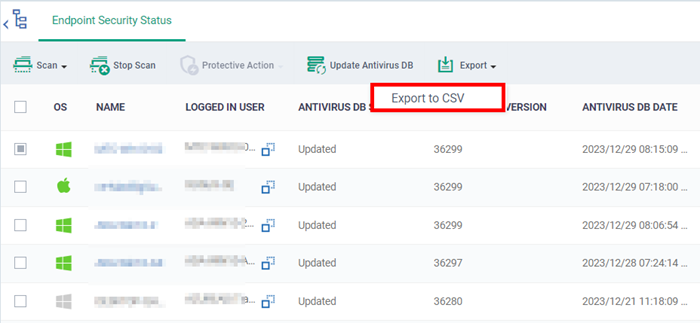
- The .csv file will be available in 'Dashboard' > 'Reports'
- See Reports in The Dashboard for more details.