


SSLVPN Client
The firewall can be configured to create secure tunnels to other SSL VPN servers and/or other DCF accounts to serve as a gateway for the local network infrastructure. Each tunnel is constructed as a client to connect to different servers through Gw2Gw setup.
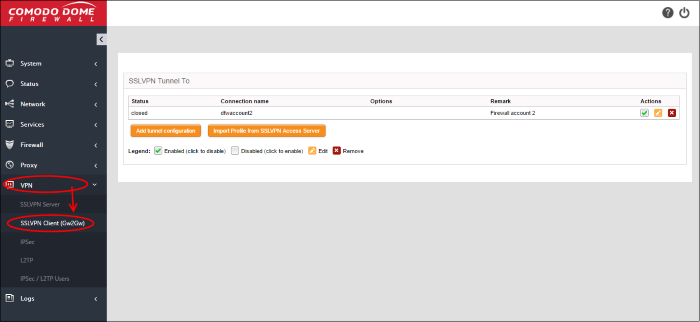
The 'SSLVPN Client' interface displays a list of VPN client connections and allows admins to create new tunnels.
To open the 'SSLVPN Client' interface, click 'VPN' > 'SSLVPN Client (Gw2Gw)' on the left menu:
|
SSL VPN Clients table - Column Descriptions |
|
|---|---|
|
Column |
Description |
|
Status |
Indicates the connection status of the tunnel. The possible values are:
|
|
Connection name |
The name given to the connection for identification. |
|
Options |
Additional connection options, if any, specified during creation of the tunnel. |
|
Remark |
A short description of the tunnel. |
|
Actions |
Displays control buttons for enabling, editing and deleting the tunnel.
|
 - The checkbox allows the administrator to
switch the connection between enabled and disabled states.
- The checkbox allows the administrator to
switch the connection between enabled and disabled states. - Removes the tunnel configuration.
New tunnel configurations, and hence connections to different OpenVPN servers, can be configured in two ways:
Creating a New Tunnel Configuration
A tunnel to connect to an external SSL VPN server can be added by simply specifying its hostname, uploading its server certificate and entering its access credentials. The configuration interface also allows the administrator to specify advanced tunnel configuration parameters like fallback servers, device/connection types and so on.
|
Prerequisite - The server certificate of the external SSL VPN server needs to be exported as a PKCS#12 certificate and stored locally in the computer from which the DCF administrative console is accessed. |
To add a new tunnel configuration
- Click 'Add tunnel configuration'. The 'Add VPN tunnel' interface will open.
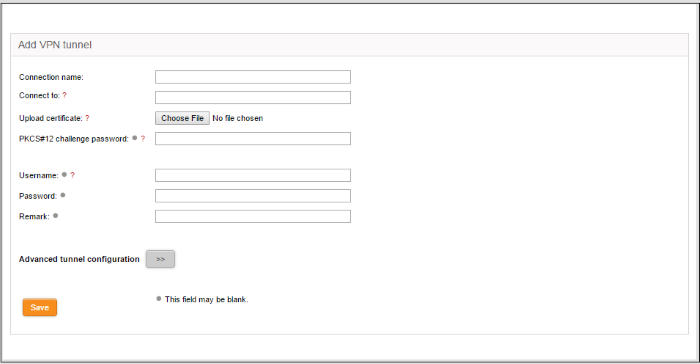
- Connection name – Enter a name to identify the tunnel
- Connect to – Enter the host name or IP address of the external SSL VPN server in the following format:
[hostname (in FQDN format)]:port:protocol or [IP address]:port:protocol
Specify the protocol in lowercase letters. If the default protocol UDP is used, you need not specify the protocol
- Upload certificate - The server certificate of the external VPN server needs to be imported into the client.
- If the external VPN server uses PSK type authentication, then the server's host certificate needs to be uploaded to the client
- If the external server uses client certificate type authentication, then the client certificate for your user account, obtained from the external CA needs to be uploaded
- Click 'Choose File' beside the 'Upload Certificate' and navigate to the location of the certificate stored in the local computer or the network and click 'Open'.
- PKCS#12 challenge password - Enter the challenge password to access the certificate in the 'Challenge password' text box.
- Username/Password - If the external VPN server requires the username and password of your user account to be entered to connect to it, enter the username and password.
- Remark - Enter a short description for the tunnel.
- If you wish to configure advanced configuration parameters for the tunnel, click the '>>' button beside the 'Advanced tunnel configuration'. Else click 'Save'. The SSL VPN client will be restarted and a new connection will be established to the server specified.
Advanced Tunnel Configuration
Clicking the '>>' button will open the 'Advanced tunnel configuration' pane.
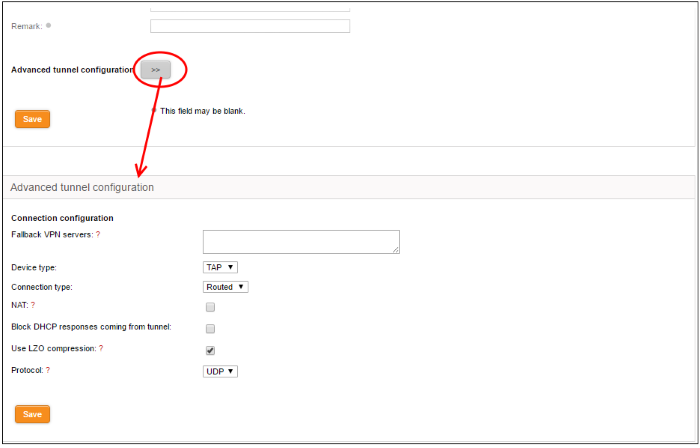
- Fallback VPN Servers – If any fallback servers are setup for the primary VPN server, specify the fallback servers in the same format used for the primary server.
- Device type – Choose the type of the virtual-network kernel device used by the server. The choice available are TUN and TAP.
- Connection type – Choose the connection type if TAP network device is used. The options available are 'Routed' and 'Bridged'.
- NAT – If the connection type is 'Routed', choose whether are not Network Address Translation (NAT) is to be applied. If applied, the host computers connected through this gateway client will be hidden behind the firewall’s VPN IP address. This configuration will prevent incoming connections requests to the hosts.
- Bridge to – If the connection type is 'Bridged', choose the internal network zone to which the connection is to be bridged.
- Block DHCP responses coming from tunnel - Select this option, if you wish to block the DHCP responses from the network at the other side of the VPN tunnel that conflict with the local DHCP server.
- Use LZO compression - Select this option, if wish to apply lossless and high speed Lempel-Ziv-Oberhumer (LZO) data compression to the traffic passing through the tunnel. The LZO compression reduces the load on the tunnel.
- Protocol – Choose the protocol used by the external EasyVPN server. The default protocol is UDP. If the UTM Appliance can access the Internet only through an upstream HTTP proxy then choose TCP and ensure that the external server also uses TCP protocol. Enter the HTTP Proxy parameters on choosing TCP.

- HTTP proxy – specify the HTTP Proxy server in the same format used for the primary server.
- Proxy username / Proxy password – Enter the username/password to access the proxy server
- Forge proxy user-agent – Enter the user agent string to be used by the UTM appliance to identify itself as a browser to the proxy server, This is optional, and useful if the proxy accepts connections only for some type of browsers.
- Click 'Save'.
The new advanced parameters for the tunnel configuration will be saved.
Importing the Configuration from the OpenVPN Server
If the client configuration profile is available from the external VPN server for automatic configuration of the client, then the simplest way of creating a new tunnel is by directly importing the configuration from the server. Upon successful import of the configuration profile from the server, a new tunnel will be automatically created for connection to the external server.
To import the configuration profile
- Click 'Import profile from SSLVPN Access Server' from the SSLVPN Client interface. The 'Import VPN tunnel from SSLVPN Access Server' pane will open
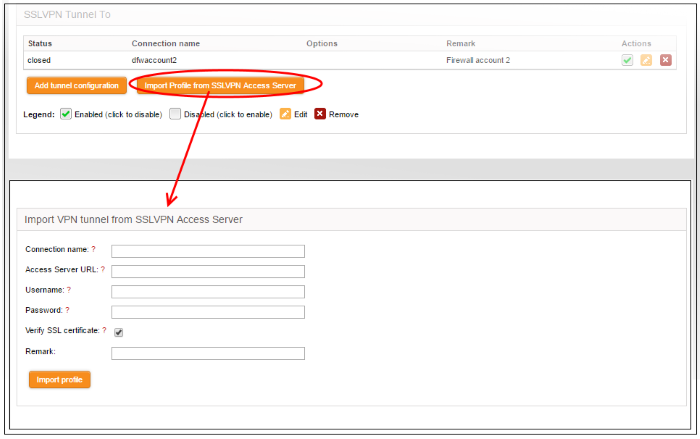
- Connection name - Enter a name to identify the tunnel
- Access Server URL – Enter the URL of the external SSLVPN server with the Remote Procedure Call (RPC) configuration
- Username / Password - Enter the username and password of your user account at the server
- Verify SSL certificate – If the server runs on SSL encrypted channel, select this option. The client will check for the valid SSL certificate at the server in order to establish the connection. If the server is implemented with a self-signed certificate, do not select this option
- Remark - Enter a short description for the tunnel
- Click 'Import Profile' after entering the details. The client will connect to the server and import the client configuration file. A new tunnel will be configured with the imported configuration profile.