Create a New Alert
There are two ways to create an alert:
Create a new alert
- Click 'Configuration Templates' > 'Alerts'
- Click 'Create Alert'
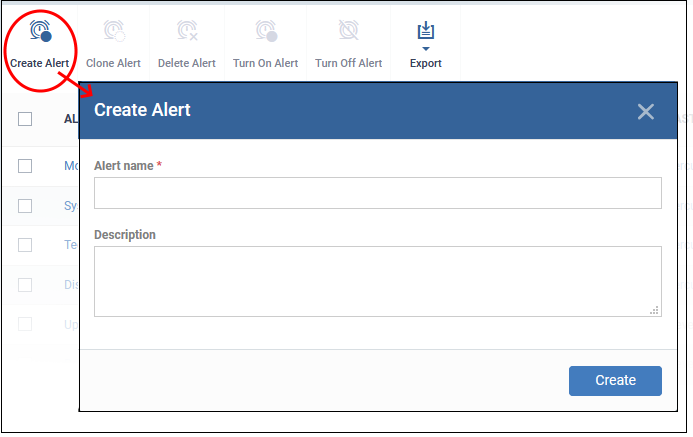
- Alert name – Enter a label for the alert
- Description – Short notes about the alert
- Click ‘Create’
The alert is saved and the configuration screen opens at the ‘General’ section:
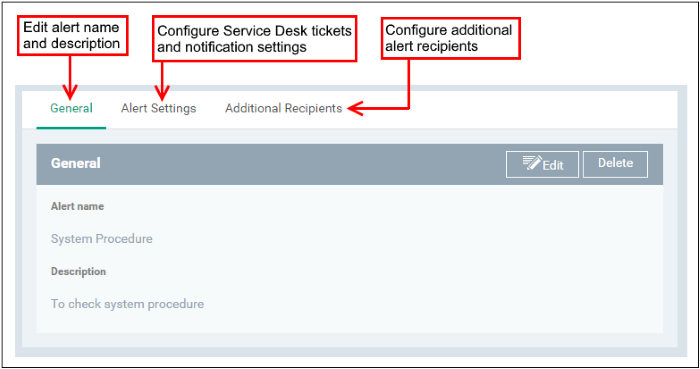
- Click 'Alert Settings' tab then 'Edit':
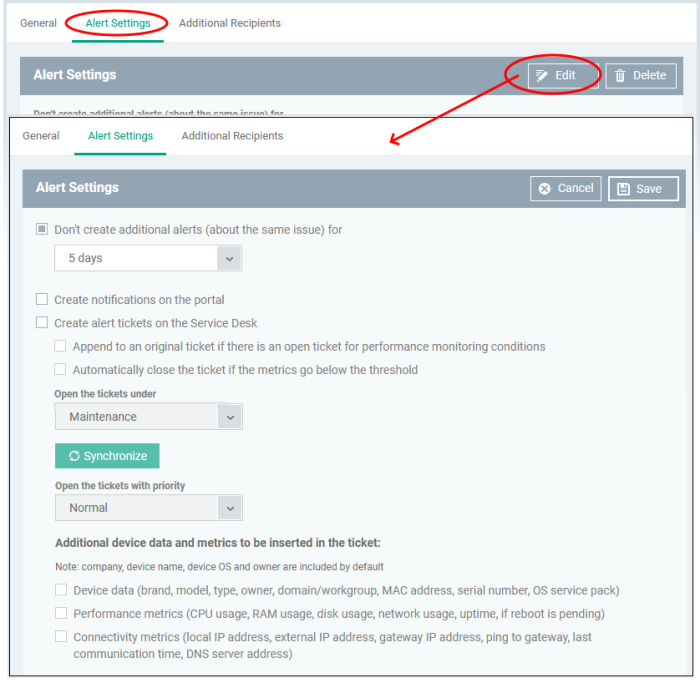
- Don't create additional alerts (about the same issue) for – Specify whether repeat alerts should be generated if the same issue occurs within the stated period. You can choose a time period between 5 minutes and 5 days.
- Create notifications on the portal – The alert is also shown in the Notifications screen.
- Create alert tickets on the Service Desk - If enabled, a support ticket is automatically created in Service Desk in response to the alert. You can choose the department to which the ticket is assigned.
- Append to an original ticket if there is an open ticket for performance monitoring conditions – Enable to add the alert information to an existing ticket, if one exists for the same issue. If disabled, a new ticket is created for every alert.
- Automatically close the ticket if the metrics go below the threshold – Enable to auto-close the ticket if the monitored condition reverts back to acceptable levels. For example, if an alert is created because disk usage goes above 90%, the ticket will be auto-closed should disk usage fall back below 90%.
- Open the tickets under - Select the Service Desk department to which you want to assign the tickets.
The drop-down shows all departments in Service Desk.Click the 'Synchronize' button to instantly import any new departments created in Service Desk.
- Open the tickets with priority – Select the ticket priority - normal, high or critical.
- Additional device data and metrics to be inserted in the ticket - By default, the name of the company, device type, device OS and the owner information are included in the ticket. To add additional device data and metrics to the ticket, select the respective options.
- Device Data - Adds device information like brand, model. IP address and so on
- Performance Metrics - Adds device performance information like CPU usage, RAM usage, disk usage, network usage and more
- Connectivity Metrics - Adds information on network to which the device is connected, like local IP address, external IP address, gateway IP address and more.
- Click 'Save'.
- Click 'Additional Recipients' then 'Edit' to choose additional recipients of alert emails:
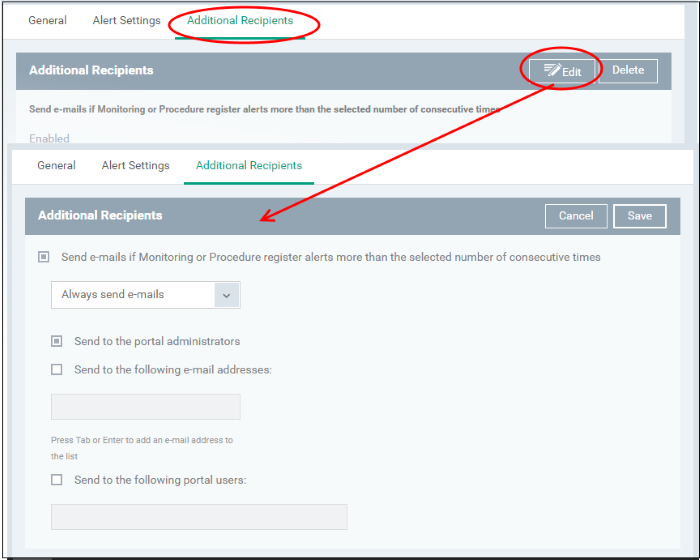
- Send e-mails if Monitoring or Procedure register alerts more than the selected number of consecutive times - Choose when email alerts should be sent about an issue. For example, if you select 5 from the drop-down, email alerts are only sent if the same issue occurs 5 times.
- Send to the portal administrators - Emails are sent to all users that have an 'Administrator' role.
- Send to the following e-mail addresses - Add additional recipients of the alert. You can add multiple recipients. Press either 'Tab' or 'Enter' between email addresses.
- Send to the following portal users - Add recipients who have a ‘User’ role. Start typing the username and select from the suggestions. You can add multiple users.
- Click
'Save' to apply your changes. The alerts will be available for
selection in the Procedure section and while configuring Monitor
Settings for a Windows profile.
Create an alert by cloning an existing alert
- Click 'Configuration Templates' > 'Alerts'
- Select the alert you want to clone
- Click 'Clone Alert' at the top:
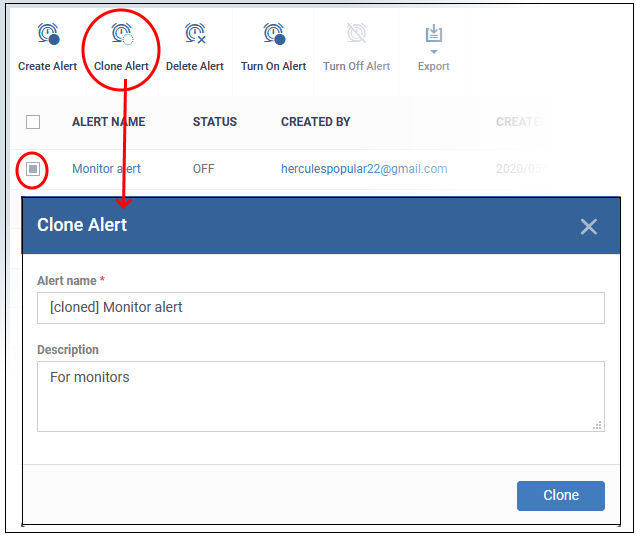
- If required, enter a new name for the alert and a short description
- Click 'Clone'
A new alert is created with settings identical to the source alert.
- Click the name of the cloned alert
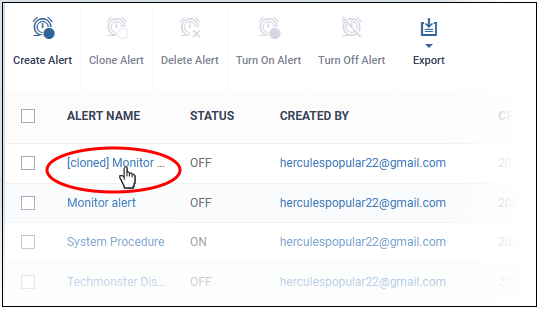
- Edit the alert settings as required. The section above explains all settings, if you need help with them.
- Click 'Save' to apply your changes


