DLP Quarantined Files
Click 'Security' > 'Data Loss Prevention' > ‘Quarantined Files’
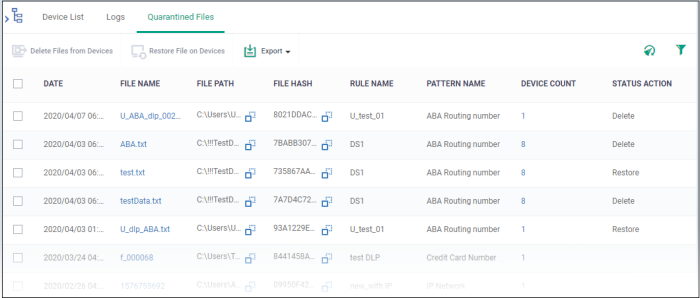
The DLP quarantined files screen shows files that were quarantined on endpoints by a discovery rule.
- Click 'Security' > 'Data Loss Prevention'
- Click the 'Quarantined Files' tab

|
Column Heading |
Description |
|---|---|
|
Date |
The date and time the file was quarantined |
|
File Name |
The file in which sensitive data was found.
|
|
File Path |
The location of the file on the device.
|
|
File Hash |
The SHA1 hash value of the executable file.
|
|
Rule Name |
The discovery rule that quarantined the file. |
|
Pattern Name |
The data format that the rule searched for. For example, an ‘ABA routing number’ is a nine digit code. |
|
Device Count |
Number of devices on which the file was quarantined. Click the number to view the device details. |
|
Status Action |
The admin’s response to the quarantined file. It can be deleted, restored or none. |
|
Controls |
|
|
Delete Files from Devices |
Remove files from the endpoints. Select file(s) and click this link above. |
|
Restore File on Devices |
Move files to original locations on the endpoints. Select file(s) and click this link above. |
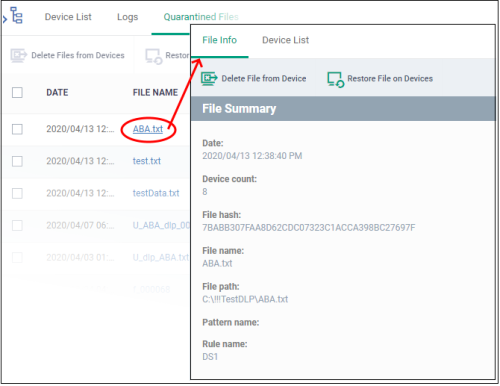
- Click the file name to view its details:

The details of the file such as its name, date quarantined and more are shown.
- Delete File from Device - Remove the file from the endpoint
- Restore File on Devices - Move the file from quarantine back to its original location
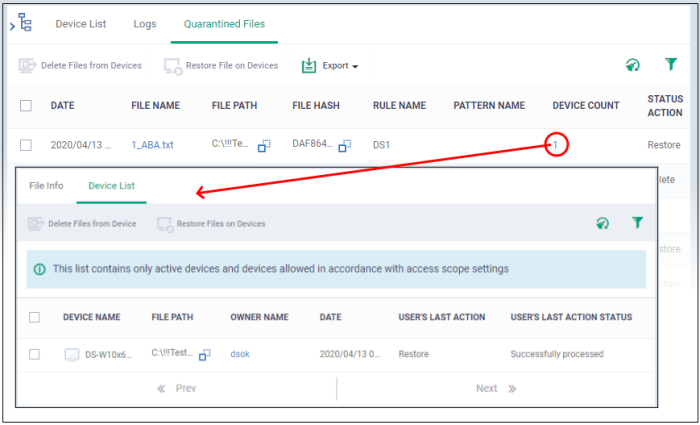
- ‘Device List’ tab - Shows endpoints on which the file was quarantined.See below for more.
- Click the device number to view its details:

- Device Name - The name of the endpoint. Click the name to view its full details.
- File Path - The original location of the quarantined file.
- Owner Name - Logged in user name.
- Date - Date and time the file was quarantined.
- User’s Last Action - The response to the quarantined item by the admin.
- User’s Last Action Status - The success or failure of the response.
Export DLP quarantined files list
- Click 'Security ' > 'Data Loss Prevention'
- Click the 'Quarantined Files' tab.
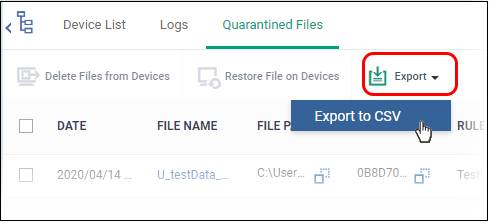
- Click the 'Export' button above the table then choose 'Export to CSV':

- The CSV file will be available in 'Dashboard' > 'Reports'
- See Reports in The Dashboard for more details.


