Create a Custom Procedure
Endpoint Manager lets you create custom script/patch procedures to achieve specific tasks. Click the following links to find out more:
Create a custom Windows / Mac OS script procedure
- Click 'Configuration Templates' > 'Procedures' > 'Create' > 'Create Windows Script Procedure' or ‘Create macOS Script Procedure’
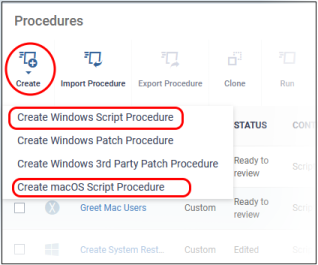
The process to create script procedure for Windows and Mac OS is the same. Windows script procedure creation is explained below.
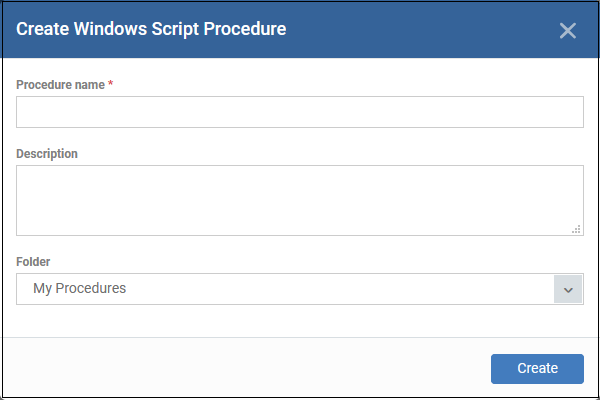
- Procedure name - Create a label which describes the purpose of the procedure.
- Description - Add background comments and notes about the procedure.
- Folder - Specify where it should be saved
Click ‘Create’.
- You are taken to the procedure configuration screen:
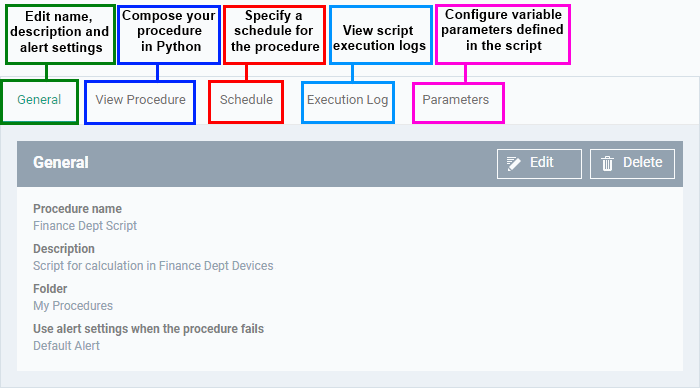
- Click 'Edit' to modify the basic settings:
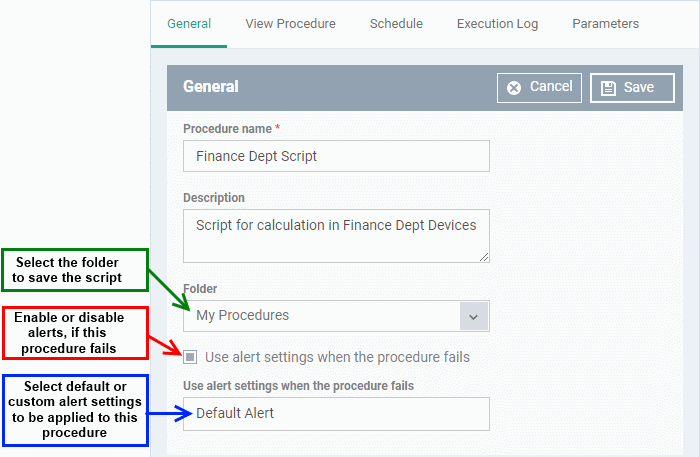
- Default Alert - You can view the settings of the default alert in 'Configuration Templates' > 'Alerts'. You can create custom alert settings if required from this interface. Make sure the alert is active to receive notifications.
- Click 'Save' to apply your settings.
- Click the 'View Procedure' tab followed by 'Edit' to define a Python script for your procedure. The built-in text editor lets you to compose your script:
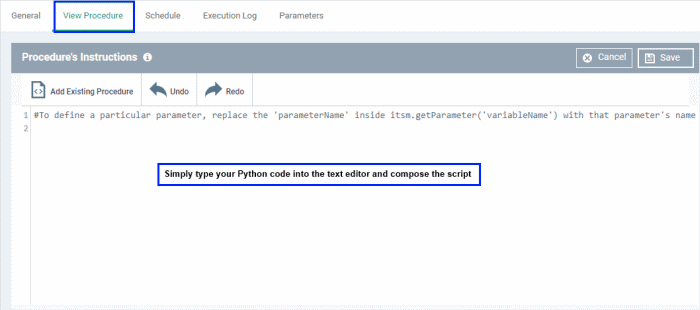
- You can include variable whose values are populated when the procedure runs.
- To define variable parameters in the script:
- Click the 'View Procedure' tab followed by 'Edit'
- In the text editor, type the parameter name and enter the value as itsm.getParameter('parameter name'). Examples:
- Age = itsm.getParameter('age')
- Year = itsm.getParameter('year')
- The variables will become available in the 'Parameters' tab. You can define the type, label and default values for them. An example is shown below:
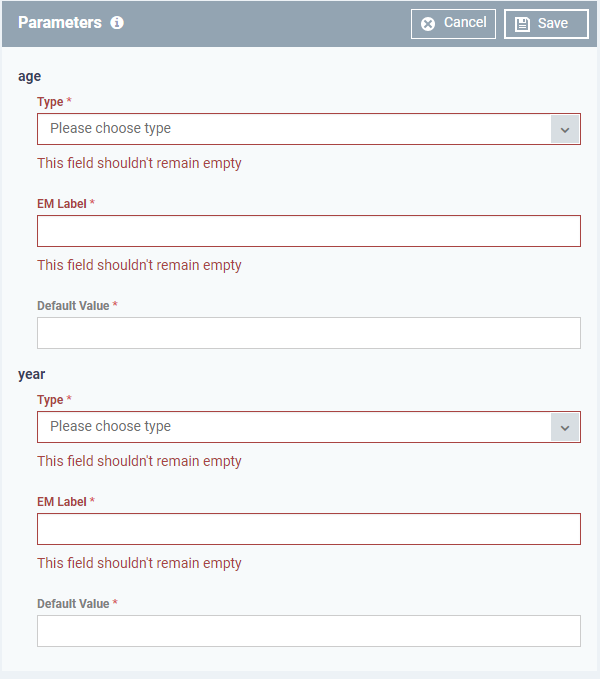
Configure the following for each parameter:
- Type - Choose the category of variable. The supported types are:
- Integer
- Double
- String
- List
- EM Label - Enter a name for the variable
- Default Value – Enter a value for the parameter to be taken when no value is input during run-time
- Click
'Save' to save the script.
- After saving your script you need to approve it before it can be deployed in a profile.
- You can create a schedule for a procedure when you add it to a profile. See Add a Procedure to a Profile / Procedure Schedules for more details.
-
The execution log will get populated after the procedure has successfully run on end-points. You can view the history of execution of this procedure at anytime by selecting this procedure from the Procedures interface and clicking the 'Execution Log' tab.
- Note 1. Comodo runs a free script library at https://scripts.comodo.com/ which contains Python scripts covering a wide range of tasks. Feel free to try any script that fits your needs. You can also use this site to request a new script for a particular task you think will be useful. You can contribute your own scripts to the MSP forum at https://forum.mspconsortium.com/forum/script-library.
- Note 2. You can also use the Import and Clone features if you wish to create a new procedure using an existing procedure as a starting point
Create a custom Windows patch procedure
Windows only.
- Click 'Configuration Templates' > 'Procedures' > 'Create' > 'Create Patch Procedure'
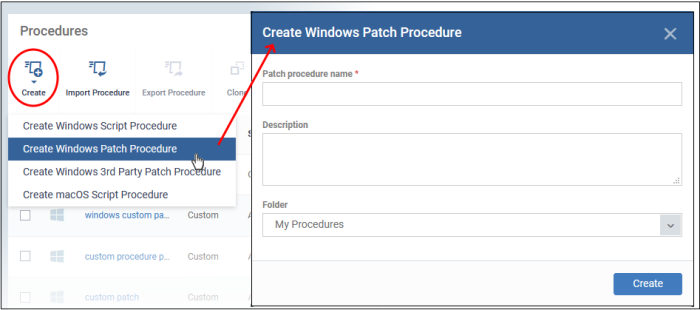
- Enter a name and description and specify the folder where it should be saved. If required, you can create new sub-folders under 'My Procedures' in the 'Procedures' area.
- Click ‘Create’ to open the configuration screen:
Procedure Configuration
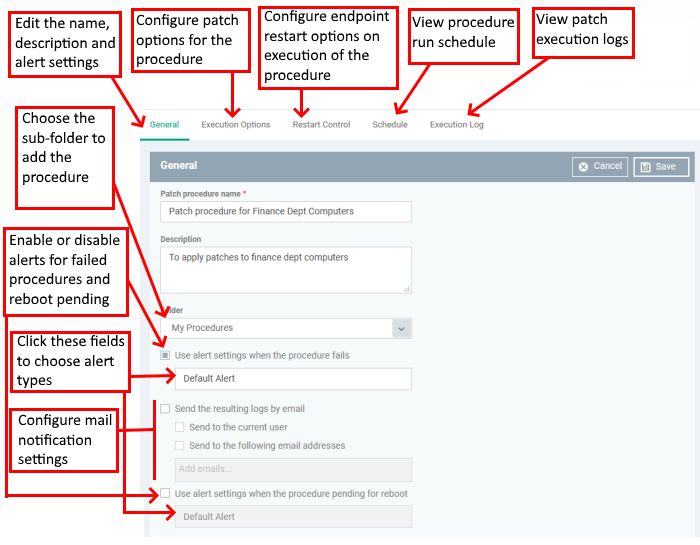
- To configure patch options for your procedure, click the 'Execution Options' tab followed by the 'Edit' button. You can select the Microsoft software updates required for the procedure from the options.
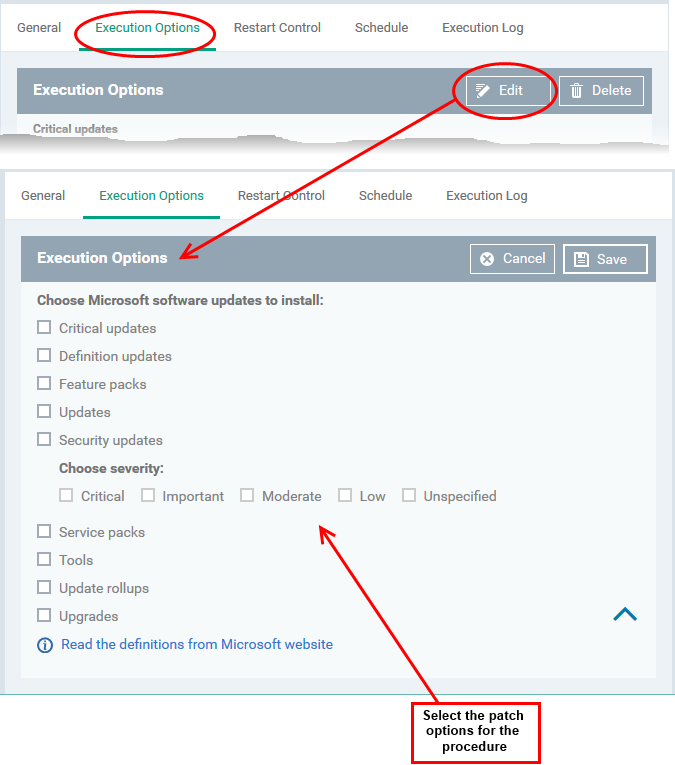
- Click the link 'Read the definitions from Microsoft website' link to view patch details
- Choose which types of patch the procedure should install and click 'Save'
- Click the 'Restart Control' tab followed by the 'Edit' button to configure restart options for the endpoint after the procedure has run successfully.
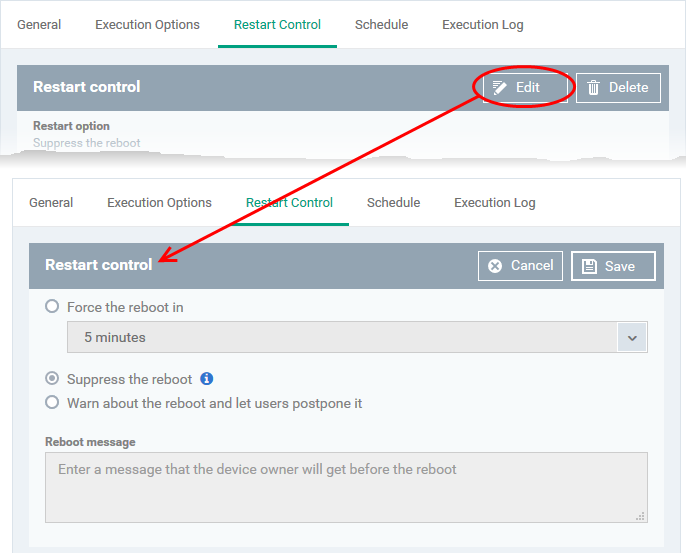
- You can choose to:
- Continue the operation of the endpoint without restart by selecting 'Suppress the reboot'
- Force restart the endpoint a certain period of time after the procedure has completed.
OR
- Display a warning to the user and let them postpone the restart. Type a message for the user if you choose this option.
- The 'Schedule' tab will be auto-populated once you add the procedure to a configuration profile and schedule its execution. See Add a Procedure to a Profile / Procedure Schedules for more details.
- The 'Execution Log' will be auto-populated after the procedure has been successful executed as part of a profile. You can view a history of executions at anytime by selecting this procedure in the 'Procedures' interface and clicking the 'Execution Log' tab.
- After saving, your patch procedure will be automatically approved, added to the 'Procedures' list and can be deployed in a profile.
|
Important Note: Patches that are hidden by administrators will not be executed. See 'Manage OS Patches on Windows Endpoints' for more details. |
Create a custom 3rdparty patch procedure
- Click 'Configuration Templates' > 'Procedures' > 'Create' > 'Create Windows 3rd Party Patch Procedure'
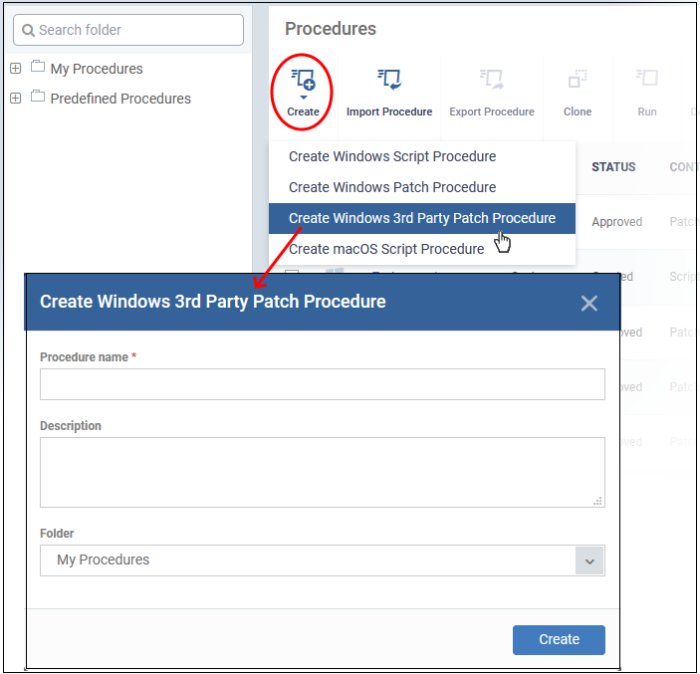
- Enter a name and description for your procedure and specify the folder in which you want to save it.
- Click ‘Create’ to open the procedure configuration screen:
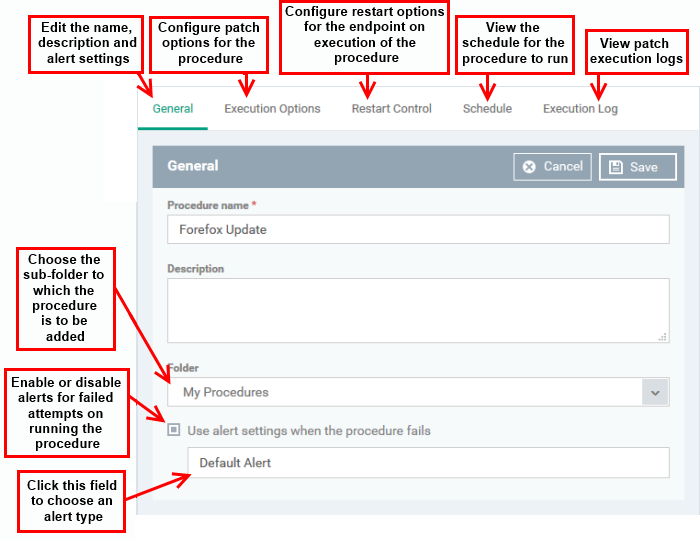
- To configure patch options for your procedure, click the 'Execution Options' tab followed by the 'Edit' button. You can select the applications to be updated from the options.
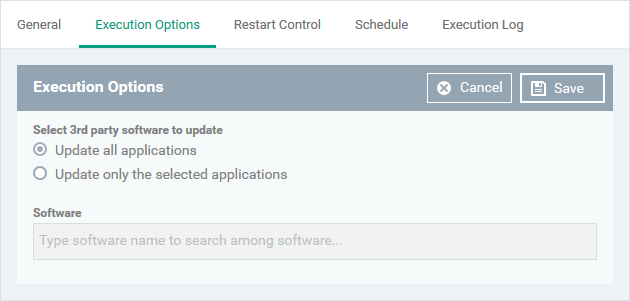
- Select 3rd party software to update - Allows you to choose whether all upgradable applications identified at the endpoint to be updated or only specific application(s) is/are to be updated.
- Update all applications - Select this option if you want all outdated applications in the endpoint to be updated on running the procedure
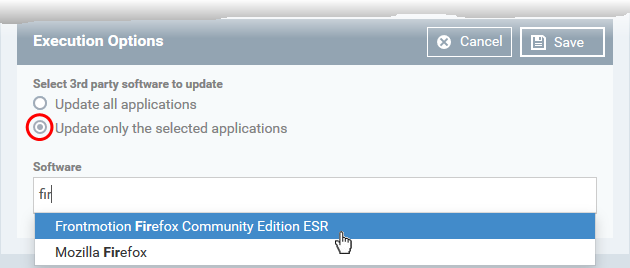
- Update only the selected applications - Select this option if you want only specified applications are to be updated on the endpoint, then specify the applications to be updated.
- Start entering the first few characters of the application. The upgradable applications identified from all managed endpoints and matching the search criteria will be displayed as options
- Select the application from the list
- Click 'Save'
- Click the 'Restart Control' tab followed by the 'Edit' button to configure restart options for the endpoint after the procedure has run successfully.

- You can choose to:
- Continue the operation of the endpoint without restart by selecting 'Suppress the reboot'
- Force restart the endpoint a certain period of time after the procedure has completed.
OR
- Display a warning to the user and let them postpone the restart. Type a message for the user if you choose this option.
- The 'Schedule' tab will be auto-populated once you add the procedure to a configuration profile and schedule its execution. See Add a Procedure to a Profile / Procedure Schedules for more details.
- The 'Execution Log' will be auto-populated after the procedure has been successful executed as part of a profile. You can view a history of executions at anytime by selecting this procedure in the 'Procedures' interface and clicking the 'Execution Log' tab.
- After saving, your patch procedure will be automatically approved, added to the 'Procedures' list and can be deployed in a profile.


