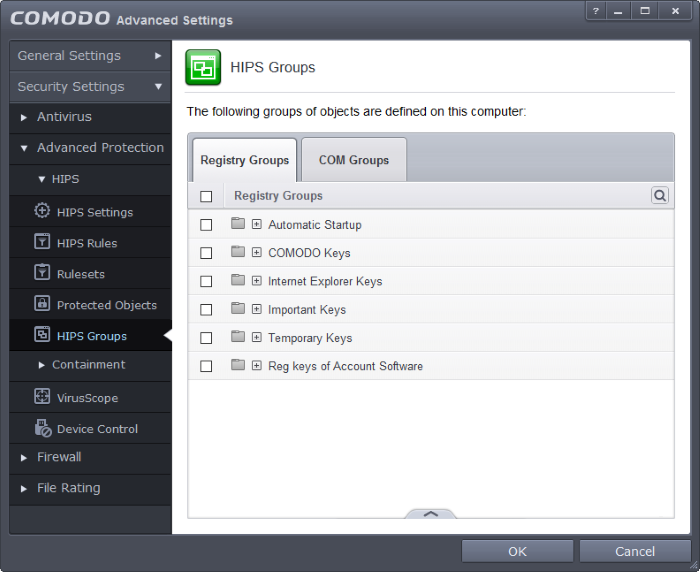
Registry Groups
Registry groups are predefined batches of one or more registry keys. Creating a registry group allows you to quickly add it to Registry Protection list.
To open the Manage Registry Groups interface
- In the Advanced Settings screen, click Security Settings > Advanced Protection > HIPS > HIPS Groups and select the Registry Groups tab.

This interface allows you to
- To add a new group or add key(s) to an existing group, click the handle from the bottom and click 'Add'.

-
Add a new group - Select 'New Group' from the 'Add' drop-down, enter a name for the group in the 'Edit property' dialog and click 'OK'

-
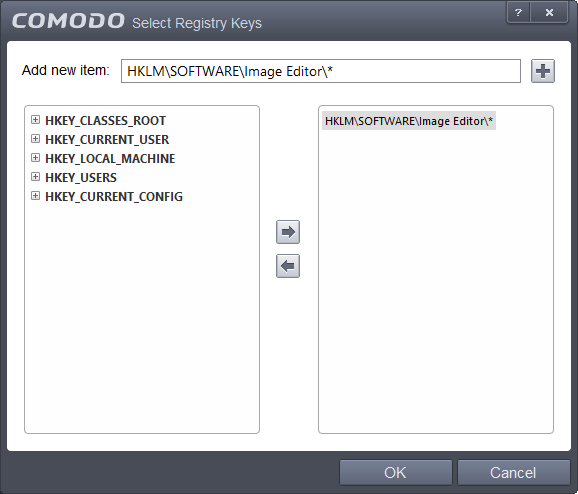
Add keys to a group - Select the Group, click the handle and click Add and choose 'Registry Keys'. The 'Select Registry Keys' dialog will be opened.
You can add items by browsing the registry tree in the right hand pane, selecting the key and moving it to right hand side pane by clicking the right arrow button. To add item manually enter its name in the 'Add new item' field and press the '+' button.
-
To edit an existing group, select the group, click the handle and choose Edit. Edit the name of the group in the 'Edit Property' dialog

- You can add items by browsing the registry tree in the right hand pane, selecting the key and moving it to right hand side pane by clicking the right arrow button. To add item manually enter its name in the 'Add new item' field and press the '+' button.
-
To edit an existing group, select the group, click the handle and choose Edit. Edit the name of the group in the Edit Property dialog

-
To remove a group, select the group, click the handle and choose 'Remove'.
-
To remove an individual file from a group, click + at the left of the group to expand the group, select the key or entry to be removed, click the handle and choose 'Remove'.


