Windows - Enable Comodo Secure DNS
You can manually enable Comodo Secure DNS by changing your DNS server addresses to:
- Preferred DNS : 8.26.56.26
- Alternate DNS : 8.20.247.20
Enable Comodo Secure DNS
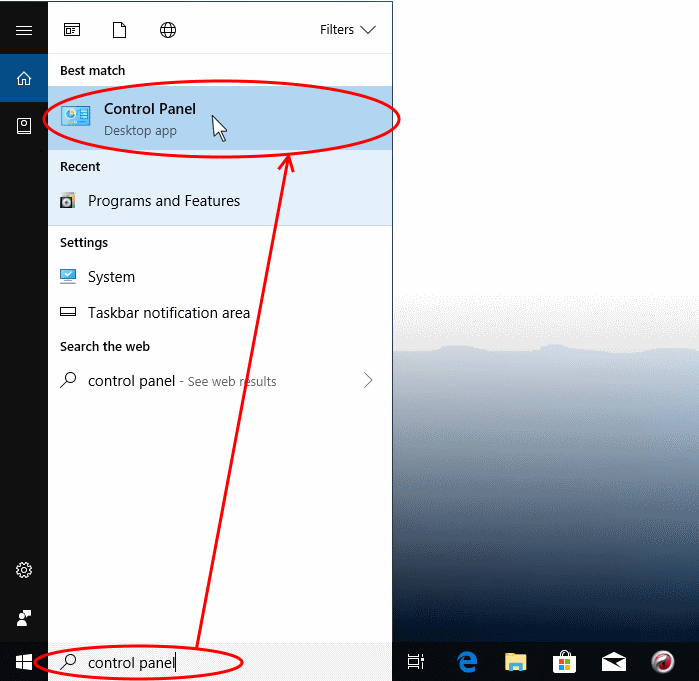
1. Click the Windows 'Start' menu
2. Type 'control panel' into the search box then click the program name:
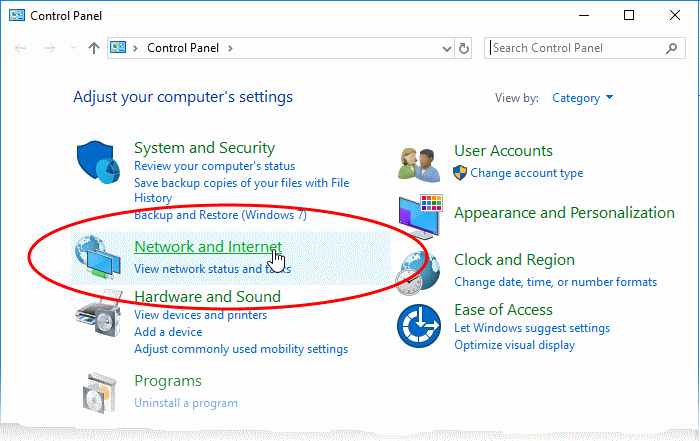
3. Select 'Network and Internet' from the control panel menu:
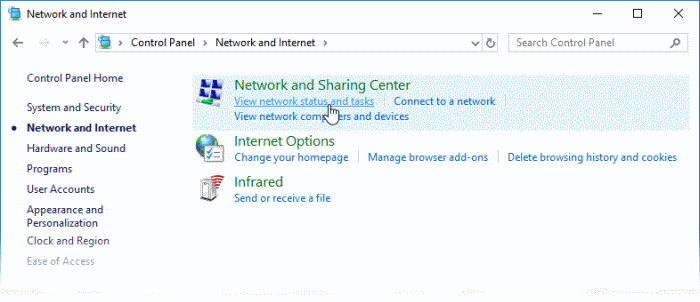
4. Select 'View network status and tasks' under Network and Sharing Center' as shown below:
The list of networks to which you are currently connected is shown.
5. Click the network type link in the network through which you are connected to internet:
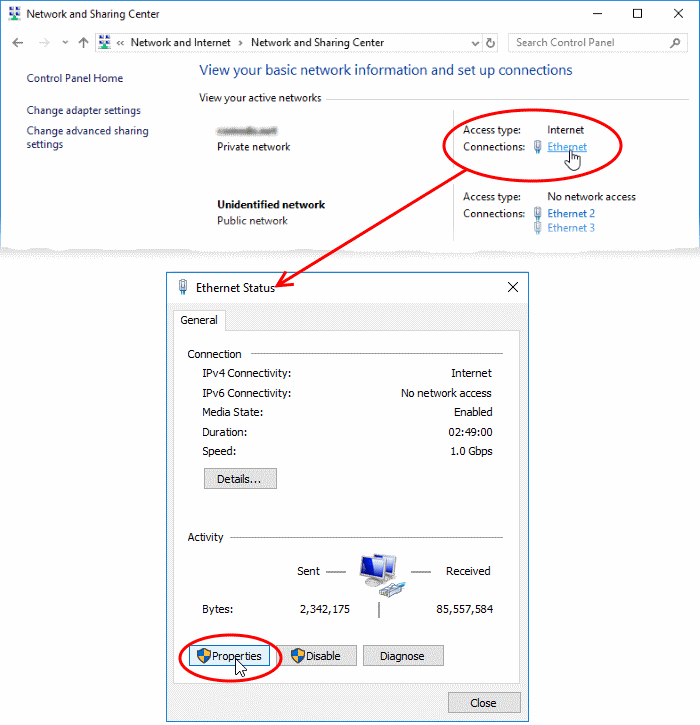
This opens the 'Status' dialog for the selected connection.
6. Click 'Properties' in the status dialog
- At this point, Windows might ask for your permission to continue or request that you enter an administrator password
- Once you have granted permission/entered an admin password, the 'Connection Properties' dialog appears:
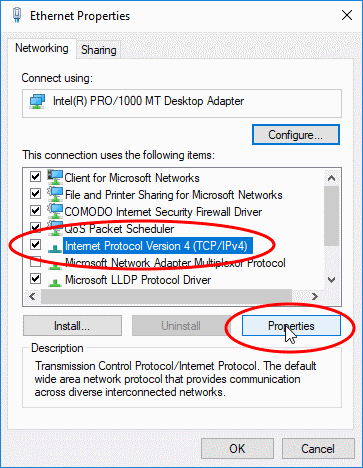
7. Scroll down the list and select 'Internet Protocol Version 4 (TCP/IP)' then click the 'Properties' button as shown above.
8. Enable 'Use the following DNS server addresses'.
9. Enter the addresses listed below:
Preferred DNS : 8.26.56.26
Alternate DNS : 8.20.247.20
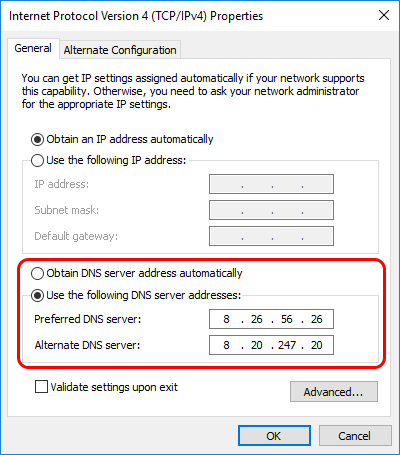
10. Click 'OK' to save your settings
11. Click 'OK' in the connection properties dialog to activate your settings
- Your computer will now use Comodo DNS as it's default domain name resolution service for all applications that connect to the internet.
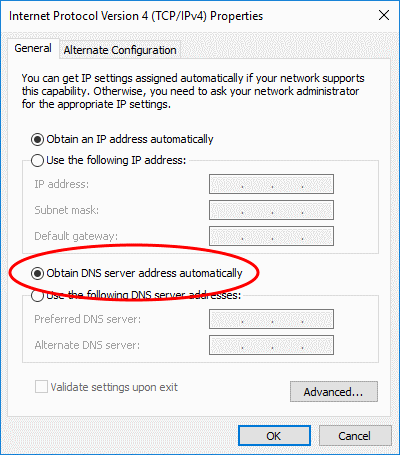
- Follow steps 1 to 7 of the 'Enable Comodo DNS' tutorial to open the IP4 properties dialog
- Enable 'Obtain DNS server address automatically' then click 'OK'.
|
Note: Alternatively, you can enter the server addresses of a different DNS service before clicking 'OK'. |


