Website Filtering Rules
- The powerful rule-configuration interface lets you create rules which are as sweeping or as granular as you require. Rules can be created on a per-user basis, allowing you to control exactly which websites certain people can or cannot visit. You can also disable or enable a rule as required at any time.
- Comodo Firewall implements rules in the order they are in this list. Should a conflict exist between individual rules, then the rules at the top takes priority. Click the 'Move Up' or 'Move Down' buttons at the top to change a rule's priority.
Open the website filtering rules section
- Click 'Settings' at the top left of the CCS home screen to open the advanced settings interface
- Click 'Website Filtering' on the left and choose the 'Rules' tab
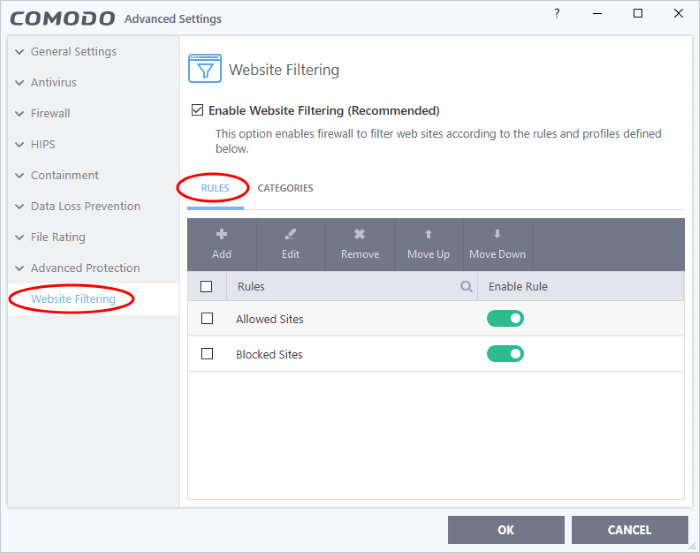
- The enable rule switch allows you to turn a rule on or off.
- The check-boxes next to a rule name let you select it for editing, deleting or re-prioritizing.
- Click the magnifying glass icon to search for a specific rule in the list.
The rules interface allows you to:
Create a new Website Filtering rule
1. Open the website filtering panel by clicking 'Settings' from the CCS home screen and then select 'Website Filtering' from the 'Advanced Settings' interface.
2. Click
the 'Add' button at the top.
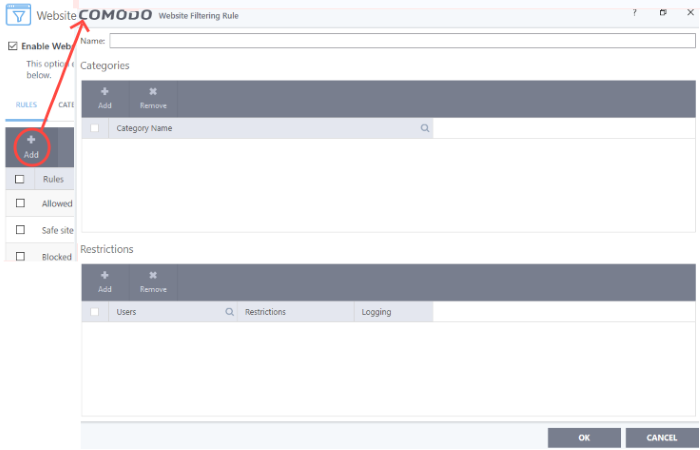
3. Enter a name for your new filter.
4. Select
the categories that should be added to the filter:
- Click the 'Add' button from the 'Category' pane
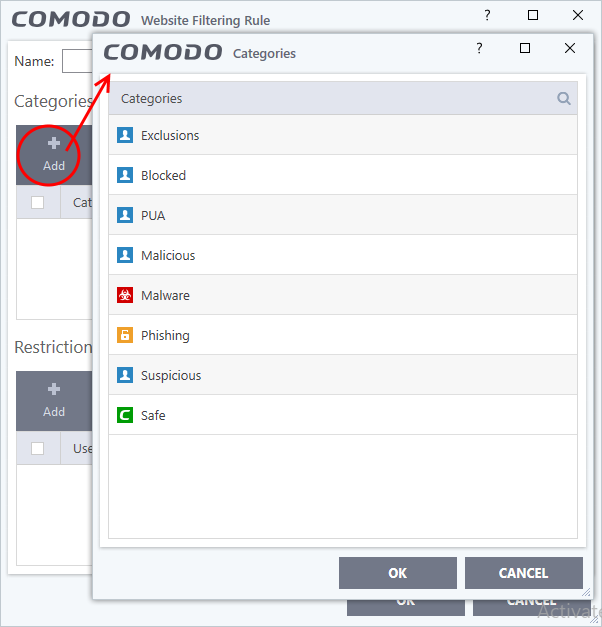
- Select a category and click 'OK' to add it to your rule. Repeat the process to add more categories.
The 'Categories' window contains a list of pre-defined Comodo categories and any user created categories. Comodo categories cannot be modified.
- Exclusions - Websites you have decided to trust and allow connections to for the current session and future sessions.
- Blocked - Websites you have decided not to trust and deny connections.
- PUA Sites - Sites that host 'Potentially Unwanted Applications' (PUA). While not strictly speaking malware, a PUA is a piece of software that has functionality that may not have been made clear to a user. An example is a browser toolbar which tells you the weather forecast, but which also tracks your online activity.
- Malicious Sites - Sites that are known to host or contain links to malware, malicious scripts or deceptive content. These are intended to cause damage to your computer or steal personal data.
- Malware Sites - The URL leads to a direct malware download. Malware is designed to damage your computer, steal sensitive information or gain unauthorized access to your system.
- Phishing Sites - Fake copies of popular banking, shopping and social media websites that intend to steal customer data.
- Suspicious Sites - Sites which have shown strong evidence of suspicious behavior but have not yet hosted content which would warrant placing them in the 'Malware' or 'Malicious' categories. Users are advised to be on high alert should they visit these sites.
- Safe Sites - Websites that are considered safe according to the global whitelist.
See Website Categories, for more details on creating and modifying user specified categories.
-
Add 'Users' or 'User Groups' to whom the rule should be applied:
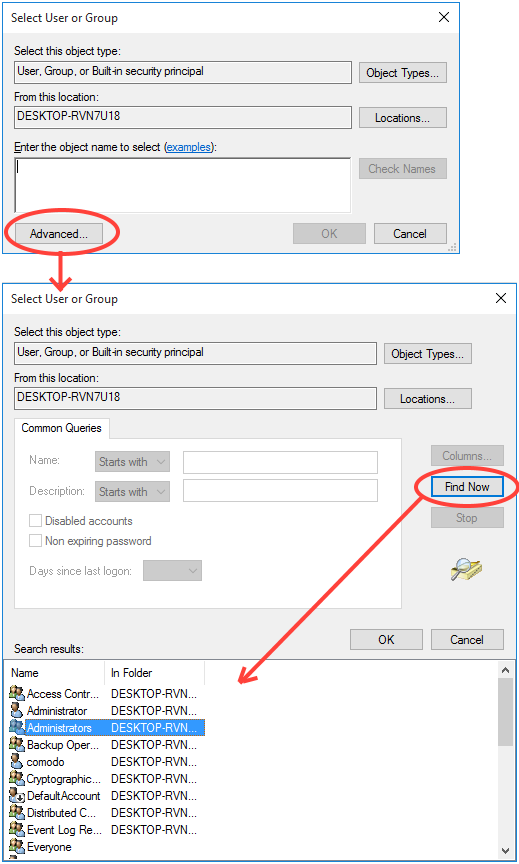
- Click the 'Add' button from the 'Restrictions' pane. The 'Select User or Group' dialog will appear:
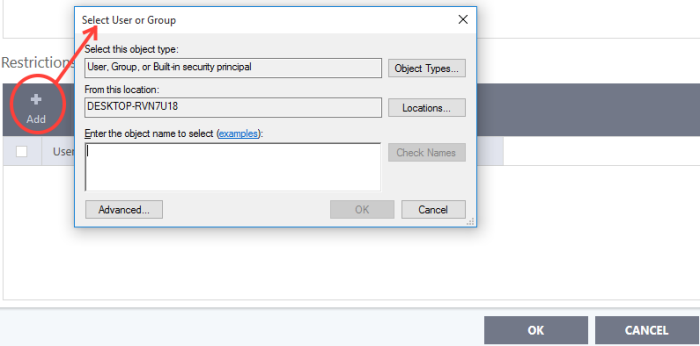
- Enter the object name to select - add users to whom the filter should be applied. Names should be in the format
[domain name]/user/group name] or [user/group name]@[domain name]
.
Alternatively, click 'Advanced' then 'Find Now' to locate specific users. Click 'OK' to confirm the addition of the users.
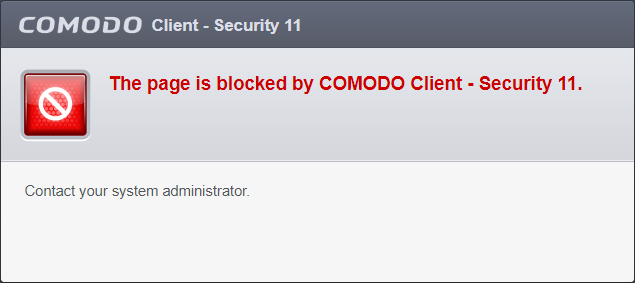
You next need to specify whether those users should be allowed or blocked from viewing the websites, or whether they should be asked if they want to continue. This is done by modifying the link in the 'Restrictions' column:
- Allow - The websites in the categories can be accessed by the user
- Block - The websites in the categories cannot be accessed by the user
6. Use the 'Logging' switch to choose whether or not attempts to access a categorized website are logged.
7. Click 'OK' to save your new rule. The new rule will be added to the list of rules under the 'Rules' tab.
8. Make sure that the rule is enabled using the toggle switch under the 'Enable Rule' column for the rule to take effect.
- You can disable or enable rules at any time using the switch under the 'Enable Rule' column
Important Note to Windows 8 and
Windows 8.1 users: If you are using Internet Explorer 11 version
11.0.9600.16384, it is mandatory to add the user group 'ALL
APPLICATION PACKAGES' to the Restrictions list in addition to the
intended users for each rule you create.
If you or other users access websites using Internet Explorer 11 on Windows 8/8.1, then you must add this user group or your rules will have no effect. For example, users will still be able to access blocked websites.
To add 'ALL APPLICATION PACKAGES' to the restrictions list
- Click 'Advanced' in the 'Select User or Group' dialog
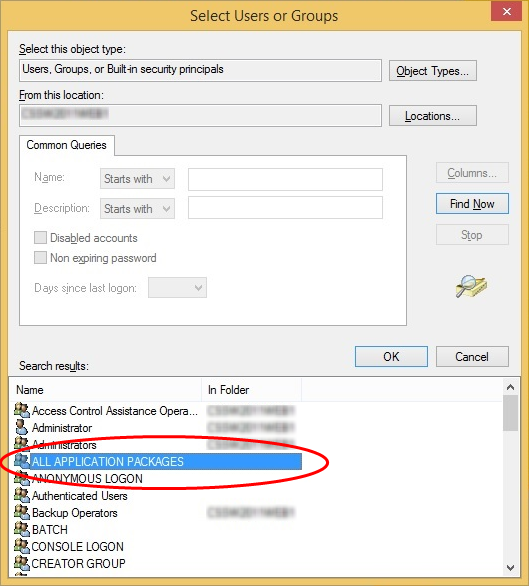
- Click 'Find Now' and select 'ALL APPLICATION PACKAGES' from the list of users and groups displayed in the list at the bottom
- Click 'OK'

-
Open the 'Website Filtering' Panel by clicking 'Settings' from the CCS home screen and then 'Website Filtering' from the 'Advanced Settings' interface.
-
Choose the website filtering rule to be edited under the 'Rules' tab by selecting the checkbox beside the rule.
-
Click the 'Edit' button at the top.
The 'Website Filtering Rule'
interface for the selected rule will open. You can add/remove
categories, add/remove users or change the restriction for selected
users from this interface. See Create a new website filtering rule for more details on
this interface.
Remove a website filtering rule
2. Open the 'Rules' tab. Choose the rule(s) you want to move by selecting the checkbox(es) beside the rule.
3. Click the 'Remove' button at the top.
4. Click 'OK'.
Change the priority of website filtering rules
1. Open the 'Website Filtering' panel by clicking 'Settings' then 'Website Filtering' in the 'Advanced Settings' interface.
2. Open the 'Rules' tab. Choose the rule you want to move by selecting the checkbox beside the rule.
3. Click the 'Move Up' or 'Move Down' buttons to change the order of the rules.
4. Click 'OK'.


