Comodo Help
Find the desired product help
Comodo KoruMail

Comodo KoruMail

Admin Guide Version

English

Print Help Download Help
User Management > Manage Admins And End Users > Manage Admins
  • Introduction To KoruMail Secure Email Gateway
  • Korumail Deployment Process
  • Access The System
    • Access Via CLI Console
    • Access Via Web Console
    • The Main Interface
  • The Dashboard
    • System Usage Graphics
    • About Software
    • Change Your Password
  • User Management
    • Manage Admins And End Users
      • Manage Admins
      • Manage End Users
    • Manage Groups
  • System Configurations
    • Network Configuration
      • Interfaces
      • Network Settings
      • Network Time Protocol (NTP)
      • Timezone
      • Static Routes
      • Simple Network Management Protocol SNMP
    • Services
    • Licenses
    • Configure System Settings
      • System General Settings
      • Cache Settings
      • Session Settings
      • GUI Customization
      • System Backup
      • System Restore
      • Log Upload Settings
      • Postmaster Settings
      • SMTP TLS Settings
      • Update Database
      • Syslog Server
    • Logs
      • Log Files
      • Purge Files
    • Tools
      • Check Connectivity
      • Clear SMTP Queue
    • Session Reports
    • System Usage Statistics
  • SMTP Configuration
    • SMTP (Send E-Mail Protocol) Settings
      • General Settings
      • Advanced Settings
      • Outbound Delivery Queue
    • Manage Domains
      • Manage Domain Names
      • Manage Domain Routes
      • Manage Smart Hosts
      • Default Domain Routing
    • KoruMail SMTP AUTH Connector
      • SMTP Authentication Settings
      • Block Users
      • Anomaly Detection
    • LDAP/Local DB/My SQL User Database
      • LDAP Profile
      • Local DB Users
      • My SQL User Database
    • Greylist
      • Greylist Ignored IP Addresses/Domains
    • Manage RBL Servers
    • Disclaimer
    • SMPT Relay
    • DomainKeys Identified Mail (DKIM)
    • Outgoing SMTP Limits
    • Incoming SMTP Limits
  • Modules
    • Anti-spam
      • Anti-spam General Settings
      • Authorized Trainers
      • Advanced Anti-spam Settings
      • Bayesian Training
      • Content Filter
      • Signature Whitelist
      • Attachment Filter
    • Anti-Virus
      • Anti-Virus General Settings
      • Advanced Anti-Virus Settings
    • KoruMail Reputation Network (KRN)
    • Anti-Spoofing
    • SMTP IPS/FW
      • SMTP IPS General Settings
      • Whitelist IP Addresses
      • Blocked IP Addresses
      • Rate Control
    • Auto Whitelist
    • Containment System
    • Data Leak Prevention (DLP)
    • Attachment Verdict System
  • Profile Management
    • Add And Configure A New Profile
      • Edit A Profile
      • Delete A Profile
  • Reports
    • Mail Logs Report
    • SMTP Queue Report
    • Delivery Logs Report
    • SMTP-AUTH Logs Report
    • Summary Reports
    • Domain Reports
    • Attachment Verdict Reports
    • Original Mail Requests
  • Quarantine & Archive
    • Quarantine & Archive Settings
      • Quarantine & Archive General Settings
      • Email Reports Settings
      • Admin Email Reports Settings
    • Quarantine Logs
    • Archived Mails
  • Appendix - KoruMail Versions
  • About Comodo Security Solutions

Manage Admins


    To open this area:

    • Click 'User Management' > 'Users' on the left-menu
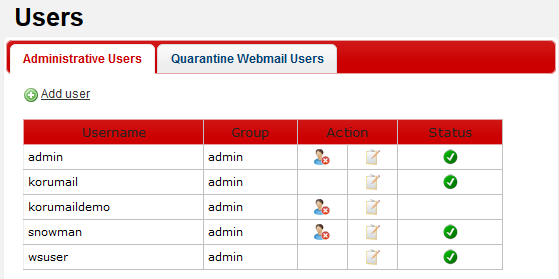
    • Click the 'Administrative Users' tab:


    Administrative Users – Table of Column Descriptions

    Column Header

    Description

    Username

    The admin name.

    Group

    The name of the group to which the administrator belongs. See 'Manage Groups' for more details.

    Action


    Delete the admin. Administrators with appropriate privileges can delete other admins by clicking this icon. Please note, admins that are currently logged in cannot delete themselves.


    Administrators with appropriate privileges can edit other admins' details. See 'Edit an Administrator' for more details.

    Status

    Indicates whether the admin is in enabled or disabled status. Disabled admins cannot log into the web console. See 'Enabling/Disabling Administrators' for more details.


    From the this interface an appropriately privileged administrator can:

    • Add an administrative user
    • Delete an administrative user
    • Edit an administrative user
    • Enable/Disable an administrative user


      To add an administrative user

      • Click the 'Add User' link


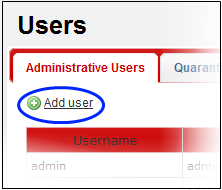
      The 'Add New User' screen will be displayed.


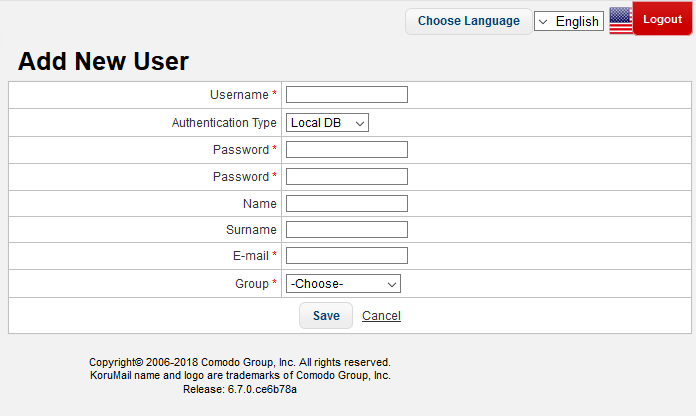
      • Username: Enter the username to access the console
      • Authentication Type: Two options are available – Local DB and LDAP AD 
      • Local DB: Authentication of the user will be done using the local database 
      • LDAP AD: Authentication of the user will be done using LDAP  
      • Password: Enter the password to access the console and confirm it in the next field. 
      • Name: The first name of the administrative user
      • Surname: The surname of the user
      • E-mail: Enter the email address of the administrative user
      • Group: Select the group to which the admin user should be added. See 'Manage Groups' for more details.
      • Click the 'Save' button to add the new admin user.


      To delete an administrative user

      • Click the  icon beside the user that you want to delete


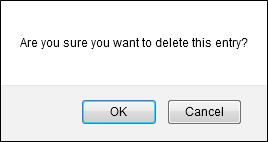
      • Click 'OK' to confirm the deletion.


      To edit an administrative user

      • Click the  icon beside the user that you want to edit

      The 'Edit User' screen will be displayed:


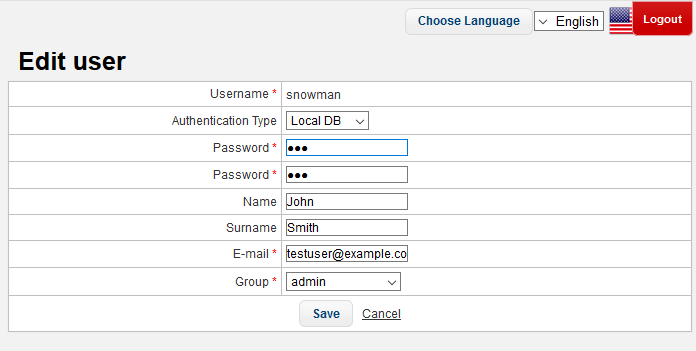
      • Edit the details as required. The screen is similar to the 'Add New User' section. See 'Add an administrative user' for more details.
      • Click the 'Save' button.

      The changes will be saved and a confirmation note will be displayed.


      To enable/disable an administrative user


      The icon under the 'Status' column indicates whether the 'Administrator User' is enabled or disabled.


      Indicates the user is disabled and cannot login to the web console.


      Indicates the user is enabled and can access the web console.


      • Click the icon to toggle between enabled and disabled statuses.
      • Click 'OK' in the confirmation dialog.

      Our Products
      • Free Antivirus
      • Free Internet Security
      • Website Malware Removal
      • Free Anti-Malware
      • Anti-Spam (Free Trial)
      • Windows Antivirus
      • Antivirus for Windows 7
      • Antivirus for Windows 8
      • Antivirus for Windows 10
      • Antivirus for MAC
      • Antivirus for Linux
      • Free Endpoint Security
      • Free ModSecurity
      • Free RMM
      • Free Website Malware Scanner
      • Free Device Manager for Android
      • Free Demo
      • Network Security
      • Endpoint Protection
      • Antivirus for Android
      • Comodo Antivirus
      • Wordpress Security
      Cheap CDN
      • Bootstrap CDN
      • Semantic UI CDN
      • Jquery CDN
      • CDN Plans
      • CDN
      • Free CDN
      Enterprise
      • Patch Management Software
      • Patch Manager
      • Service Desk
      • Website Down
      • Endpoint Protection Solutions
      • Website Security Check
      • Remote Monitoring and Management
      • Website Security
      • Device Manager
      • ITSM
      • CRM
      • MSP
      • Android Device Manager
      • MDR Services
      • Managed IT Support Services
      • Free EDR
      Free SSL Certificate
      Support Partners Terms and Conditions Privacy Policy

      © Comodo Group, Inc. 2025. All rights reserved.