Manage Groups
- User groups simplify the process of configuring permission levels for admins and users. New (or existing) users added to a group will inherit the policy assigned to the group.
- Each group can be configured with different permission levels.
- The admin interface will vary according to a user's permission level. See 'Manage Admin Users' for more details.
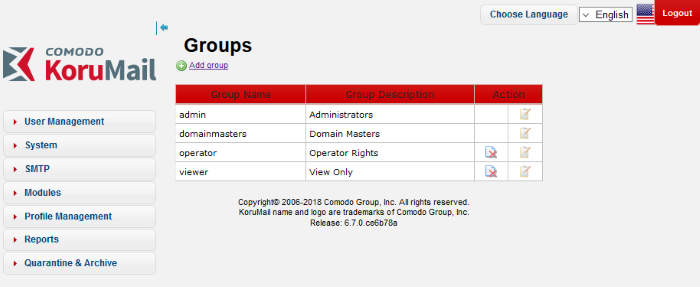
To open the 'Groups' screen
- Click the 'User Management' tab in the left menu and click 'Groups'
|
Groups – Table of Column Descriptions |
||
|---|---|---|
|
Column Header |
Description |
|
|
Group Name |
The name of the group. |
|
|
Group Description |
Enter an appropriate description for the group. |
|
|
Action |
|
Administrators with appropriate privileges can delete the group by clicking this icon. |
|
|
Administrators with appropriate privileges can edit group details and its privileges. See 'Edit a Group' for more details. |
|
From the this interface an appropriately privileged administrator can:
- Click the 'Add group' link
The 'Add New Group' screen will be displayed.
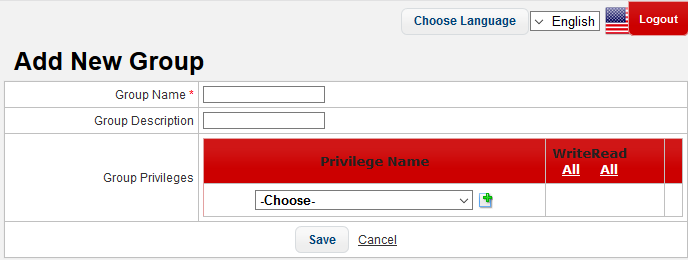
- Group Name: Enter the name of the group
- Group Description: Enter an appropriate description for the group
- Group Privileges: Select the privileges that should be assigned to the group from the 'Privilege Name' drop-down.
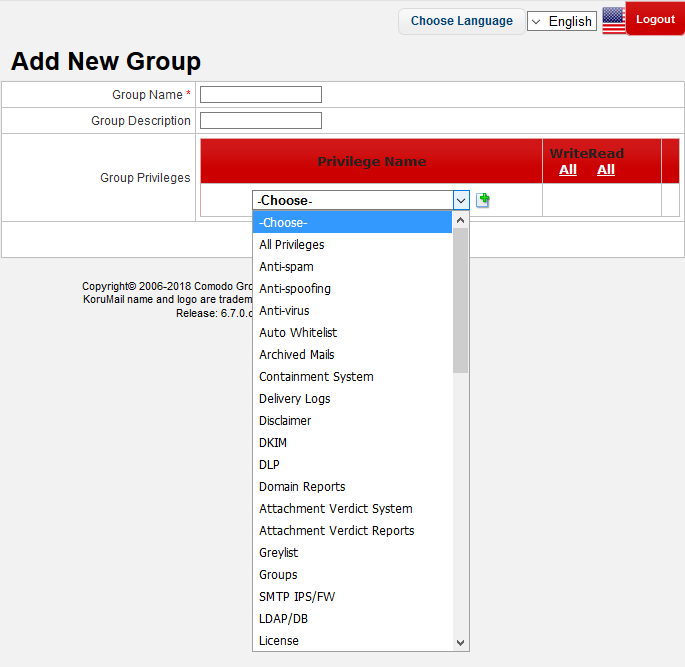
- After the selecting the privilege for the group, click the 'Add'
button
 to include it. The added privileges will be displayed.
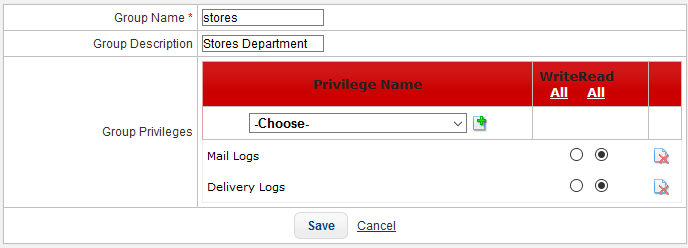
By default, the added privileges will have 'Read' rights only, meaning the features can be viewed and cannot be configured by the admin user.
- Select the 'Write' option to make the privileges configurable for the admin user.
- To select the 'Write' or 'Read' option for all the privileges, click the 'All' link below it.
- To delete a privilege, click the delete icon
 beside it.
- Click the 'Save' button to add the new group.
Now this new group can be assigned to admin users. See 'Manage
Admin Users' for more details on how to assign a group
to admin users.
- Click the
 icon beside the group that you want to delete
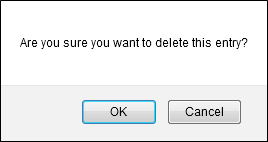
- Click 'OK' to confirm the deletion.
- Click the
 icon beside the group that you want to edit
The 'Edit group' screen will be displayed.
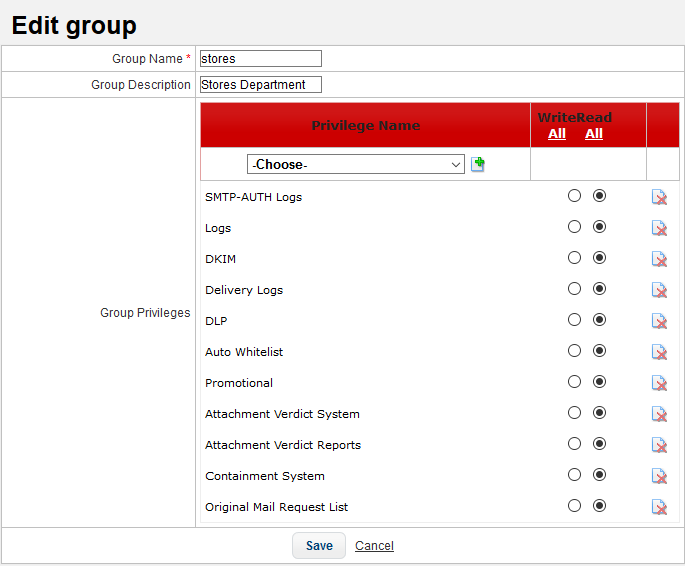
- Edit the details as required. The screen is similar to the 'Add New Group' section. See 'Add a new group' for more details.
- Click the 'Save' button.
The changes will be saved.


