


Active HIPS Rules
Click 'Settings' > 'HIPS' > 'HIPS Rules'
- The rules screen shows your installed applications classified into file groups, and the HIPS ruleset that applies to them.
- You can change the ruleset of a specific application or file group, and create your own custom rulesets.
- Click 'Settings' at the top of the CIS home screen to open the 'Advanced Settings' interface
- Click 'HIPS' > 'HIPS Rules' on the left.
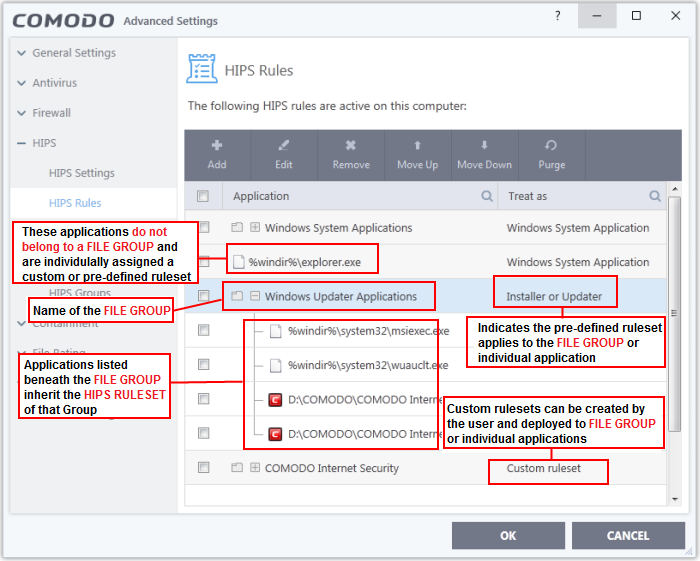
The first column, Application, displays a list of the applications on your system for which a HIPS ruleset has been defined. If the application belongs to a file group, then all member applications assume the ruleset of the group. The second column, Treat As, displays the name of the HIPS ruleset assigned to the application or group of applications.
You
can use the search option to find a specific file in the list by
clicking the search icon at the far right of the column header and
entering the name in full or part.
General Navigation:
The control buttons at the top of the list enable you to create and manage application rule sets.
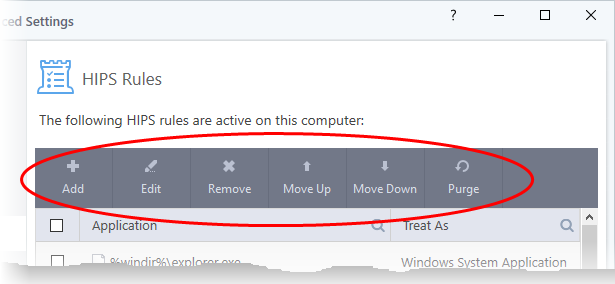
- Add - Allows the user to add a new application to the list and then create its ruleset. See 'Create or Modify a HIPS Ruleset' for more details.
- Edit - Allows the user to modify the HIPS rule of the selected application. See 'Create or Modify a HIPS Ruleset' for more details.
- Remove - Deletes the selected ruleset.
|
Note: You cannot add or remove individual applications from a file group using this interface - you must use the 'File
Groups' interface to do this. |
- Purge - Runs a system check to verify that all the applications for which rulesets are listed are actually installed on the host machine at the path specified. If not, the rule is removed, or 'purged', from the list.
- Move UP/Move Down - Users can re-order the priority of rules by simply selecting an application name or file group and selecting 'Move Up' or 'Move Down' from the options. To alter the priority of applications that belong to a file group, you must use the 'File Groups' interface.
Create or Modify a HIPS Ruleset
Defining a HIPS Ruleset for an application or File group involves two steps:
Step 1 - Select the application or file group that you wish the ruleset to apply to
- To define a rule for a new application (i.e. one that is not already listed), click the 'Add' button at the top of the HIPS Rules pane.
This brings up the 'HIPS Rule' interface as shown below.
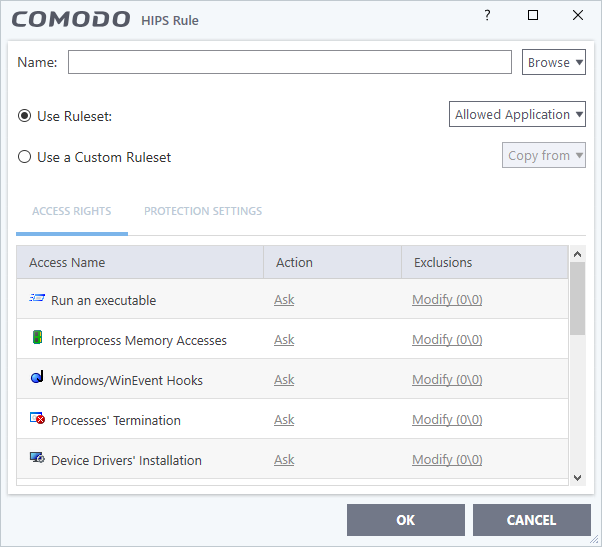
The 'Name' box is blank because you are defining a HIPS rule settings for a new application. If you were editing an existing rule, this field would show the application name and its installation path, or the application group name.
You now have 3 methods available to choose the application for which you wish to create a Ruleset - File Groups; Applications and Running Processes.
-
File Groups - Choosing this option allows you to create a HIPS ruleset for a category of pre-set files or folders. For example, selecting 'Executables' would enable you to create a ruleset for all files with the extensions .exe .dll .sys .ocx .bat .pif .scr .cpl, */cmd.exe, *.bat, *.cmd. Other such categories available include 'Windows System Applications', 'Windows Updater Applications', 'Start Up Folders' etc - each of which provide a fast and convenient way to apply a generic ruleset to important files and folders.
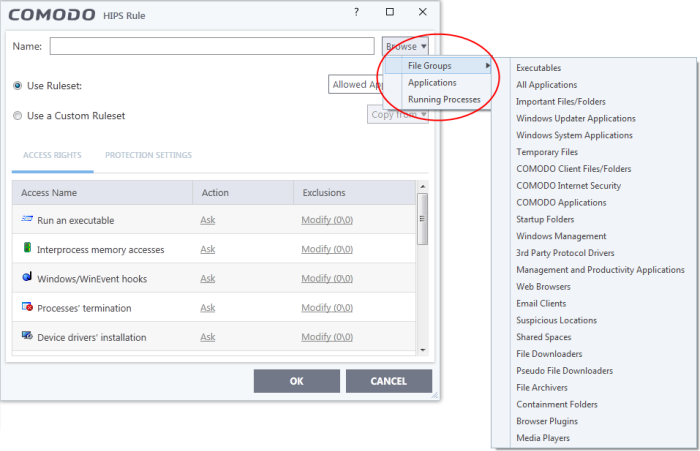
To view the file types and folders that are affected by choosing one of these options, you need to visit the 'File Groups' interface.
-
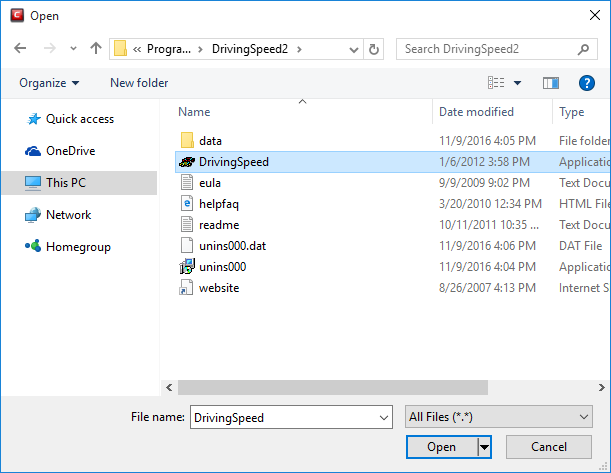
Applications - This option is the easiest for most users and simply allows you to browse to the location of the application for which you want to deploy the ruleset.
-
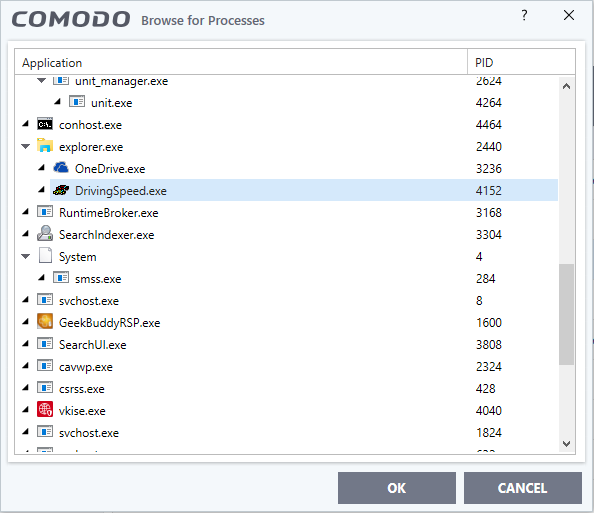
Running Processes - as the name suggests, this option allows you choose any process that is currently running on your PC in order to create and deploy a ruleset for its parent application.
Having selected the individual application, running process or file group, the next stage is to configure the rules for this ruleset.
Step 2 - Configure the HIPS Ruleset for this application
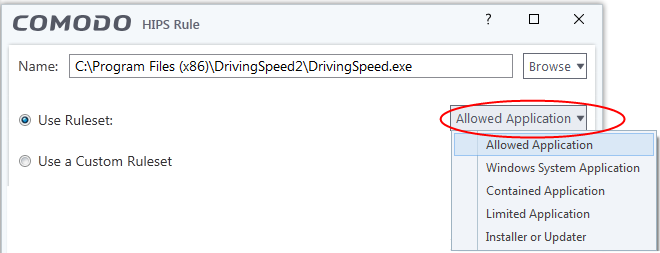
There are two broad options available for selecting a ruleset that applies to an application - Use Ruleset or Use a Custom Ruleset.
-
Use Ruleset - Selecting this option allows you to quickly deploy an existing HIPS ruleset on to the target application. Choose the ruleset you wish to use from the drop down menu. In the example below, we have chosen 'Allowed Application'. The name of the ruleset you choose is displayed in the 'Treat As' column for that application in the HIPS Rules interface (Default = Enabled).
|
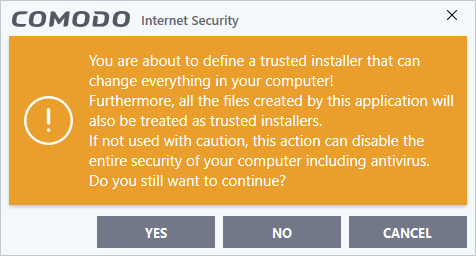
Note on 'Installer or Updater' Rule: Applying this rule to an application defines it as a trusted installer. All files created by this application will also be trusted. Some applications may have hidden code that could impair the security of your computer if allowed to create files of their own. Comodo advises you to use this 'Predefined Ruleset' - 'Installer or Updater' with caution. On applying this ruleset to any application, an alert dialog will be displayed, describing the risks involved.
|
|
General Note: Predefined Rulesets cannot be modified directly from this interface - they can only be modified and defined using the 'Rulesets' interface. If you require the ability to add or modify settings for a specific application then you are effectively creating a new, custom ruleset and should choose the more flexible Use a Custom Ruleset option instead. |
-
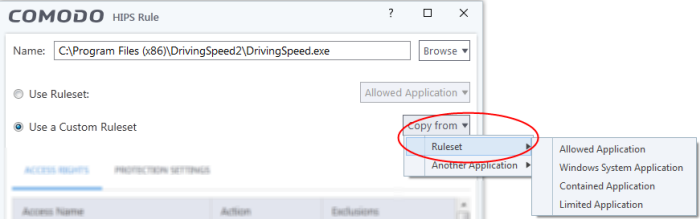
Use a Custom Ruleset - Designed for more experienced users, the 'Custom Ruleset' option grants full control over the configuration of each rule within that ruleset.
The custom ruleset has two main configuration areas - Access Rights and Protection Settings (Default = Disabled).
In simplistic terms 'Access Rights' determine what the application can do to other processes and objects whereas 'Protection Settings' determine what the application can have done to it by other processes.
|
Tip: You can use the 'Copy from' drop-down to choose an existing rule set for an application or file group. Using that as a starting point, you can customize the 'Access Rights' and 'Protection Settings' for the rules as required.
|
-
Access Rights - The 'Process Access Rights' area allows you to determine what activities can be performed by the applications in your custom ruleset. These activities are called 'Access Names'.
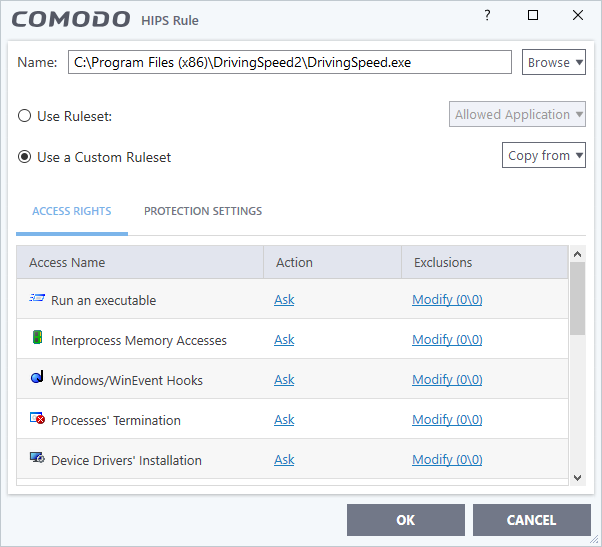
See HIPS Settings > Activities to Monitor to see definitions of the 'Action Names' listed above, and the implications of choosing 'Ask', 'Allow' or 'Block':

- Exceptions to your choice of 'Ask', 'Allow' or 'Block' can be specified for the ruleset by clicking the 'Modify' link on the right.
- Select the 'Allowed Files/Folders' or 'Blocked Files/Folders' tab depending on the type of exception you wish to create.
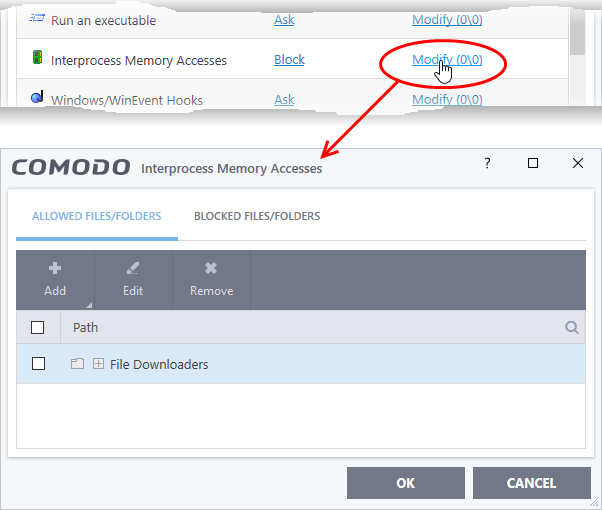
Clicking the 'Add' button at the top allows you to choose which applications or file groups you wish this exception to apply to. (click here for an explanation of available options).
In the example above, the default action for 'Interprocess Memory Access' is 'Block'. This means HIPS will block the action if 'DrivingSpeed.exe' tries to modify the memory space of any other program. Clicking 'Modify' then adding 'File Downloaders' File Group to the 'Allowed Files/Folders' area creates an exception to this rule. 'DrivingSpeed.exe' can now modify the memory space of files belonging to the 'File Downloaders' File Group.
-
Protection Settings - Protection Settings determine how protected the application or file group in your ruleset is against activities by other processes. These protections are called 'Protection Types'.
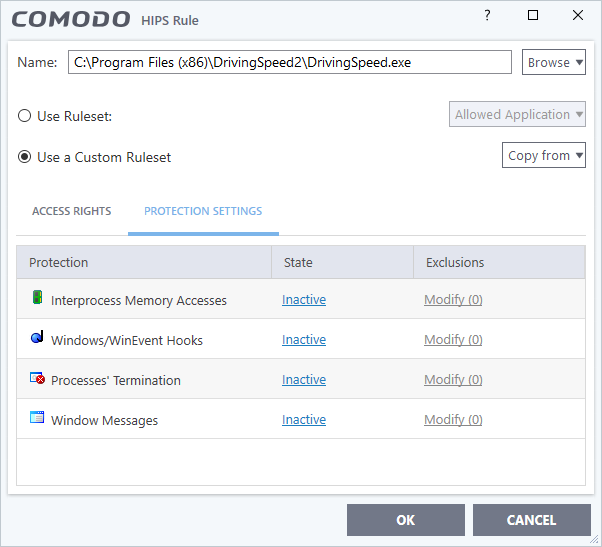
- Select 'Active' to enable monitoring and protect the application or file group against the process listed in the 'Protection' column. Select 'Inactive' to disable such protection.
Click here to view a list of definitions of the 'Protection Types' listed above and the implications of activating each setting.
Exceptions to your choice of 'Active' or 'Inactive' can be specified in the application's Ruleset by clicking the 'Modify' link on the right.
-
Click 'OK' to confirm your settings.