Blocked Zones
- A computer network lets you share information and resources with other users and computers.
- There are some networks which you trust and want to grant access to, including your home or work network.
- Conversely, there may be other networks with which you want to restrict communication, or even block entirely.
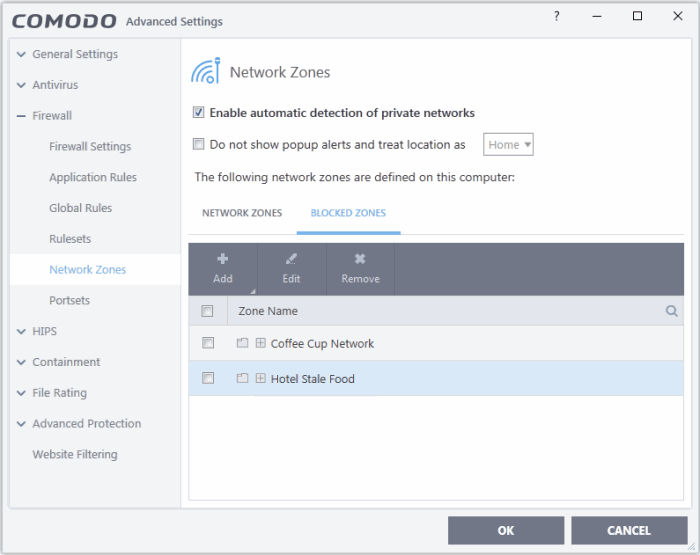
- The 'Blocked Zones' section allows you to configure restrictions on network zones that you do not trust.
|
Note: We advise new or inexperienced users to first read 'Network Zones', 'Stealth Ports Wizard' and 'Application Rules' before blocking zones this interface. |
Add and manage blocked zones
- Click 'Settings' on the CIS home screen
- Click 'Firewall' > 'Network Zones'
- Click the 'Blocked Zones' tab

The 'Blocked Zones' tab allows you to:
|
Note 1: You must create a zone before you can block it. There are two ways to do this;
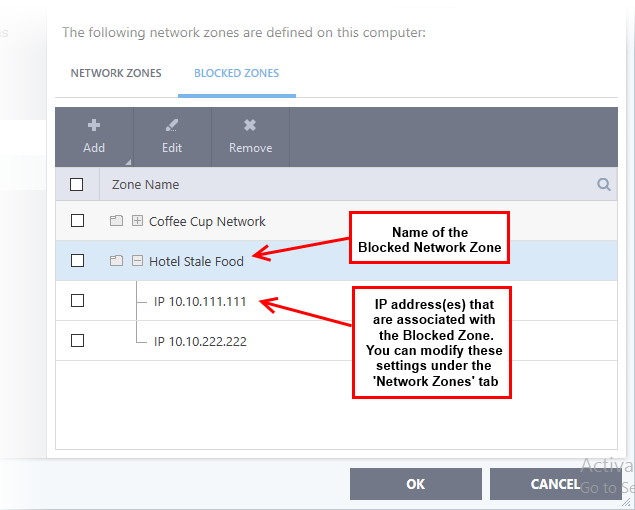
Note 2: You cannot reconfigure existing zones from this interface (e.g., to add or modify IP addresses). You need to use 'Network Zones' if you want to change the settings of existing zones. |
You can search for specific blocked zone by clicking the magnifying glass icon and entering the name of the zone in part or full.
Deny access to an existing network zone
- Click 'Settings' on the CIS home screen
- Click 'Firewall' > 'Network Zones'
- Click the 'Blocked Zones' tab
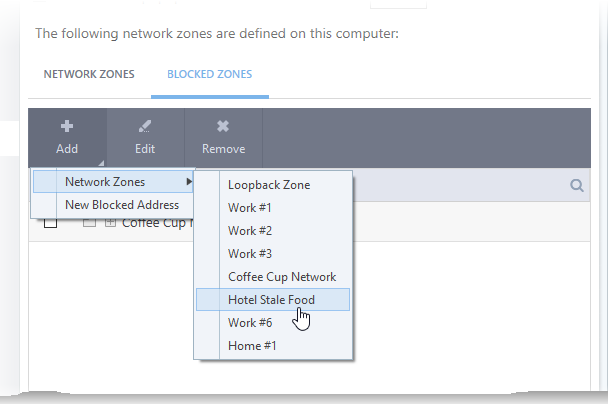
- Click 'Add' button at the top and choose 'Network Zones' from the options
- Select the particular zone you wish to block

The selected zone will appear in the 'Blocked Zones' interface.

- Click 'OK' to confirm your choice.
- All traffic to and from devices in this zone is now blocked.
Deny access to a network by manually defining a new blocked zone
- Click 'Settings' on the CIS home screen
- Click 'Firewall' > 'Network Zones'
- Click the 'Blocked Zones' tab
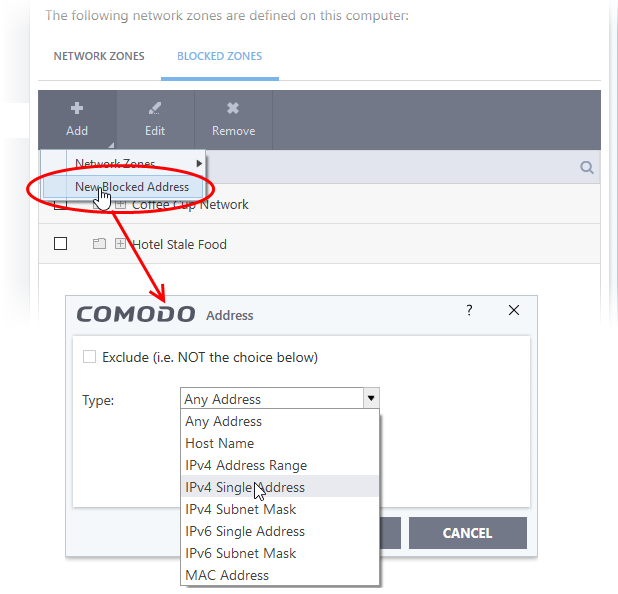
- Click the 'Add' button and choose 'New Blocked Address':

Select
the address type you wish to block from the 'Type' drop-down. Select
'Exclude' if you want to block all IP addresses except for the ones you specify using the drop-down.
- Any Address - Will block connections from all IP addresses (0.0.0.0- 255.255.255.255) Host Name- Enter a named host which denotes an address on your network.
- IPv4 Single Address - Block access to a single address - e.g. 192.168.200.113.
- IPv4 Subnet Mask - A subnet mask allows administrators to divide a network into two or more networks by splitting the host part of an IP address into subnet and host numbers. Enter the IP address and Mask of the network you wish to block.
- IPv6 Single Address - Block access to a single address - e.g. 3ffe:1900:4545:3:200:f8ff:fe21:67cf.
- Select the address to be blocked and click 'OK'.
The address(es) you block will appear in the 'Blocked Zones' tab. You can modify these addresses at any time by selecting the entry and clicking 'Edit'.
-
Click
'OK' in 'Network Zones' interface to confirm your choice. All traffic intended for and originating from devices in this zone is now blocked.


