Protected Files
- The protected files screen shows file groups to which other processes have read-only access. Programs on your computer can read the items in here, but cannot modify them.
- This prevents malicious programs from modifying important personal or system data.
- A good example of a file that ought to be protected is your 'hosts' file (c:/windows/system32/drivers/etc/hosts). This will allow web browsers to use the file as normal, but block any attempts to modify it.
- You could also use this feature to safeguard valuable files (spreadsheets, databases, documents) against accidental or deliberate sabotage.
- You
can create exceptions should you want to grant write-privileges to
specific applications.
See Exceptions for more details
Open the 'Protected Files' interface
- Click 'Settings' at the top-left of the CIS home screen
- Click 'HIPS' > 'Protected Objects'
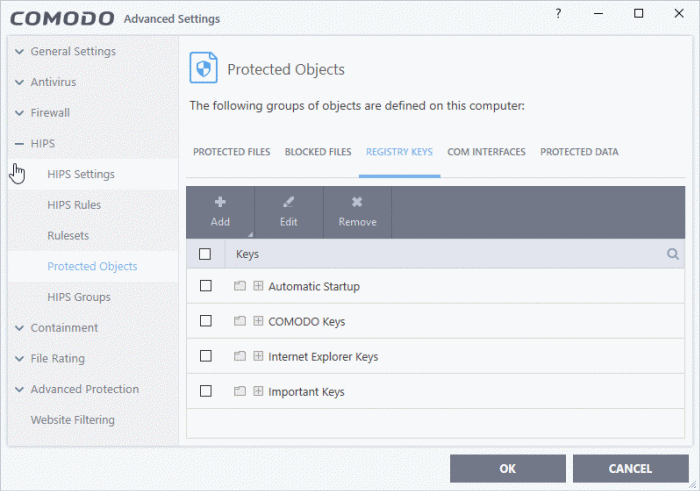
- Click the 'Protected Files' tab:
Controls:
The buttons at the top provide the following options:
- Add – Protect a new file, file-group, folder or running process
- Edit – Modify the path/location of the target item
- Remove - Delete a file or file group from protected files
- Purge - Runs a check to verify that all files in the list are actually installed at the path specified. If not, the item is removed from the list.
Right-click Options:
- Right-click on an item to open a menu which lets you add, edit, remove and purge files:
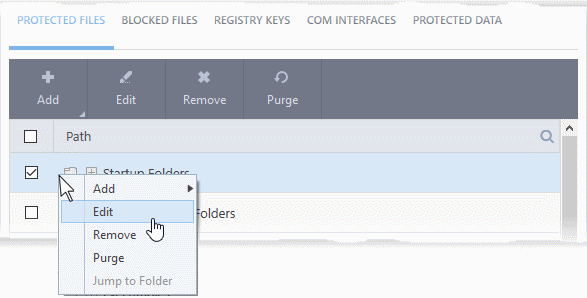
The options available are as described above.
See the following sections for help with each task:
Manually add an individual file, folder, file group or file group
- Click 'Settings' on the CIS home-screen
- Click 'HIPS' > 'Protected Objects' > 'Protected Files'
- Click the 'Add' button
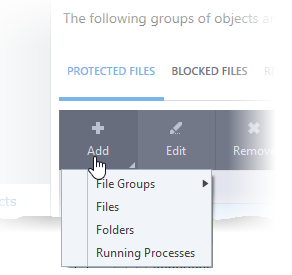
You can add items using any of the following methods:
- A file group is a pre-set category of files or folders. Adding a file group to protected files is a convenient way to protect an entire class of files and folders.
- For example - by protecting the 'Executables' group, CIS protects all files with the extensions .exe .dll .sys .ocx .bat .pif .scr .cpl */cmd.exe, *.bat, and *.cmd.
- Other groups protected by default include 'Startup Folders', 'Important Files/Folders' and 'Comodo Client File/Folders'.
- CIS ships with a set of predefined file groups which can be viewed in 'Advanced Settings' > 'File Rating' > 'File Groups'.
- You can also create your own file groups, and add your new group to 'Protected Files'. All items in your group will be covered, including any files you add to the group in future. See File Groups for more details.
Protect a file group
- Click 'Settings' on the CIS home screen
- Click 'HIPS' > 'Protected Objects'
- Open the 'Protected Files' tab
- Click 'Add' > 'File Groups':
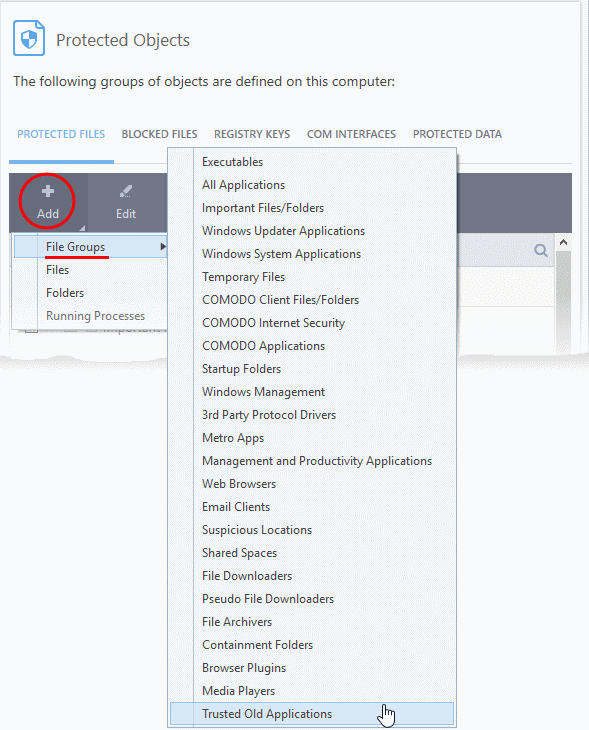
- Select a target file group from the list
- The file group will be added to 'Protected Files' list:
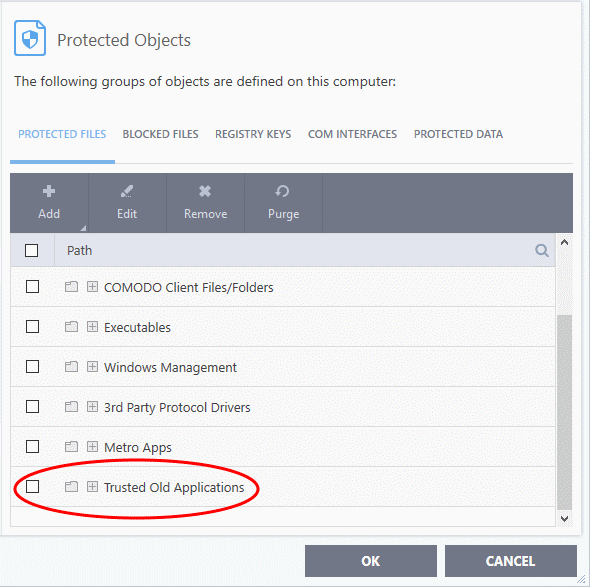
- Repeat the process to add more file groups.
- Click
'OK' in the 'Advanced Settings' interface to save your settings
- Click 'Settings' on the CIS home screen
- Click 'HIPS' > 'Protected Objects'
- Open the 'Protected Files' tab
- Click 'Add' > 'Files'
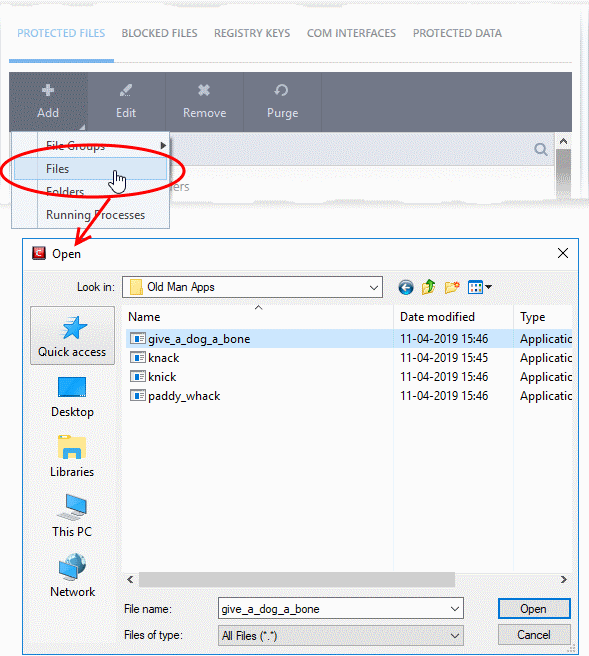
- Navigate to and select the files you want to add and click 'Open'
- Repeat the process to add more files
- Click 'OK' in the 'Advanced Settings' interface to save your settings
All
files in the folder or drive will be protected. This includes items
added after the folder was added to 'Protected Files'.
- Click 'Settings' on the CIS home screen
- Click 'HIPS' > 'Protected Objects'
- Open the 'Protected Files' tab
- Click 'Add' > 'Folders'
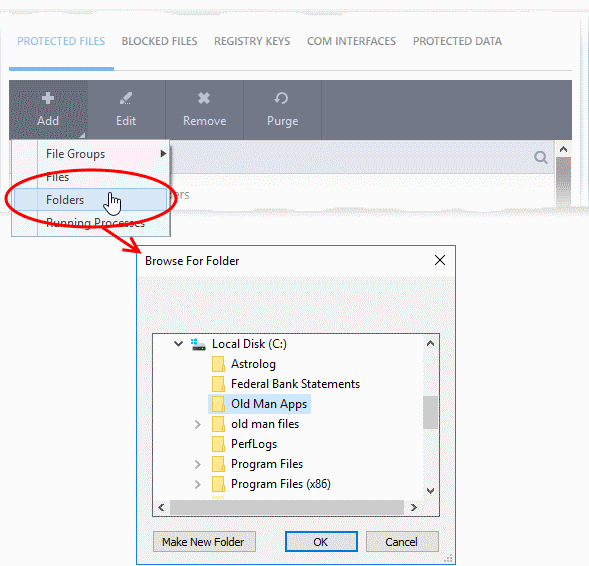
- Browse to the drive or folder you want to protect and click 'OK'
- Repeat the process to add more folders
- Click
'OK' in the 'Advanced Settings' interface to save your settings
Add an application from a running process
Adding a running process will add the parent application to protected files.
- Click 'Settings' on the CIS home screen
- Click 'HIPS' > 'Protected Objects'
- Open the 'Protected Files' tab
- Click 'Add' > 'Running Processes'
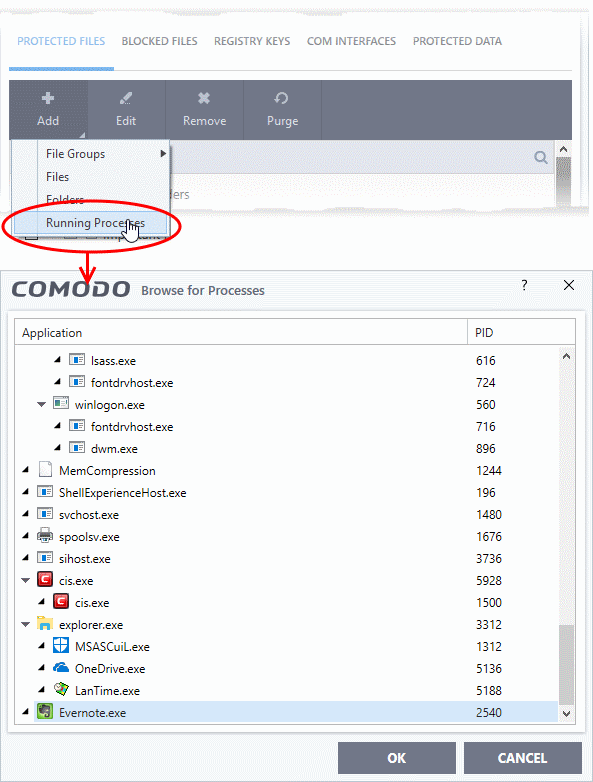
A list of currently running processes in your computer will be shown.
- Select the process you want to protect and click 'OK'. The parent application of the process is added to protected files
- Repeat the process to add more files
- Click 'OK' in the 'Advanced Settings' interface to save your settings
Edit an item in the Protected Files list
- Click 'Settings' on the CIS home screen
- Click 'HIPS' > 'Protected Objects'
- Open the 'Protected Files' tab
- Select the item from the list and click the 'Edit' button or right-click on an item and choose 'Edit'

-
Edit the file path, if you have relocated the file and click 'OK'
- Click 'OK' in the 'Advanced Settings' interface to save your settings
Delete an item from Protected Files list
- Click 'Settings' on the CIS home screen
- Click 'HIPS' > 'Protected Objects'
- Open the 'Protected Files' tab
- Select the item from the list and click the 'Remove' button or right-click on an item and choose 'Remove'
The selected item will be deleted from the protected files list. CIS will not generate alerts, if the file or program is subjected to unauthorized access.
Exceptions
-
Exceptions let you selectively allow certain applications or file groups to access a protected item.
- You create the exception by adding an 'Allow' rule for the application in the HIPS Rules area ('Settings' > 'HIPS' > 'HIPS Rules')
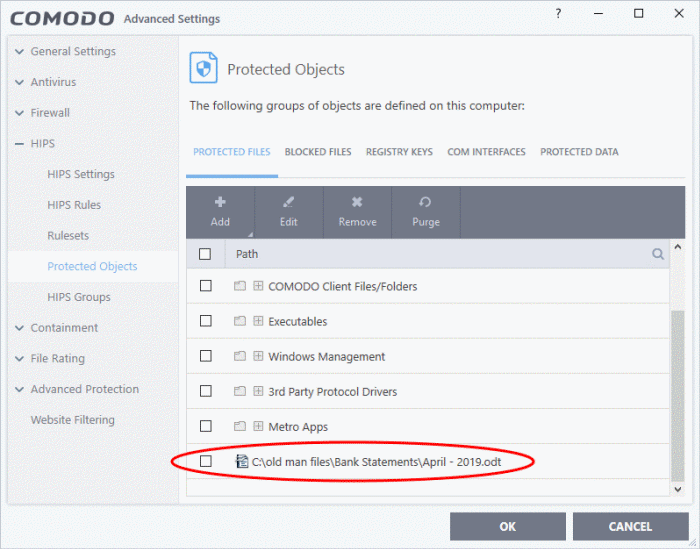
- For example, imagine an Open Office document called 'April – 2019.odt', which contains important information.You want the 'Open Office Writer' program to modify the file as you are working on it, but you don't want other applications to access it.
- You would first add 'April – 2019.odt' to 'Protected Files'. Once added, go to 'HIPS Rules' and create an allow rule for 'swriter.exe'. This means Open Office Writer alone is allowed to modify 'April – 2019.odt'.
- Add 'April - 2019.odt' to protected files as shown below:
- Then go to 'HIPS Rules' interface and add it to the list of applications
- Click the 'Edit' button after selecting the checkbox beside it
- In the 'HIPS Rule' interface, select 'Use a Custom Ruleset'
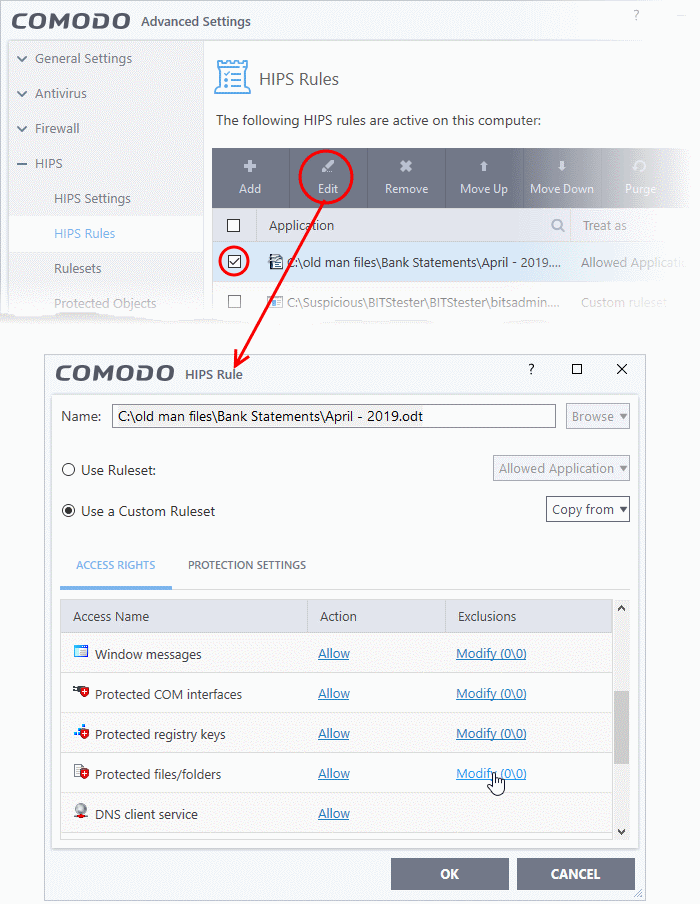
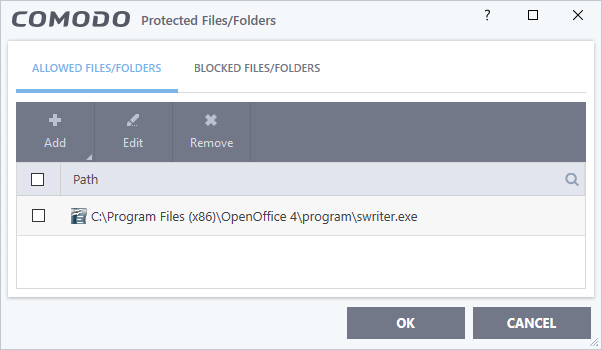
- Under the 'Access Rights' section, click the link 'Modify' beside the entry 'Protected Files/Folders'. The 'Protected Files/Folders' interface will appear
- Under the 'Allowed Files/Folders' section, click 'Add' > 'Files' and add swriter.exe as exceptions to the 'Ask' or 'Block' rule in the 'Access Rights'
Another example of where protected files should be given selective access is the Windows system directory at 'c:/windows/system32'. Files in this folder should be off-limits to modification by anything except certain Windows. In this case, you would add the directory c:/windows/system32* to the 'Protected Files area (* = all files in this directory). Next go to 'HIPS Rules', locate the file group 'Windows Updater Applications' in the list and follow the same process outlined above to create an exception for that group of executables.


