Create and Manage File Groups
-
Click 'Settings' > 'System Templates' > 'File Groups Variables'
-
File groups are handy, predefined groupings of one or more file types. You can select a file group as the target of various functions and rules. For example, you scan specify that a file group is excluded from AV scans, or that everything in a file group is auto-contained when run.
-
Xcitium ships with a set of predefined file groups, and allows you to create your own.
-
After creating a group, it becomes available for selection when configuring a Windows profile.
Open the 'File Groups' interface
-
Click 'Settings' > 'System Templates'
-
Click the 'File Groups Variables' tab
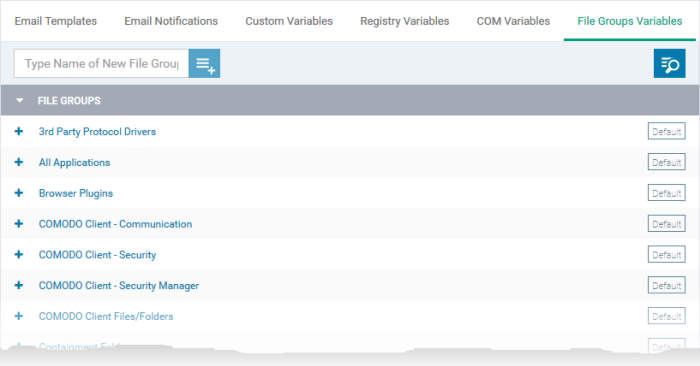
'Default' groups cannot be edited or deleted.
-
Click the 'File Groups' column header to sort the items in ascending/descending order of their names
-
Click the search icon at the top right and enter the name of the group on part or full to filter or search for a specific file group.

Add a new File group
-
Enter a name for the group and click the '+' button. The group name should ideally identify the content or purpose of the group:

The new group is added to the list. The next step is to add files to the group.
-
Click the '+' at the left of the group name

-
Enter the full standard folder/file path of the file to be added to the group in the 'New File Group Path' field and click 'Add'
|
Tip: To include all the files in a folder, place the wildcard character in the place of file name in the folder path. For example: " C:My Files* " |
The file(s) are added to the group.

-
Repeat the process to add more files to the group.
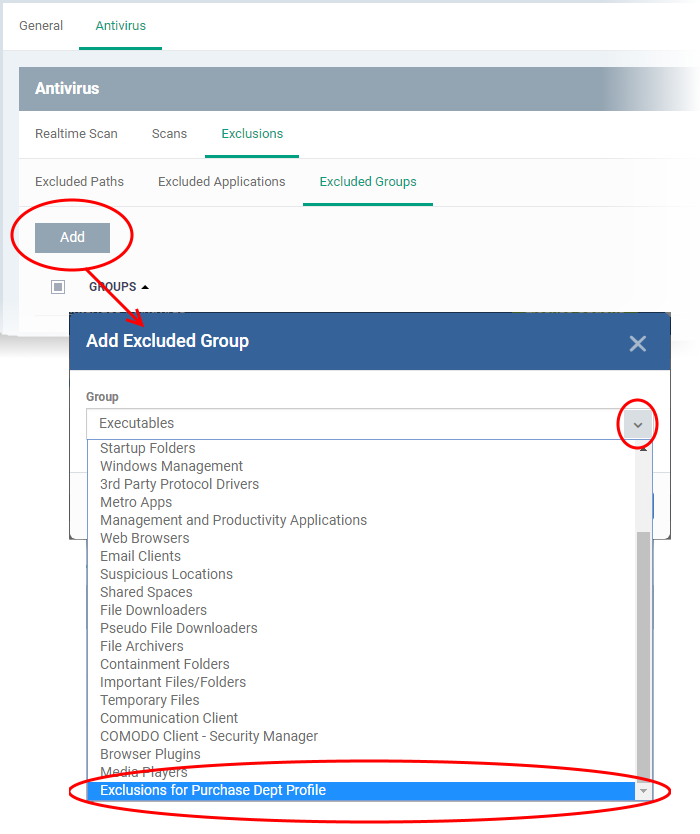
Once a File Group is added, it will be available for selection in applicable settings interfaces for defining the File Groups, example, for adding to 'Exclusions' list in 'Antivirus Settings' panel in the 'Windows Profile' interface.
-
Click the pencil icon beside the file name to edit the files in the group
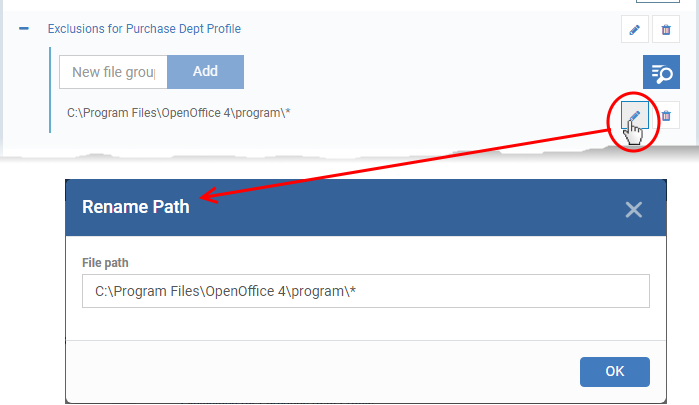
Edit the file path in the 'Rename Path' dialog and click 'OK'.
-
Click the trash can icon beside the file name to remove the file added by mistake or an unwanted file from the group.
Edit the name of a File Group
-
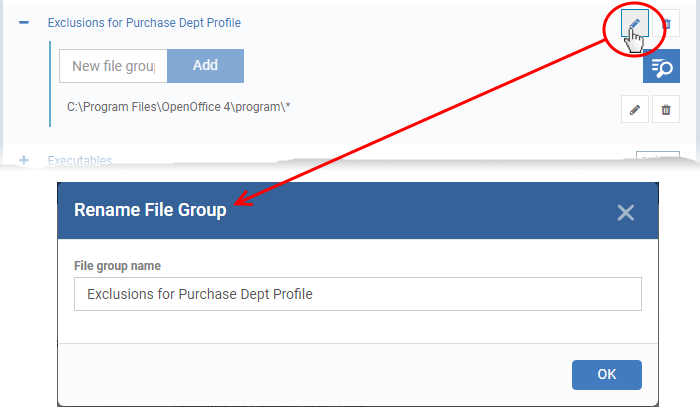
Click the pencil icon beside the file group
-
Enter the new name for the group in the 'Rename File Group' dialog and click 'OK'
Remove a File Group
-
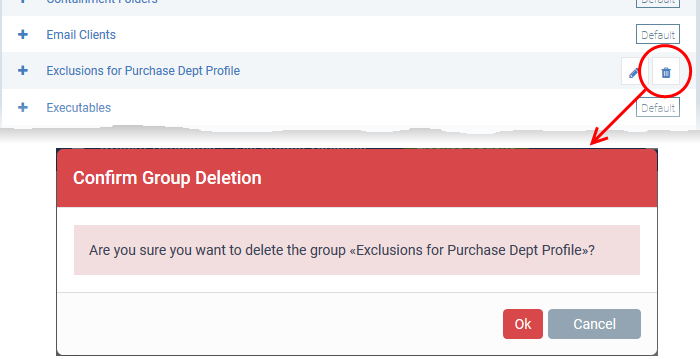
Click the trash can icon in the group row:
