CTEM Agents
CTEM agents form the foundation of the Continuous Threat Exposure Management(CTEM) platform. Installed on endpoints such as workstations and servers, they continuously collect system data and perform vulnerability, compliance, and security scans. This enables real-time visibility into the organization’s security posture and helps identify risks across the environment.
- Click 'Security' > 'Continuous Threat Exposure Management' > 'Agents'
Agents are categorized automatically into the Lightweight Agents and Deprecated Agents categories.
- Lightweight Agent(Default Agent type): This is an agent installed on a single endpoint (a workstation or a server) that scans only the local endpoint where it is installed.
The Lightweight Agent is running an authenticated scan since it’s been installed with administrator privileges and the installation uses a continuous scanning method on the locally installed asset.
- Deprecated Agent: This is for ‘inactive’ agents no longer checking in after 90 days by default. (Deprecation Days can be configured at the CTEM Settings)
If an agent does not perform a scan within the defined Deprecation Days period, it will automatically move to the Deprecated Agents list. If the same agent performs a scan later, it will automatically move back to the Active Agents list.
If you deprecate an agent and then restart the service, the agent moves from Deprecated to Lightweight.
How to install an CTEM Agents
- Click 'Security' > 'Continuous Threat Exposure Management'
- Click 'Agents' > Download Agent icon
- Select the desired operating system: Windows, Mac, Linux, or ARM.
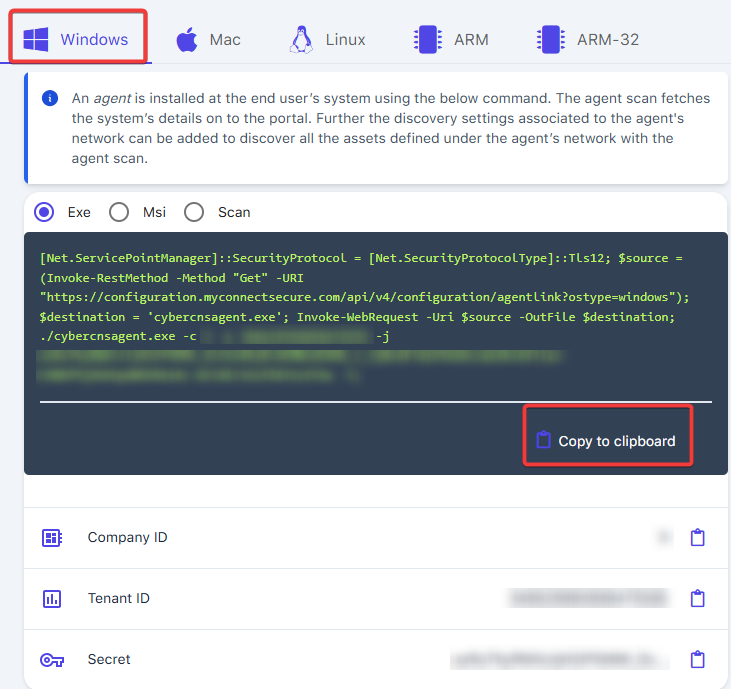
Windows
- Select 'Exe' or 'MSI' or 'Scan' as desired
- Tap the Copy to Clipboard button to copy the prebuilt PowerShell script to your clipboard.
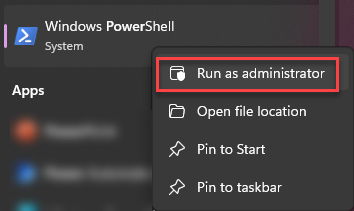
- Open PowerShell as Administrator and run the script.
- The script will begin the agent download process first, which shows in the PowerShell window.
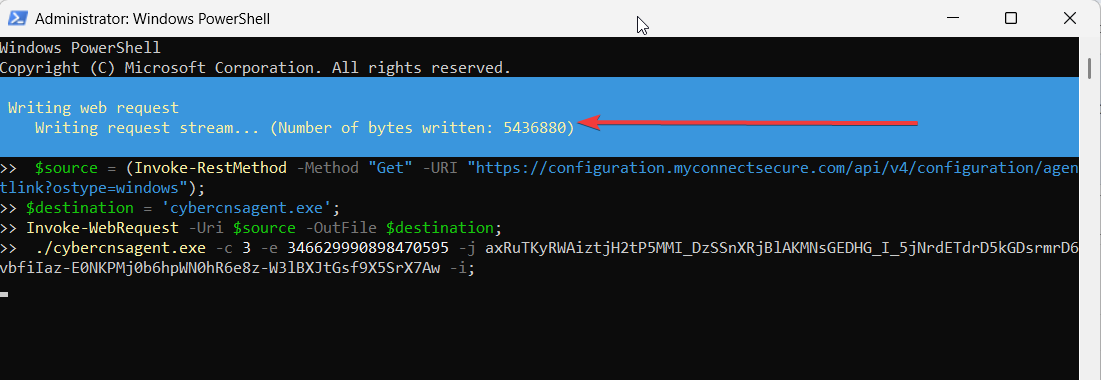
- Once the download completes, the script will start and complete the installation.
- Once the CyberCNSAgent service is started, you can close PowerShell out.
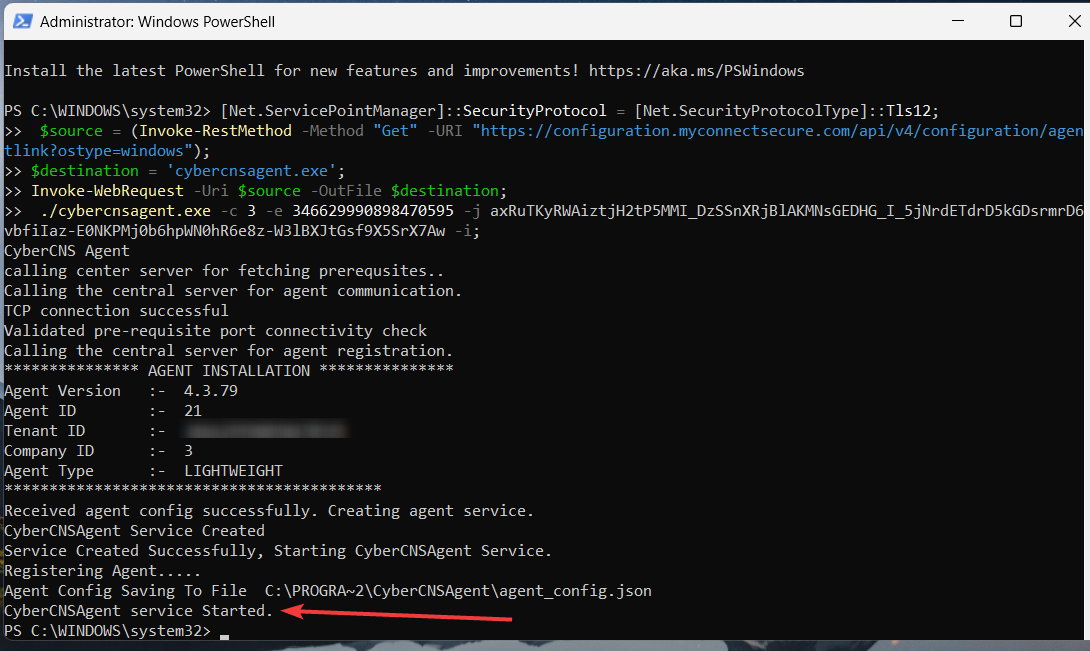
- Installation will be completed and agent can be seen in interface.
MAC
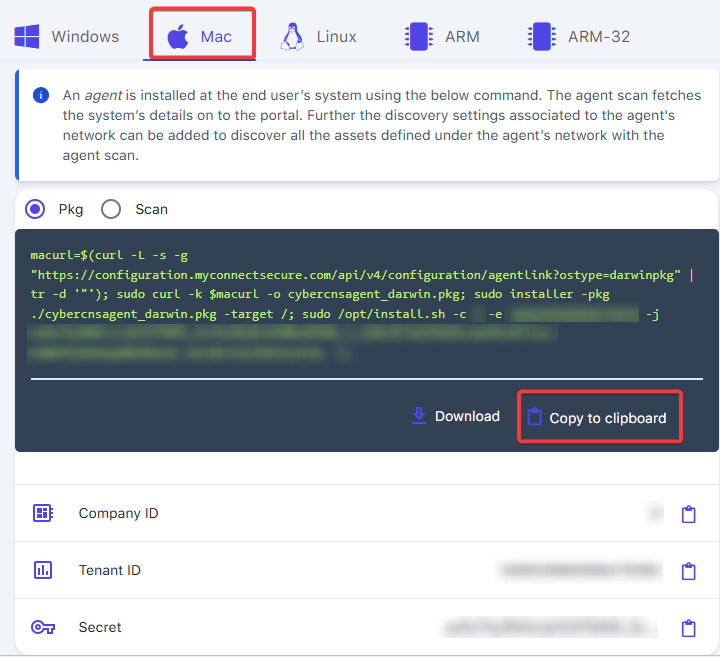
- Select the Mac option, then use the Copy to Clipboard button.
- Launch the MAC Terminal
- Execute: sudo su (enter the password)
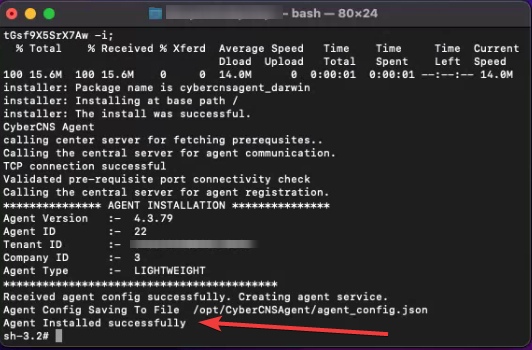
- Execute: paste the command copied to the clipboard
- MAC Agent Install Completed
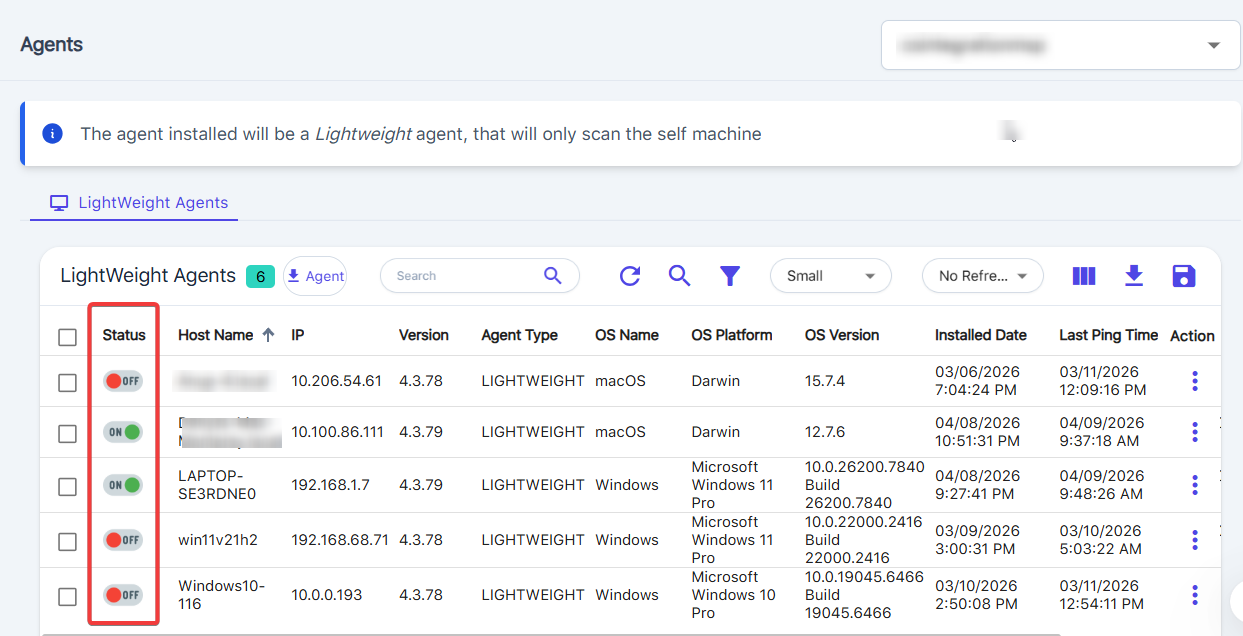
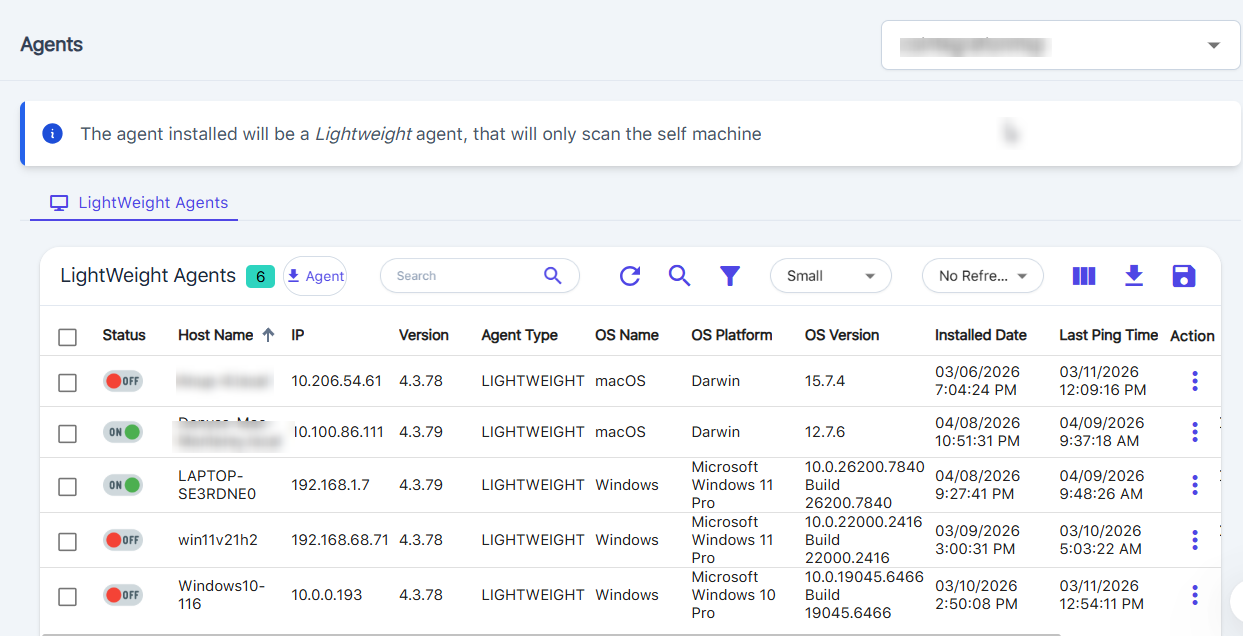
Once agent is installed successfully, we can view all the agents across all the companies.
| Lightweight Agents Column Descriptions | |
| Column Name | Description |
| Status | Indicates whether the agent is currently active or inactive. |
| Host Name | The assets' host name where the agent is installed. |
| IP | The network IP address assigned to the asset. |
| Version | The Agent’s currently installed version |
| Agent Type | Type of Agent installed like LightWeight |
| OS Name | The name of the operating system running on the asset. |
| OS Platform | The OS architecture or family (e.g., Windows, Linux, macOS) |
| OS Version | The specific version of the operating system. |
| Installed Date | The date and time the agent was first installed on the asset. |
| Last Pinged Time | Indicates when the agent last confirmed Internet connectivity. Lightweight Agents and Probes ping every 30 minutes to verify they’re active. |
| Last Scanned Time |
|
| Installed by | User who installed the Agent. This is determined by the User Secret found in the Agent installer window. |
Agent Commands
You can run agent commands to a single agent by tapping the three-dot Action menu.
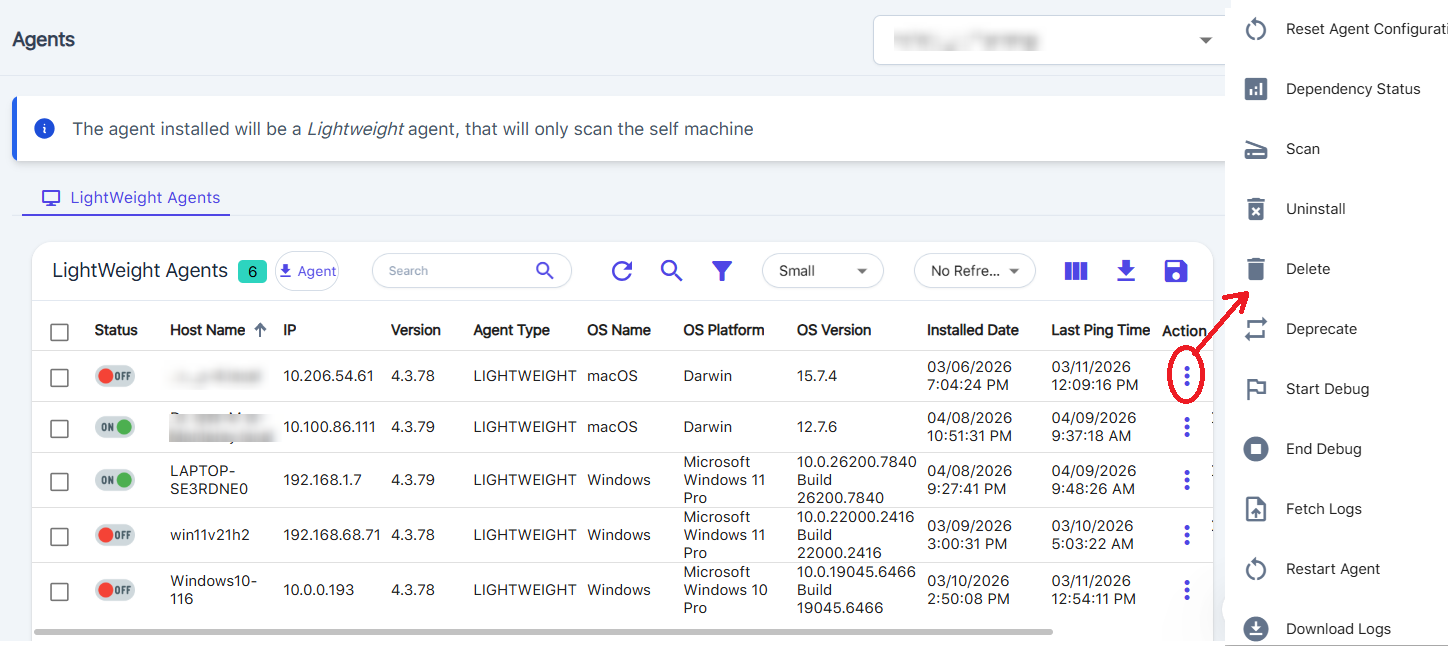
| Agent Commands | Description |
| Map Discovery & Credentials | Controls the probe agent network segment(s) and credentials; this is found at the Company level > Discovery settings. Doubt |
| Reset Agent Configuration | Select to reset the Agent configuration back to the different settings like Reset AD Data, Update Agent, and Reset Agent. |
| Dependency Status | Select to view the agent’s dependency status. If any of these are failing, agents may not be communicating correctly, in that case please contact support team for help. 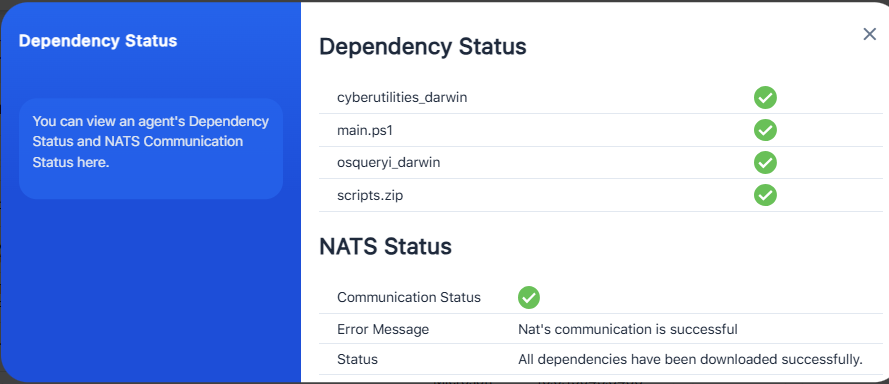 |
| Scan | Start a Compliance or LightWeight scan |
| Uninstall | Uninstalls the agent and deletes it from both the device and the portal |
| Delete | Deletes the agent from the device and portal. For Offline Agents - Deleting an offline agent removes it from the portal immediately. When the machine reconnects, it receives a deletion command that removes the CyberCNSAgent folder and its related services from the device. If the Agent is deleted and you restart the service, the agent does not appear again on the portal. |
| Deprecate | Deprecate the agent |
| Start Debug | Select to start the debugging process, which is generally used for advanced troubleshooting by support team. |
| End Debug | Select to end the debugging process. |
| Fetch Logs | Select to start the fetch logs process; this can take about 5 minutes to complete; use the Download Logs option to obtain. |
| Restart Agent | Select to restart the agent; this will restart the CyberCNSAgent service. |
| Download Logs | Download the fetched logs; see Fetch Logs above. |
Global Actions
If you want to send agent commands to multiple agents, use the checkbox to illuminate the Global Actions button on the toolbar.
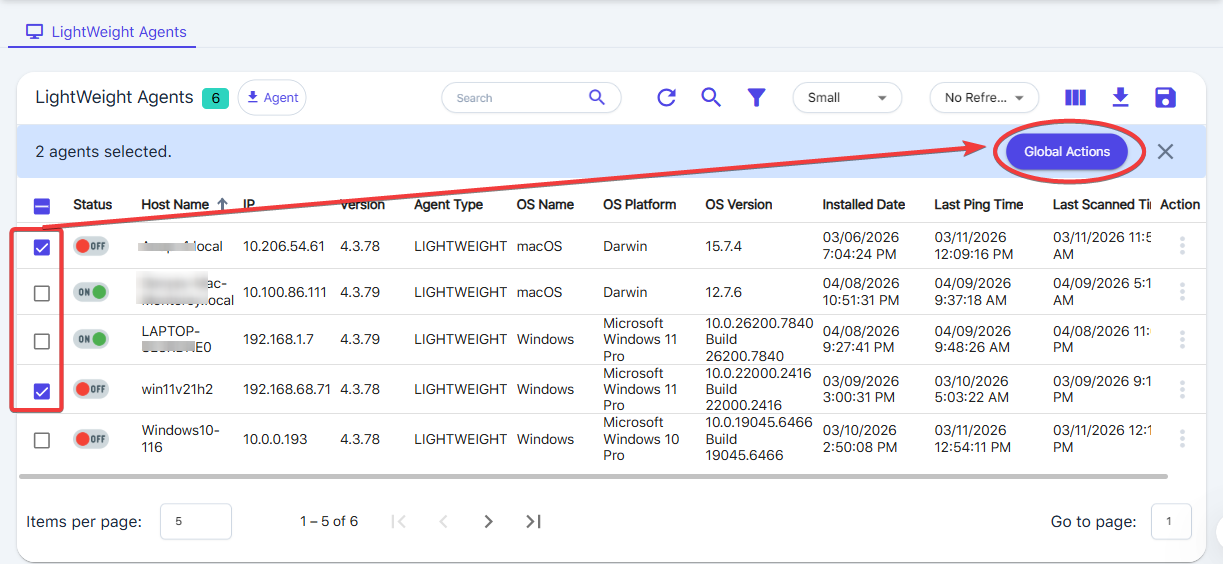
| Global Action | Description |
| Reset Agent Configuration |
|
| Scan | Start a Compliance or Lightweight Agent Scan |
| Uninstall | Uninstalls the agent and deletes it from both the device and the portal |
| Delete | Deletes the agent from the device and portal |
| Deprecate | Send agent to Deprecated Agents manually |
Status Online/Offline
- Online - An agent is shown as Online when it has successfully pinged the portal within the past hour. This indicates that the device is reachable and actively communicating with the platform.
- Offline - An agent is shown as Offline when it has not pinged the portal for more than one hour. Once the last‑ping threshold is exceeded, the system automatically marks the device as Offline.