


All Assets
- Click 'Endpoint Compliance' > 'All Assets' to open this interface.
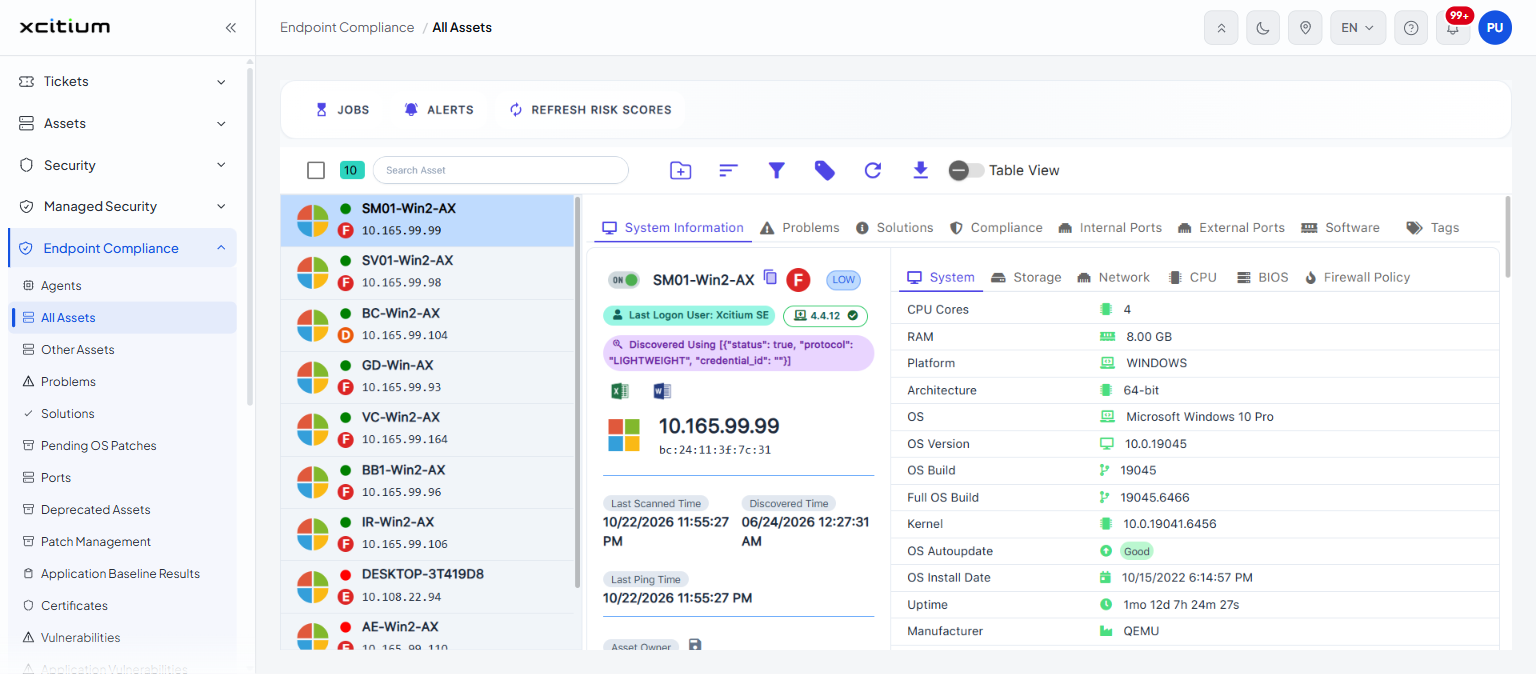
The 'All Assets' page is the inventory of everything your agents have discovered. The page is split in two: a list of assets down the left, and a detail pane on the right showing everything known about whichever asset is selected.
You can search, sort, filter and tag the asset list, add an asset by hand, export the list, switch to a full table of asset properties, and open any asset to inspect it.
The asset list
Each row in the left-hand list shows:
- An icon for the asset's operating system.
- A coloured dot showing whether the asset is online.
- The host name.
- A letter badge carrying the asset's security grade.
- The IP address.
Above the list are a check box that selects every asset, a chip showing how many assets there are, and a 'Search Asset' box.
Toolbar
| Control | Description |
| Search Asset | Reduces the list to assets matching what you type. |
| Add Asset | Opens the 'Add New Asset' form described below. |
| Sort | Opens the 'Sort By' panel described below. |
| Filter | Opens the filter builder. |
| Filter by Tags | Opens the tag filter described below. |
| Refresh Data | Fetches the asset list again. |
| Download Data | Exports the asset list. The download starts as soon as you click the button. |
| Table View | A switch that replaces the two-pane layout with a single wide table. See 'All Assets - Table View'. |
Sort the asset list
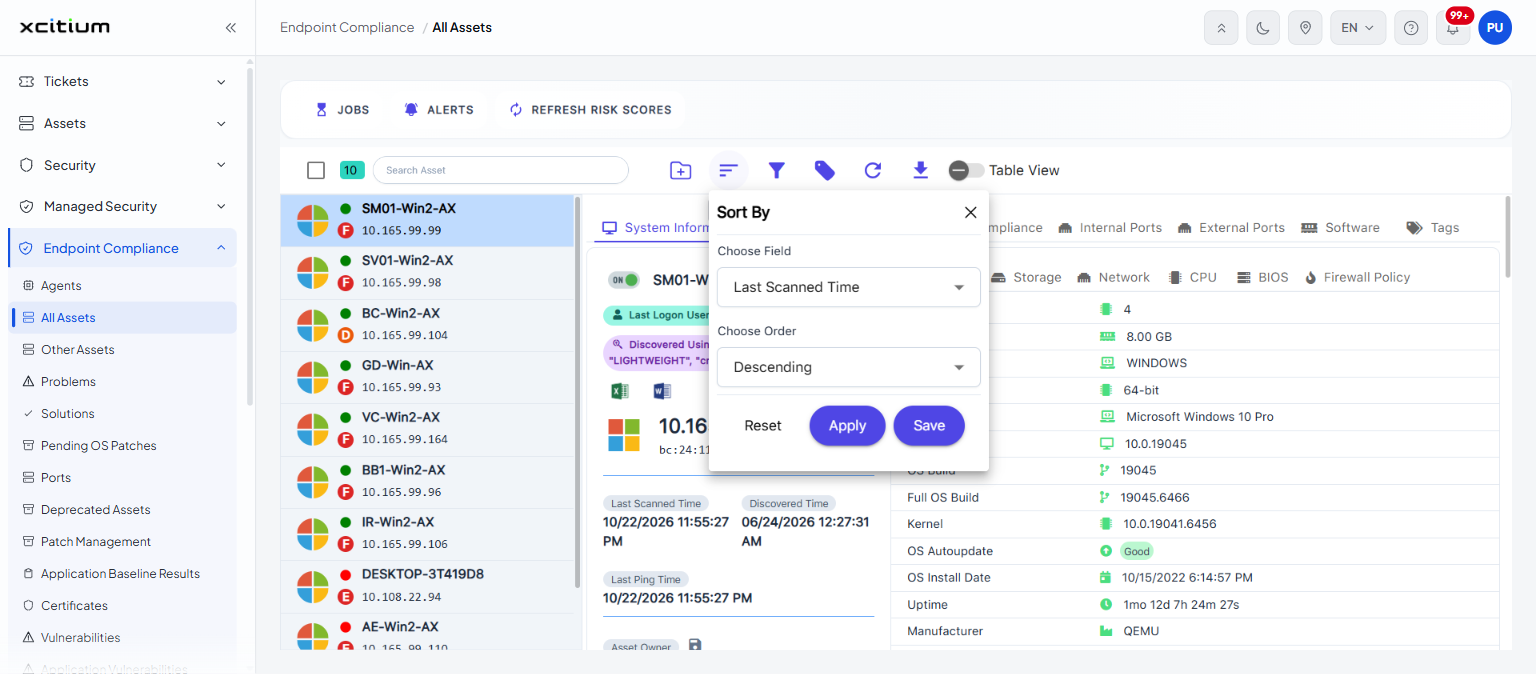
Click 'Sort' to open the 'Sort By' panel.
| Field | Control | Description |
| Choose Field | Drop-down | What to sort on. The options are 'Asset Name', 'IP Address', 'Risk Score', 'Discovered Time', 'Last Scanned Time', 'Vulnerabilities', 'Critical Vulnerability', 'High Vulnerability', 'Medium Vulnerability' and 'Low Vulnerability'. The default is 'Last Scanned Time'. |
| Choose Order | Drop-down | The direction. The options are 'Ascending' and 'Descending'. The default is 'Descending'. |
| Reset | Button | Returns the panel to its starting values. |
| Apply | Button | Sorts the list now. |
| Save | Button | Keeps this sort order for the list. |
| X | Button | Closes the panel. |
Filter the asset list
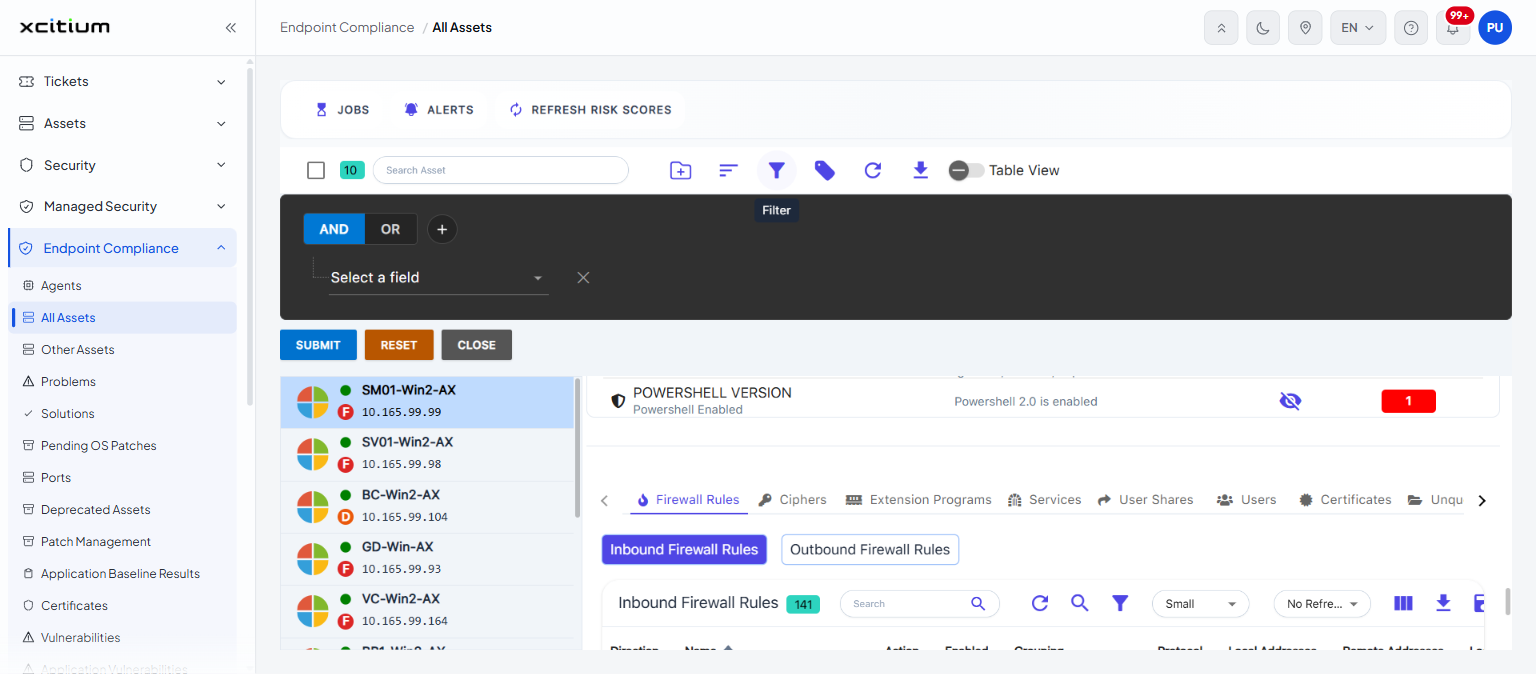
Click 'Filter' to open the filter builder above the list. It works as described in 'Work with Endpoint Compliance Lists'. On this page the 'Select a field' drop-down offers 'Status', 'IP', 'Host Name', 'OS Name', 'Platform', 'Agent Type', 'Importance', 'Discovered Time', 'Last Scanned Time', 'Security Grade', 'Risk Score', 'Max Risk Score' and 'Asset ID'.
Filter by tags
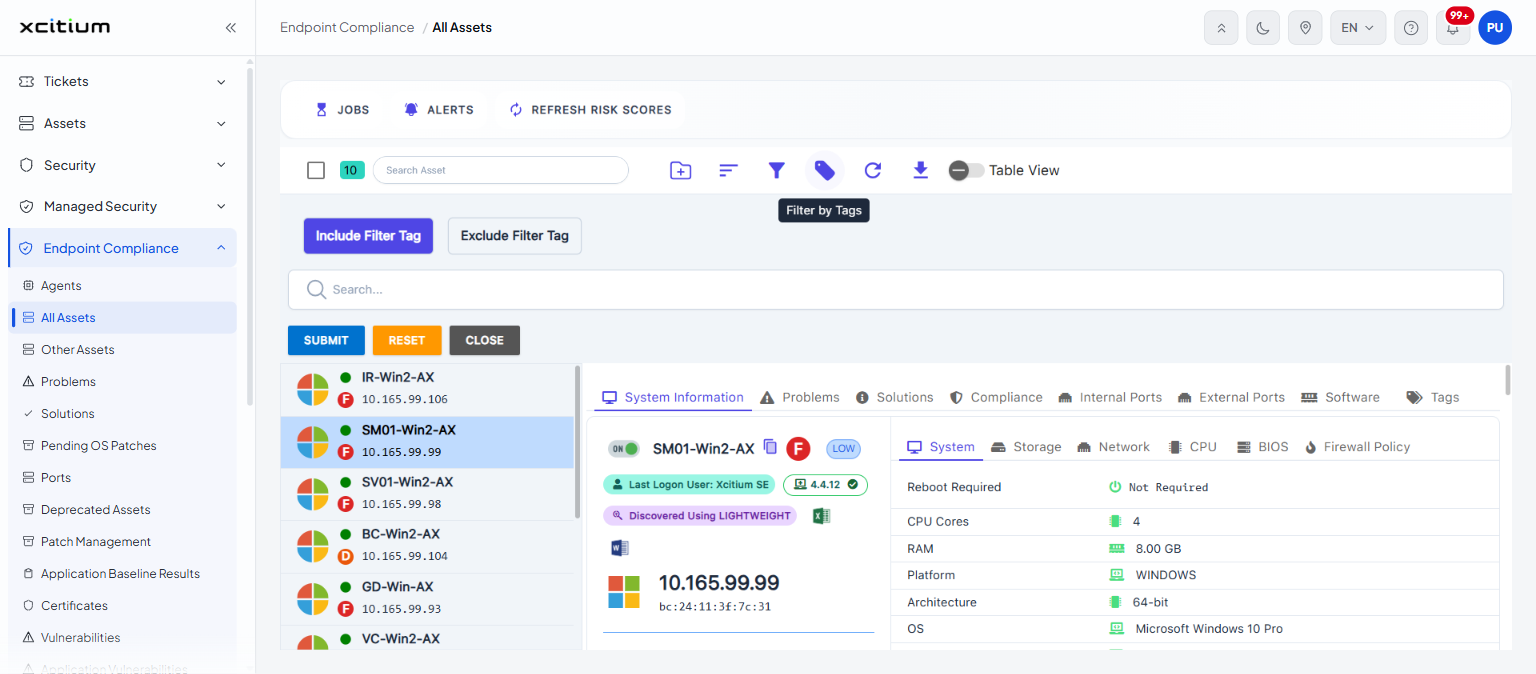
Click 'Filter by Tags' to filter the list on the tags attached to your assets.
| Control | Description |
| Include Filter Tag | Keeps only the assets carrying the tags you choose. Selected by default. |
| Exclude Filter Tag | Leaves out the assets carrying the tags you choose. |
| Search... | Finds the tag you want among those in use. |
| SUBMIT | Applies the tag filter. |
| RESET | Clears it. |
| CLOSE | Closes the panel. |
Add an asset by hand
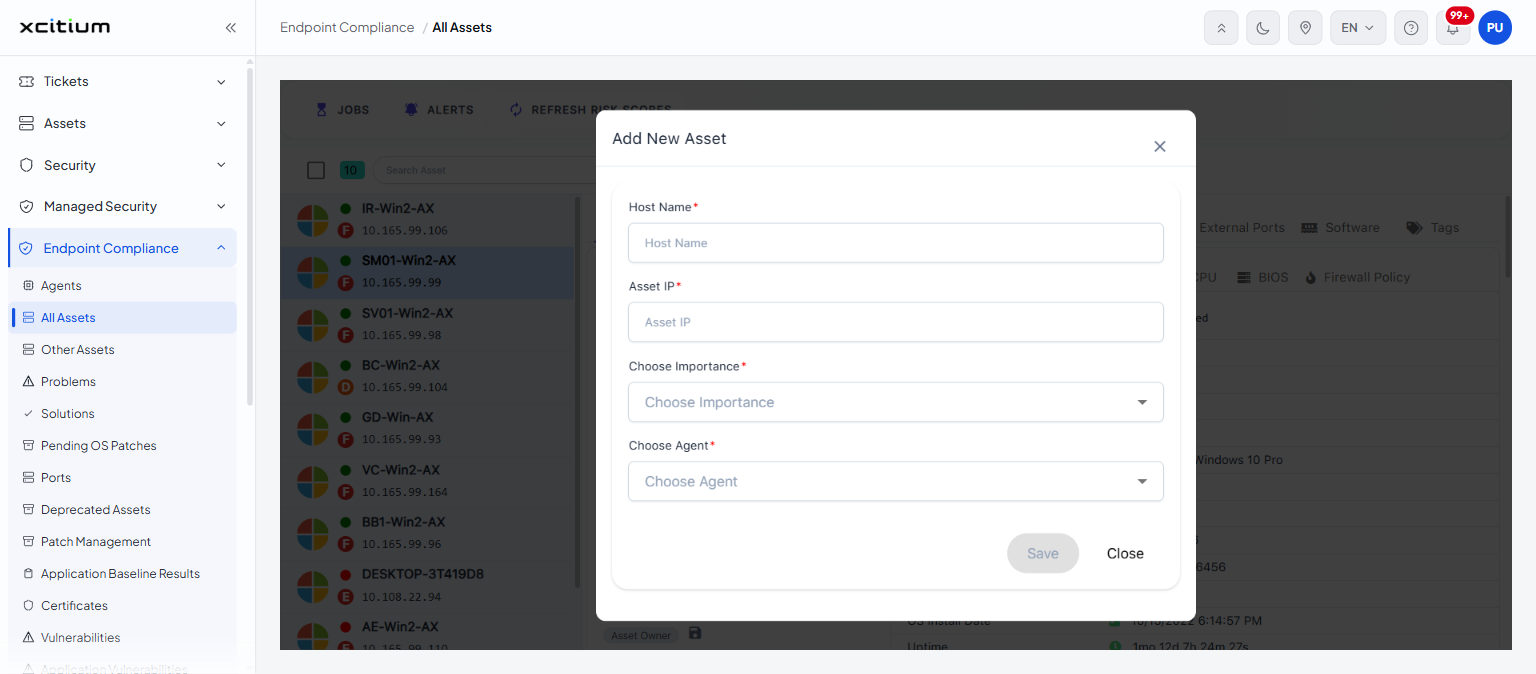
Click 'Add Asset' to open the 'Add New Asset' form.
| Field | Control | Description |
| Host Name | Text box | The name of the machine. Required. |
| Asset IP | Text box | Its IP address. Required. |
| Choose Importance | Drop-down | How important the asset is. The options are 'Critical', 'High', 'Low' and 'Medium', plus a blank entry. Nothing is selected to begin with. |
| Choose Agent | Drop-down | The probe agent that will scan the asset. The list holds the probe agents registered on your account. |
To add an asset:
- Click 'Endpoint Compliance' > 'All Assets'.
- Click the 'Add Asset' button on the toolbar.
- Type the machine's name in 'Host Name'.
- Type its address in 'Asset IP'.
- Choose an entry from 'Choose Importance'.
- Choose the agent that will scan it from 'Choose Agent'.
- Click 'Save', or click 'Close' to abandon the form.