


A Discovery's General Tab
- Click 'Assets' > 'Network Management' > 'Discoveries', then click a discovery name.
The discovery opens on its 'General' tab, which carries its name, the customer and group its findings are filed under, its SNMP settings, its probe devices and the address ranges it scans.
You can read these settings here and change them with the Edit button.
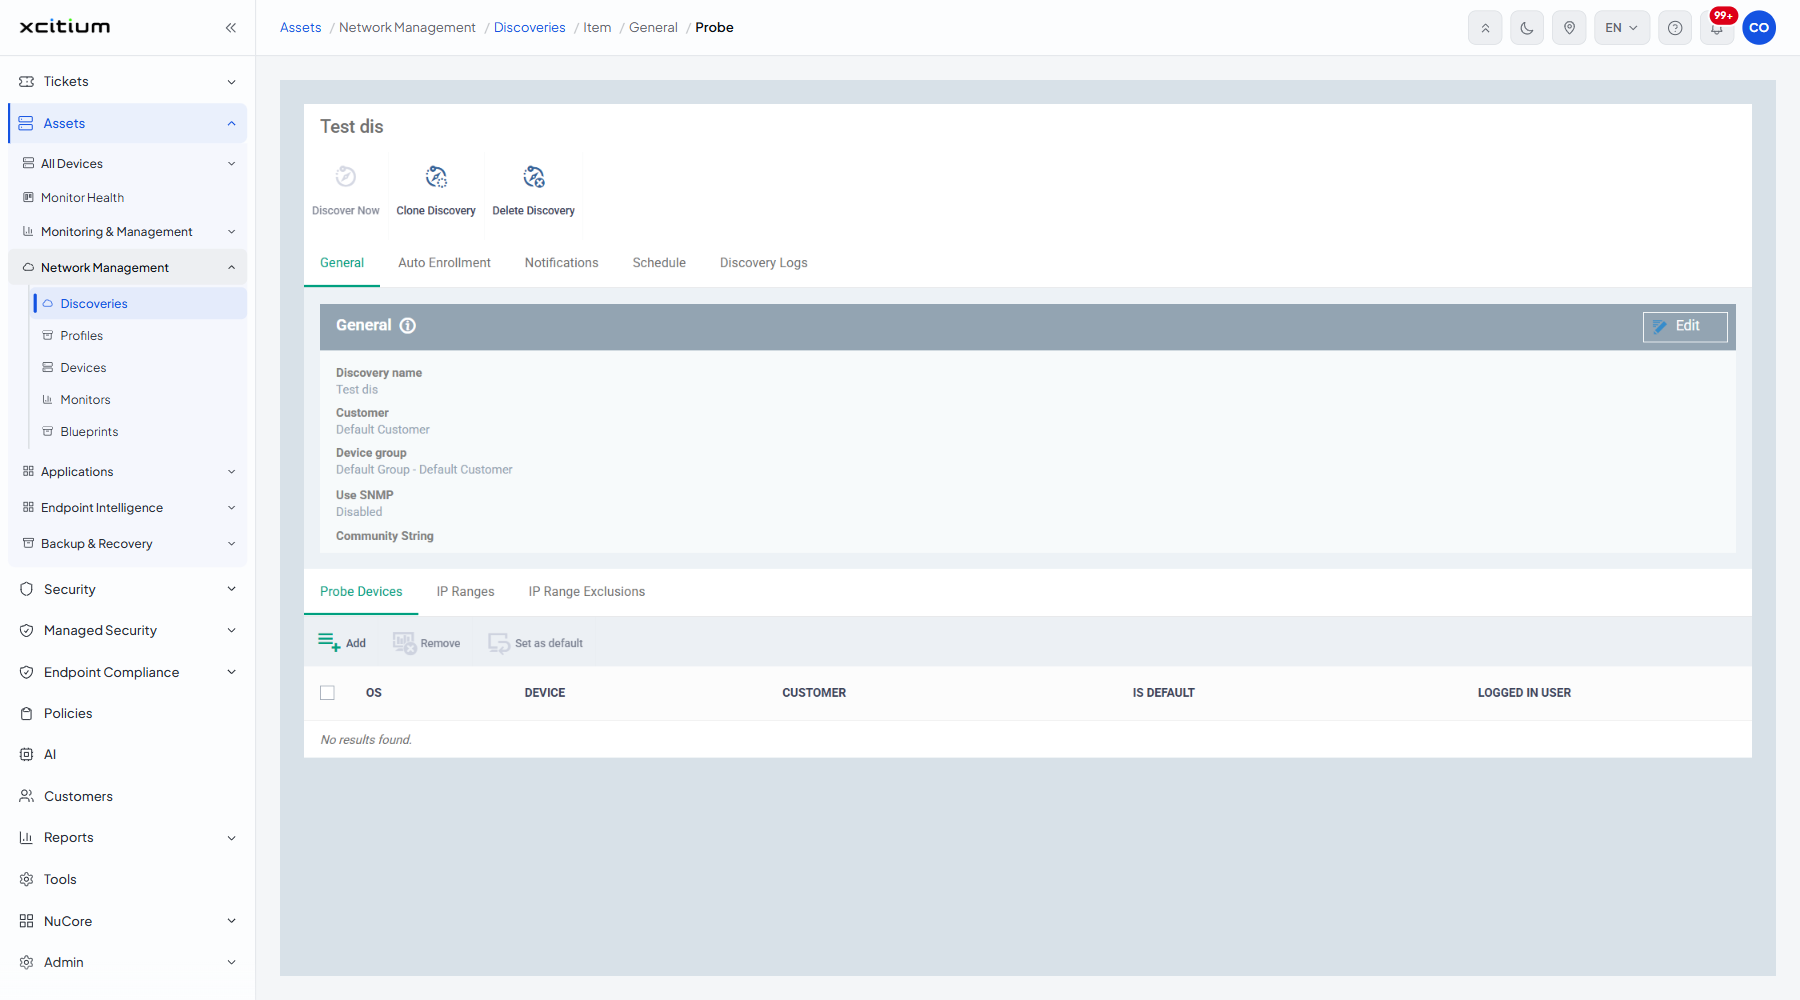
The header and tabs
The header shows the discovery name with three buttons, 'Discover Now', 'Clone Discovery' and 'Delete Discovery'. Five tabs sit below it:
- General — the settings on this page. This is the default.
- Auto Enrollment — enrolling what the scan finds automatically.
- Notifications — who is told what.
- Schedule — when the discovery runs by itself.
- Discovery Logs — every run.
The settings
| Column | Description |
| Discovery name | The label of the discovery. |
| Customer | The customer the discovered devices are filed under. |
| Device group | The group the discovered devices are filed into. |
| Use SNMP | Whether the scan also looks for SNMP devices. Values: 'Enabled', 'Disabled'. |
| Community String | The SNMP community string the scan presents, where SNMP is enabled. |
The three sections beneath
| Option | Description |
| Probe Devices | The managed devices that do the scanning. The section has its own toolbar — 'Add', 'Remove', 'Set as default' — and the columns (checkbox), OS, Device, Customer, Is default, Logged in user. |
| IP Ranges | The address ranges the scan covers. |
| IP Range Exclusions | The addresses inside those ranges that the scan should leave alone. |
The Edit form
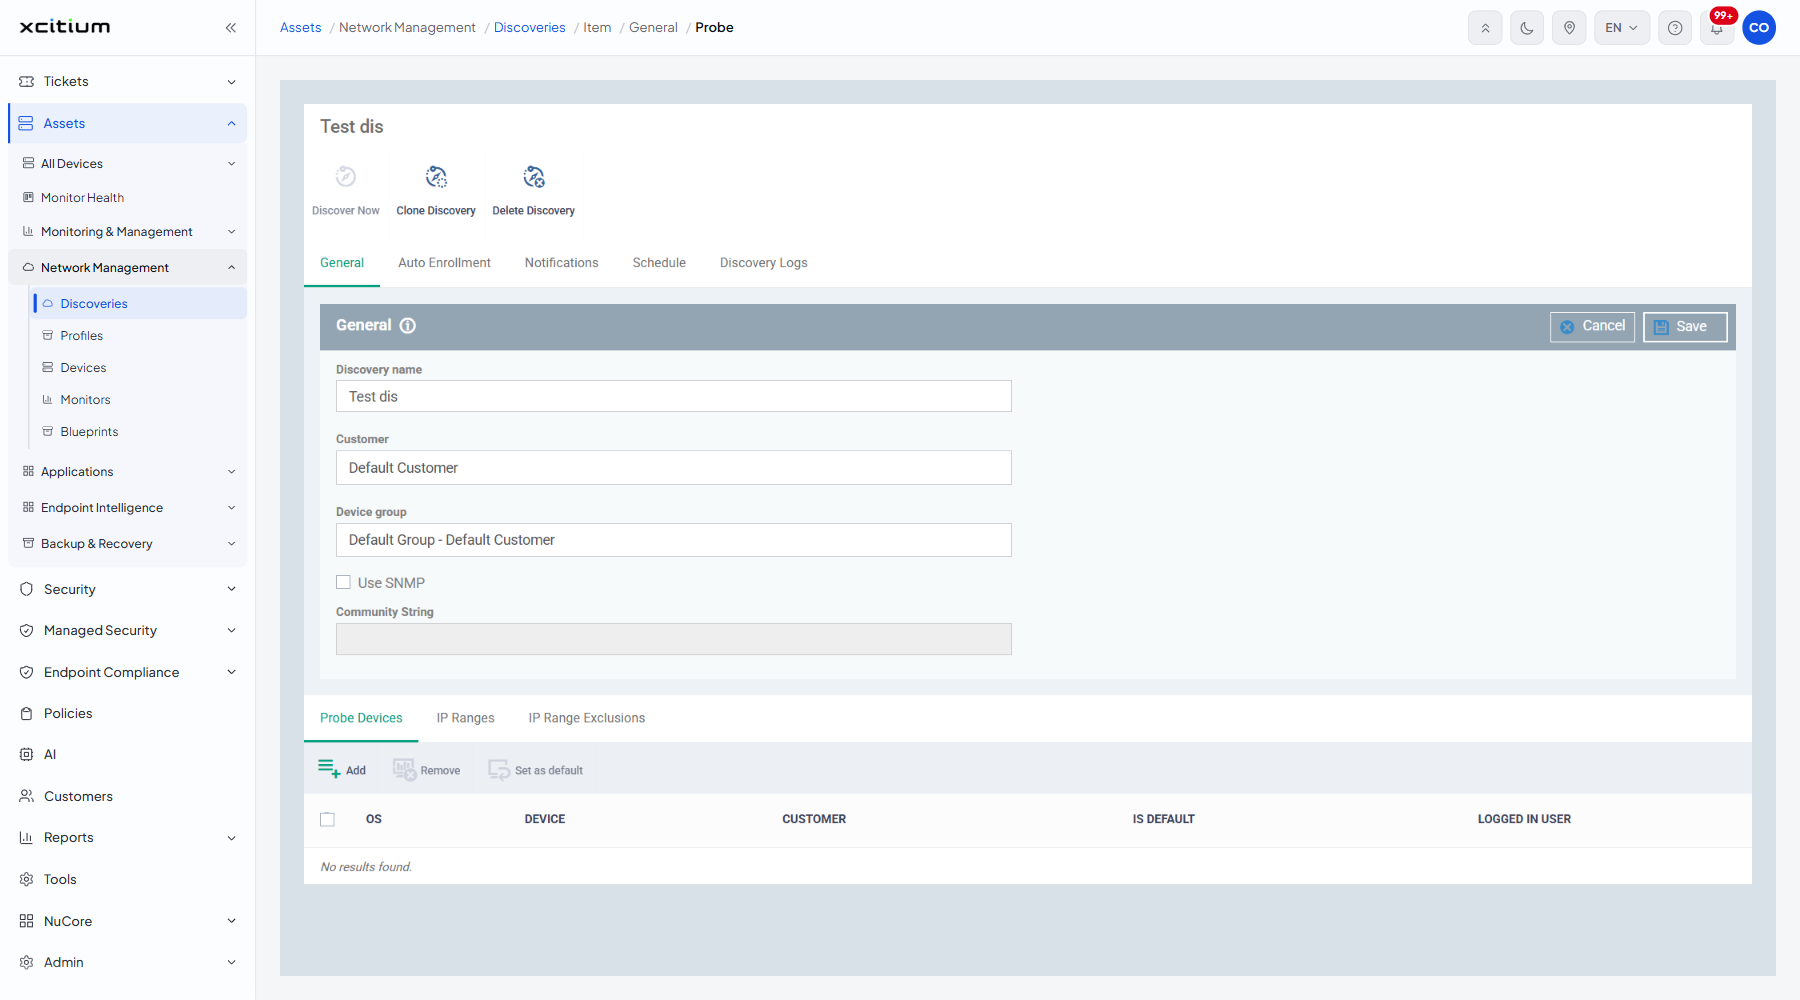
Click 'Edit' on the panel to turn the settings into a form. The panel buttons become 'Cancel' and 'Save'.
| Field | Type | Options / default | Required |
| Discovery name | Text box | The current name. | Yes |
| Customer | Lookup | Placeholder 'Type customer name to search'. | No |
| Device group | Lookup | Placeholder 'Type group name to search'. | No |
| Use SNMP | Checkbox | Clear by default. Ticking it enables 'Community String'. | No |
| Community String | Text box | Enabled only when 'Use SNMP' is ticked. | No |
Add an address range to a discovery
- Click 'Assets' > 'Network Management' > 'Discoveries' and click the discovery name.
- Click 'Edit' on the General panel.
- Use 'Add' in the 'IP Ranges' section to add the range the scan should cover.
- Use 'Add' in 'IP Range Exclusions' for any address inside that range the scan should skip.
- Click 'Save'.
Note: the first device you add under 'Probe Devices' becomes the default probe. Use 'Set as default' to move that role to another one.