


Policy General Settings
- Open a policy, then click 'General' under 'Overview' in the left-hand pane.
'General' holds the policy's own identity: what it is called, whether it is the default for its operating system, and the note that describes it. It is the section the editor opens on.
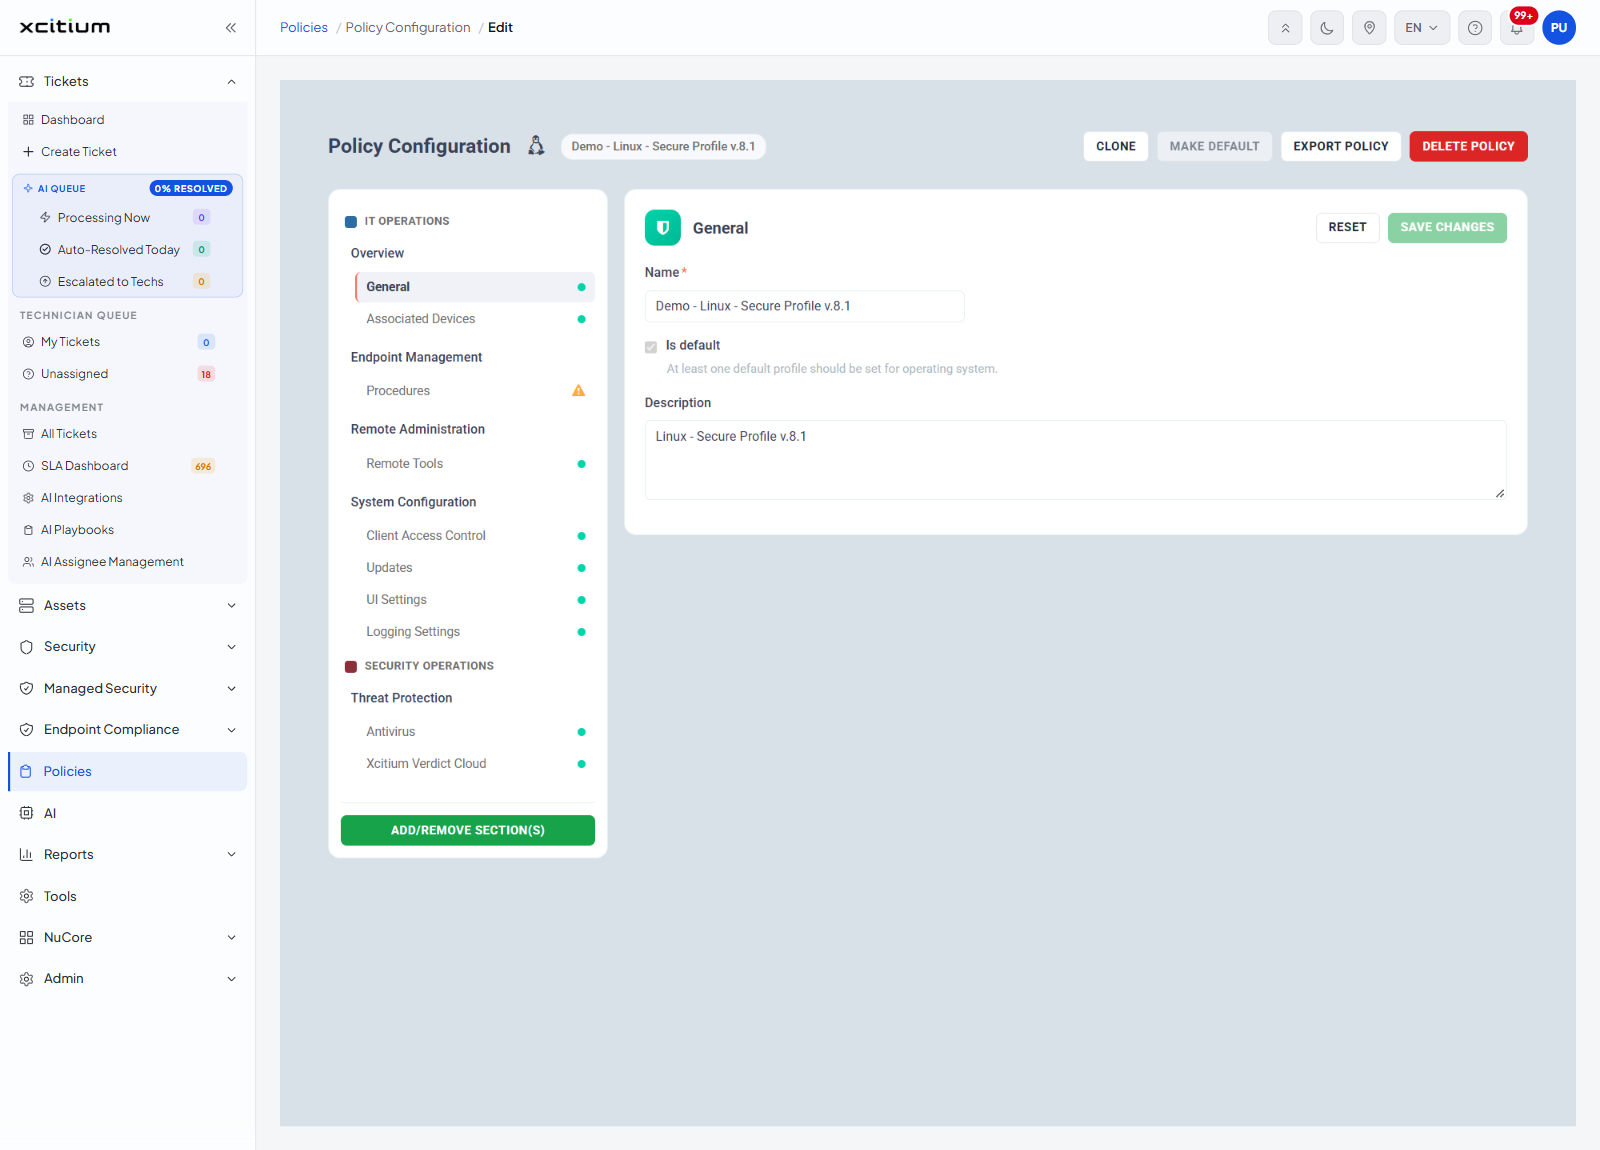
Fields
| Field | Control | Required | Description |
| Name | Single-line text box | Yes — marked with a red asterisk | The name of the policy. It is what the lists and the name chip at the top of the editor show. |
| Is default | Check box | No | Marks the policy as the default for its operating system. The line underneath reads 'At least one default profile should be set for operating system.' |
| Description | Multi-line text box | No | A free-text note about the policy. |
Buttons
| Button | Description |
| RESET | Puts the three fields back as they were. |
| SAVE CHANGES | Saves the name, the 'Is default' setting and the description. |
The read-only state
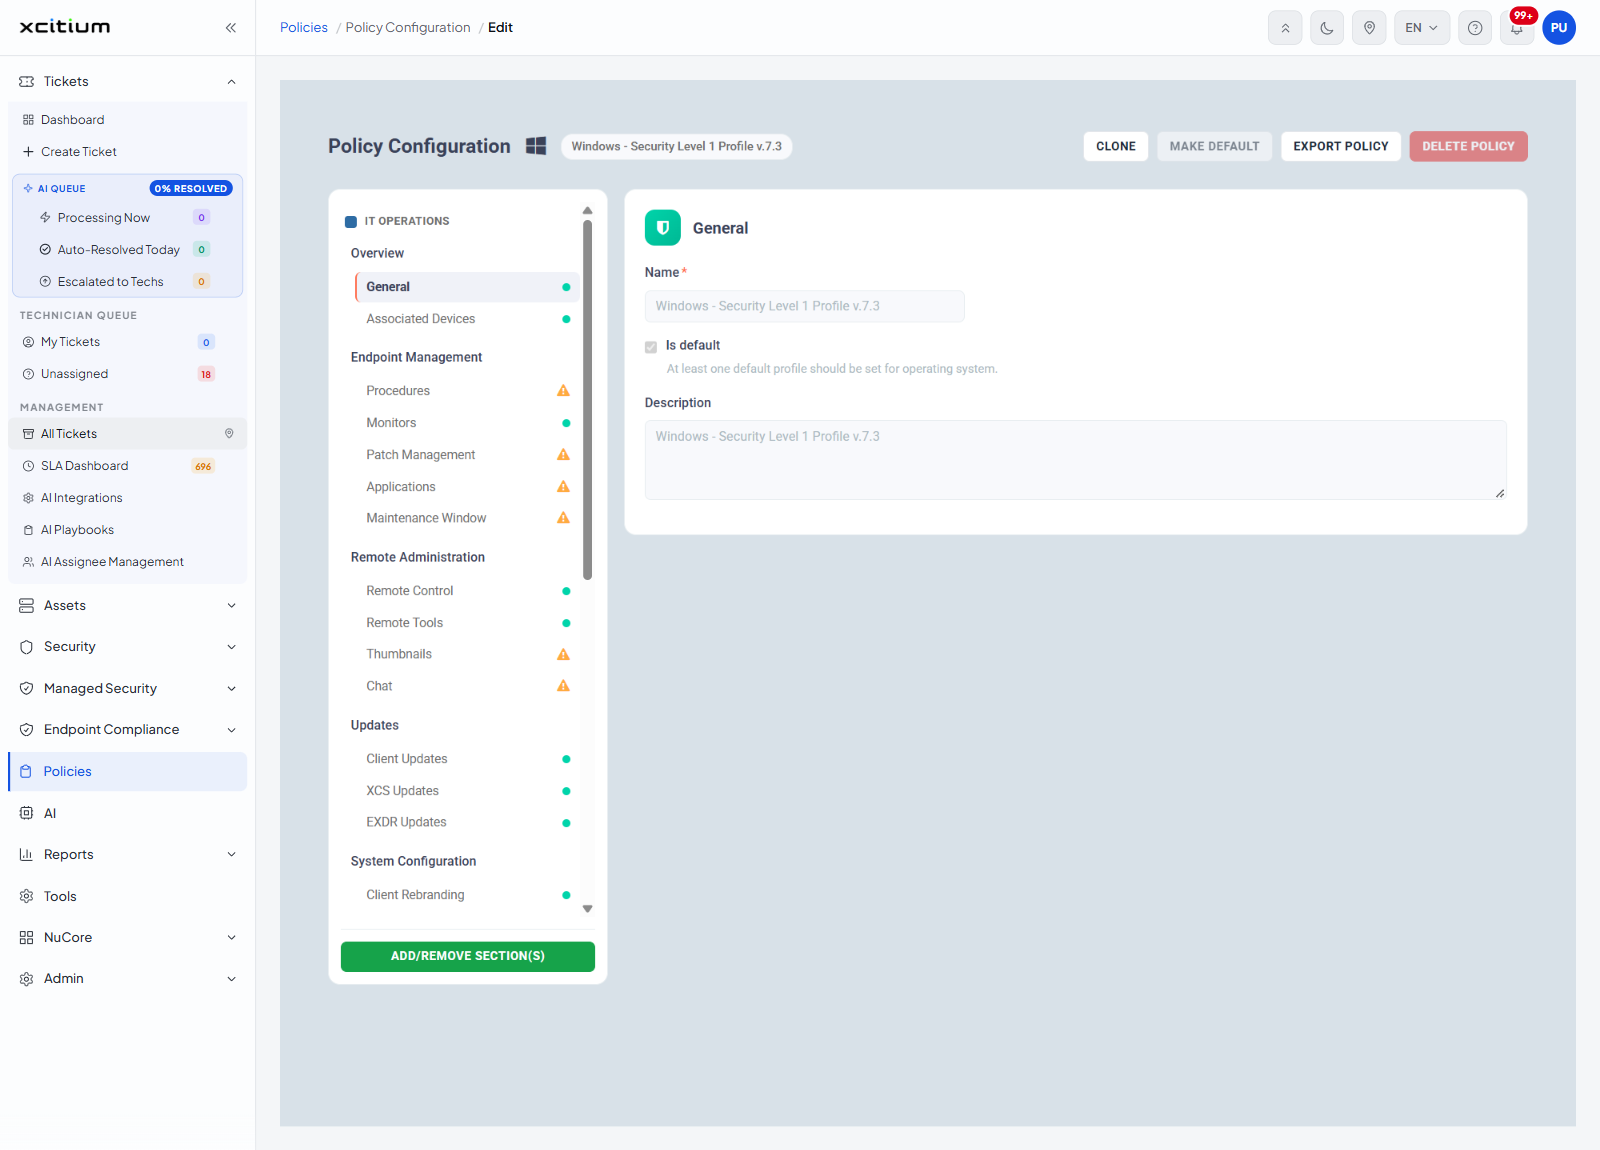
On a policy that ships with the product the three fields are greyed out, 'Is default' cannot be cleared, and the 'RESET' and 'SAVE CHANGES' buttons are not shown.
Rename a policy
- Open the policy.
- Click 'General' under 'Overview'.
- Type the new name in the 'Name' box.
- Click 'SAVE CHANGES'.
Note: to make a policy the default you can either tick 'Is default' here and save, or use the 'MAKE DEFAULT' button in the editor header.
Note: 'General' cannot be removed from a policy. Its check box in the 'Add / Remove Sections' dialog is fixed on.