


View and Edit the Device Name
- Open a device, then click the 'Device Name' tab.
A device carries two names: the hardware name it reports, and a custom name you give it so that it reads sensibly in the device list. This tab shows the custom name along with the tags and notes held against the device, and is where all three are changed.
You can rename the device, restore its hardware name, allow it to be renamed automatically, and set tags and notes.
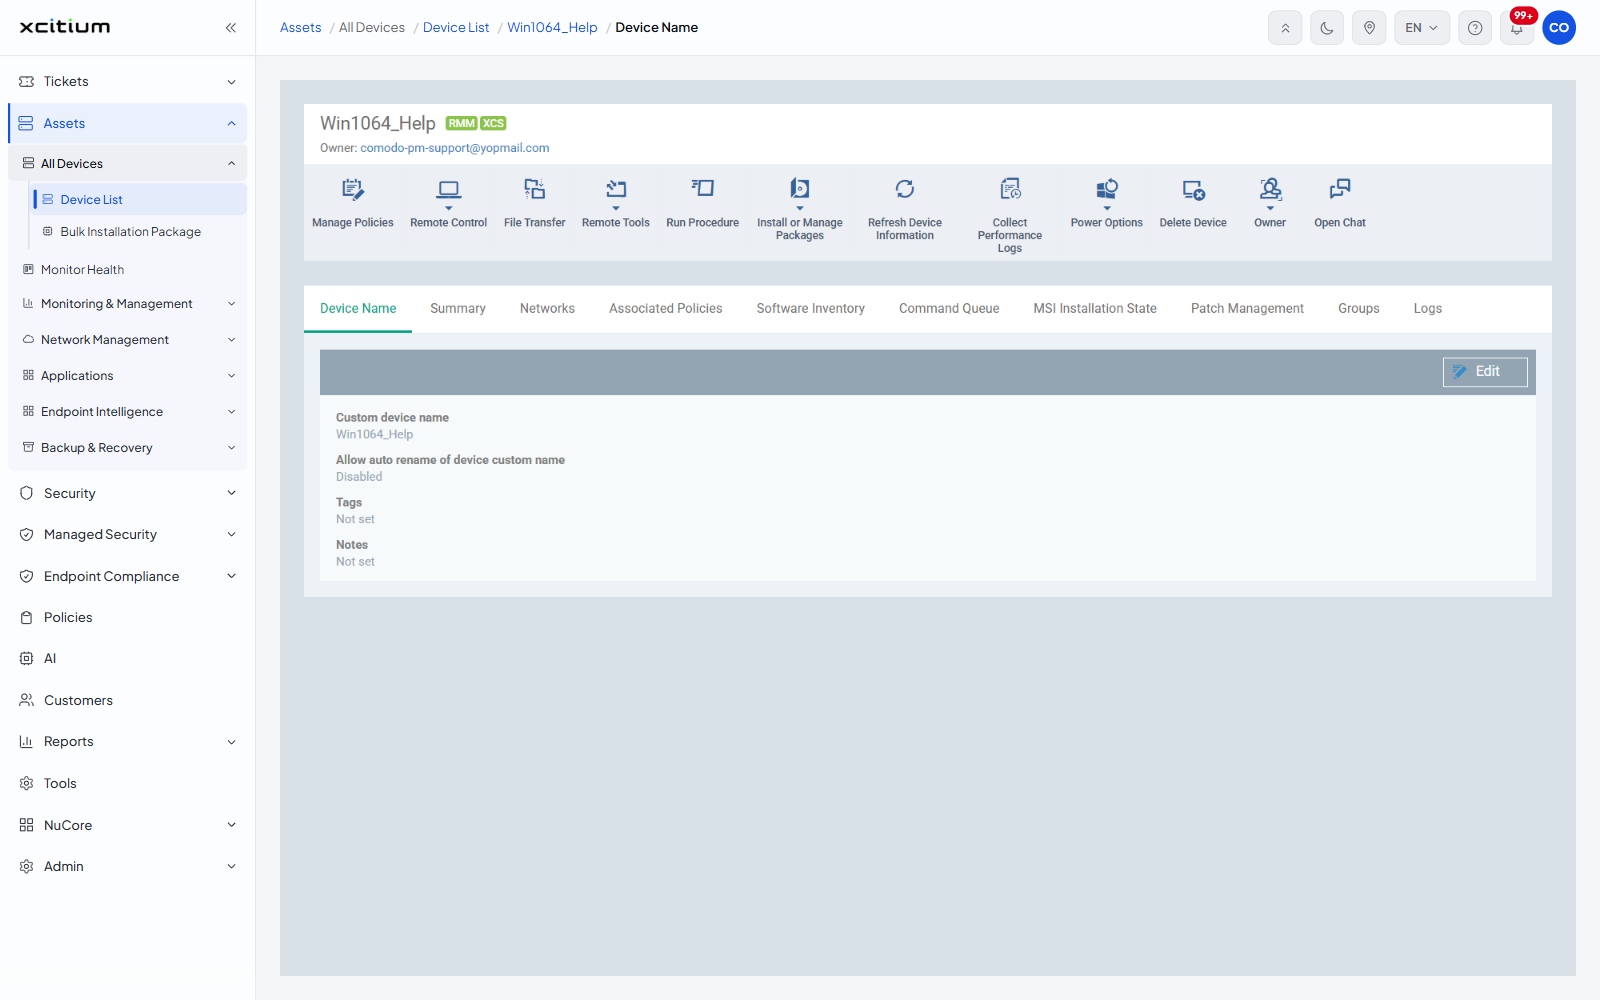
What the tab shows
| Row | Description |
| Custom device name | The name the device appears under in the device list. |
| Allow auto rename of device custom name | Whether the custom name follows the hardware name when that changes. Shows 'Disabled' when it does not. |
| Tags | The tags applied to the device. Shows 'Not set' when there are none. |
| Notes | Free text held against the device. Shows 'Not set' when empty. |
An 'Edit' button sits at the top right of the panel.
The Edit form
'Edit' turns the panel into a form, and the button becomes 'Cancel' and 'Save'.
| Field | Type | Options / default | Required |
| Custom device name | Text | Pre-filled with the current custom name. A 'Restore' button beside it puts the hardware name back. | No |
| Allow auto rename of device custom name | Checkbox | Clear by default. | No |
| Tags | Text | Placeholder 'Type tags names'. | No |
| Notes | Textarea | Empty by default. | No |
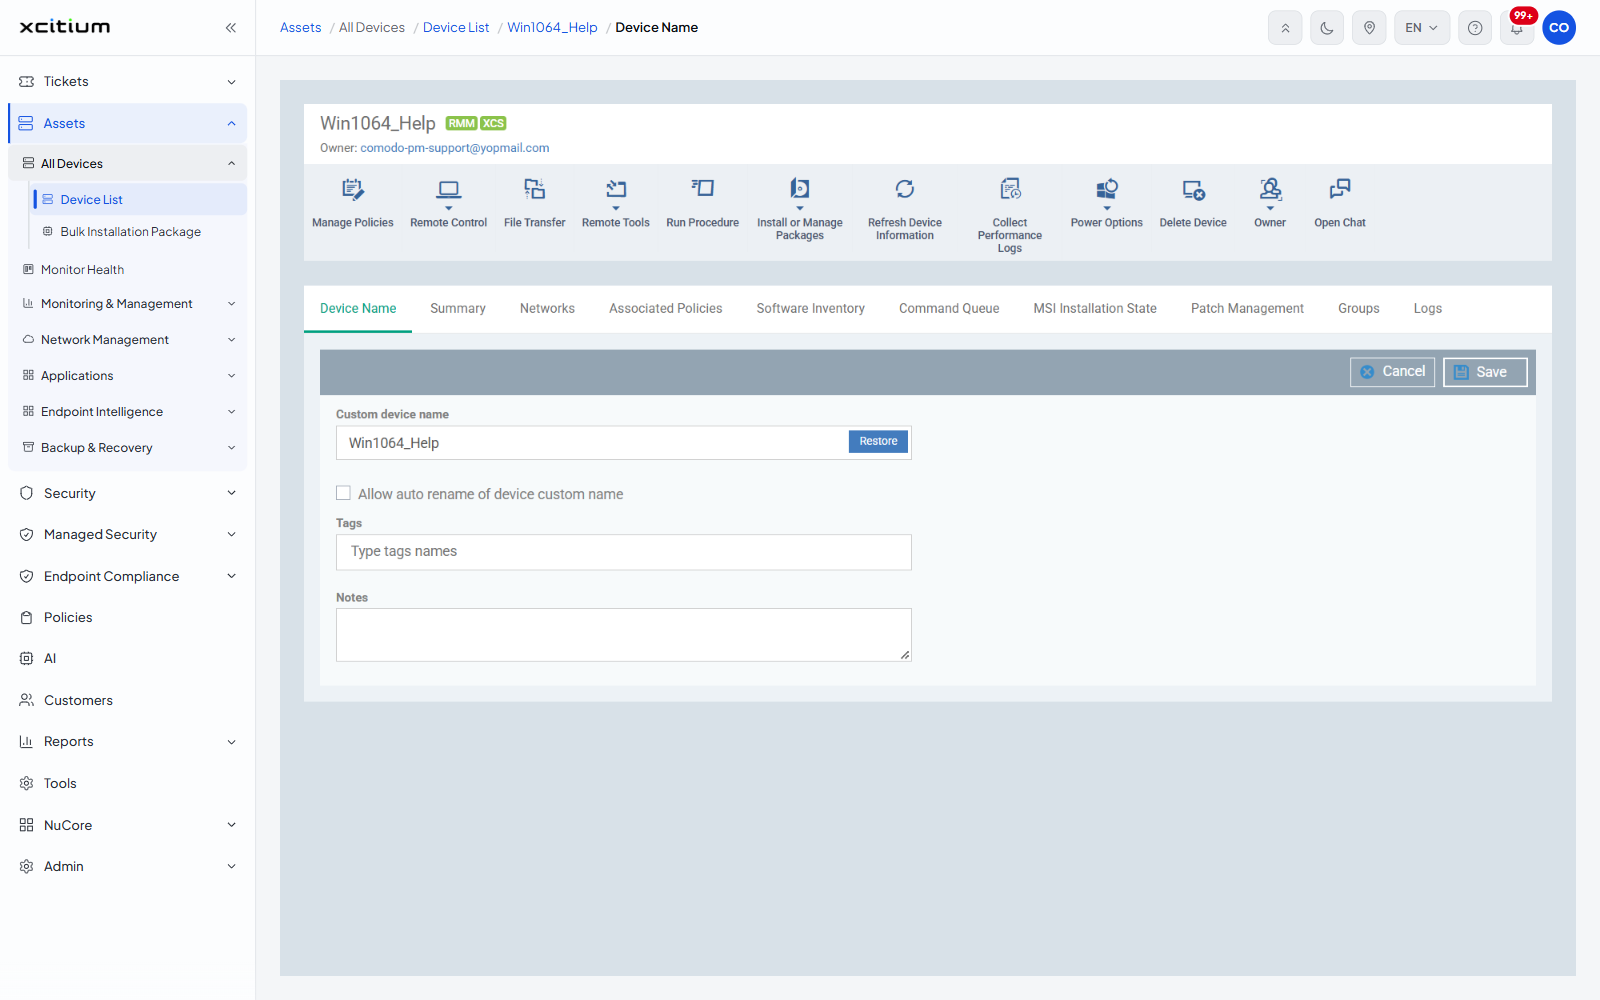
Rename a device
- Open the device and click the 'Device Name' tab.
- Click 'Edit'.
- Type the new name into 'Custom device name', or click 'Restore' to go back to the hardware name.
- Tick 'Allow auto rename of device custom name' if the custom name should follow the hardware name.
- Add tags and notes if you need them.
- Click 'Save'.
Note: renaming here changes only how the device appears in the console. It does not rename the device itself.